Are you ready to take your WordPress site to the next level? If you’re a beginner looking to enhance your website’s functionality but feel a bit overwhelmed by the technical jargon, you’re in the right place! Installing a WordPress plugin can seem daunting at first, but trust us—it’s easier than you think. With the right guidance, you’ll be able to add features that can improve your site’s performance, boost your SEO, and even make it more user-friendly.In this beginner’s guide, we’ll walk you through the simple steps to install a WordPress plugin, debunk common myths, and share tips to help you choose the best plugins for your needs. So grab a cup of coffee, sit back, and let’s unlock the potential of your WordPress site together!
Understanding what a WordPress Plugin Is and Why You Need one
WordPress plugins are powerful tools that enhance the functionality and performance of your website. Imagine wanting to add a contact form, improve SEO, or integrate social media—plugins make all of this achievable with just a few clicks. They are like apps for your WordPress site, providing features that transform a simple blog into a fully functional website tailored to your specific needs.
One of the biggest advantages of using plugins is their ability to extend your website’s capabilities without requiring any coding skills. Weather you are a blogger, a business owner, or a developer, you can find a plugin that suits your specific requirements. Some popular categories of plugins include:
- SEO Optimization: To help your site rank higher on search engines.
- Security: To protect your site from malicious attacks.
- performance: To optimize your site’s speed and efficiency.
- E-commerce: To enable online selling and payment processing.
- Social Media Integration: To connect your site with various social platforms.
Each plugin adds specific features and benefits, allowing you to customize your site to fit your vision.Moreover,many plugins are designed to be user-friendly,making it easy for anyone—regardless of technical expertise—to add new functionalities. once installed, a plugin often comes with customizable settings, enabling further personalization.
When selecting a plugin, it’s essential to consider factors such as compatibility, ratings, and support provided by the developers. Always opt for plugins that are regularly updated and have positive reviews to ensure they work smoothly with your current WordPress version and other installed plugins. This practice will not only enhance your site’s performance but also minimize potential conflicts that coudl lead to downtime or functionality issues.
utilizing plugins is crucial for anyone looking to create a dynamic and engaging WordPress site. They empower you to add innovative features and maintain your site’s competitiveness in today’s digital landscape. So, whether you’re just starting or looking to enhance your existing site, understanding and choosing the right plugins is a step toward achieving your online goals.
Finding the Right Plugin for Your Needs
When exploring the vast world of WordPress plugins, itS essential to consider what your website truly needs. With thousands of options available, finding the right plugin can feel overwhelming. Though, focusing on specific requirements can significantly simplify your search and ensure you choose a plugin that enhances your site’s functionality.
Start by identifying the core purpose of your website. Are you looking to improve SEO, boost performance, or enhance user interaction? Narrowing down your goals will help you filter through the plugin library more effectively. Here are some questions to ask yourself:
- What problem am I trying to solve?
- Who is my target audience?
- What features are most important to me?
after establishing your needs, research plugins that align with those requirements. check the WordPress Plugin Directory for user reviews and ratings, as well as how frequently the plugin is updated. A good plugin should be actively maintained, ensuring compatibility with the latest version of wordpress and security standards.
To help you make an informed decision, consider creating a comparison table of potential plugins. Here’s a simple format you can use:
| Plugin Name | rating | Last Updated | Price |
|---|---|---|---|
| Yoast SEO | 4.9/5 | 2023-01-15 | Free / Premium |
| WooCommerce | 4.6/5 | 2023-02-10 | Free / Paid Extensions |
| Contact Form 7 | 4.8/5 | 2023-03-05 | Free |
finding the right plugin requires a clear understanding of your website’s needs, thorough research, and thoughtful consideration of user feedback. with this approach, you can confidently select plugins that not only enhance your site’s functionality but also provide a better experience for your visitors.
How to Access Your WordPress Dashboard Like a Pro
Accessing your WordPress dashboard is the first step toward unleashing the full potential of your website. It’s where all the magic happens, and knowing how to navigate it like a pro can make all the difference. Here are some tips to ensure you’re making the most of your admin area:
- Direct URL Access: Instead of going through your website, simply type
www.yourwebsite.com/wp-adminin your browser. This will take you directly to the login page. - Bookmark Your Dashboard: Once logged in, bookmark your dashboard for easy access. This small step can save you time and hassle in the long run.
- Login Credentials: Keep your username and password secure but easily accessible in case you forget. Use a password manager for added security.
After logging in, familiarize yourself with the layout. The left sidebar is your navigation hub, where you can manage posts, pages, and settings. Don’t overlook the top menu bar, which offers quick access to site features. Here’s a quick rundown of essential sections you’ll want to explore:
| Section | Description |
|---|---|
| Posts | Manage blog entries, categories, and tags. |
| Media | upload and manage images, videos, and files. |
| Pages | Create static content like ‘About Us’ or ‘Contact’. |
| Plugins | Install and manage plugins to enhance functionality. |
| Settings | Configure site settings, including permalinks and privacy. |
Lastly, don’t hesitate to explore the various plugins available to enhance your dashboard experience.A few must-have plugins can definitely help streamline your workflow, such as:
- Yoast SEO: For optimizing your content for search engines.
- WP Super Cache: To improve site speed and performance.
- Akismet: For spam protection in comments.
With these tips, you’ll navigate your WordPress dashboard with confidence and efficiency. Remember, the more you explore, the better you’ll become at harnessing the power of wordpress for your site!
The Step-by-Step Process of Installing a Plugin
Installing a plugin in WordPress is a straightforward process that can significantly enhance the functionality of your website. Let’s walk through the steps to make sure you have a seamless experience.
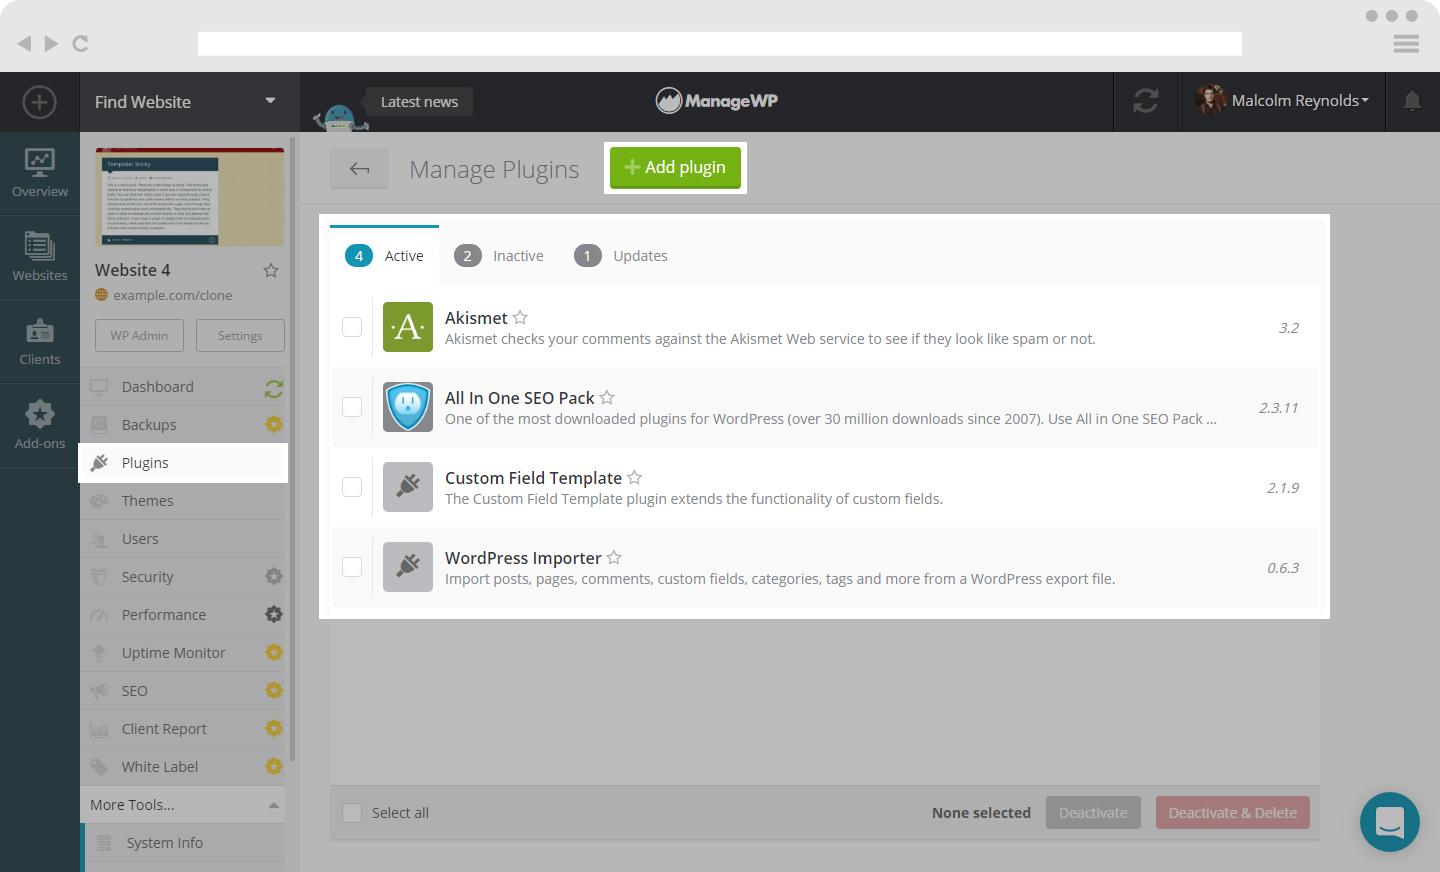
First and foremost, you need to access your WordPress dashboard. Once logged in, navigate to the Plugins section located on the left-hand menu. Here, you will see options like Installed Plugins and Add New. To add a new plugin, click on Add New.
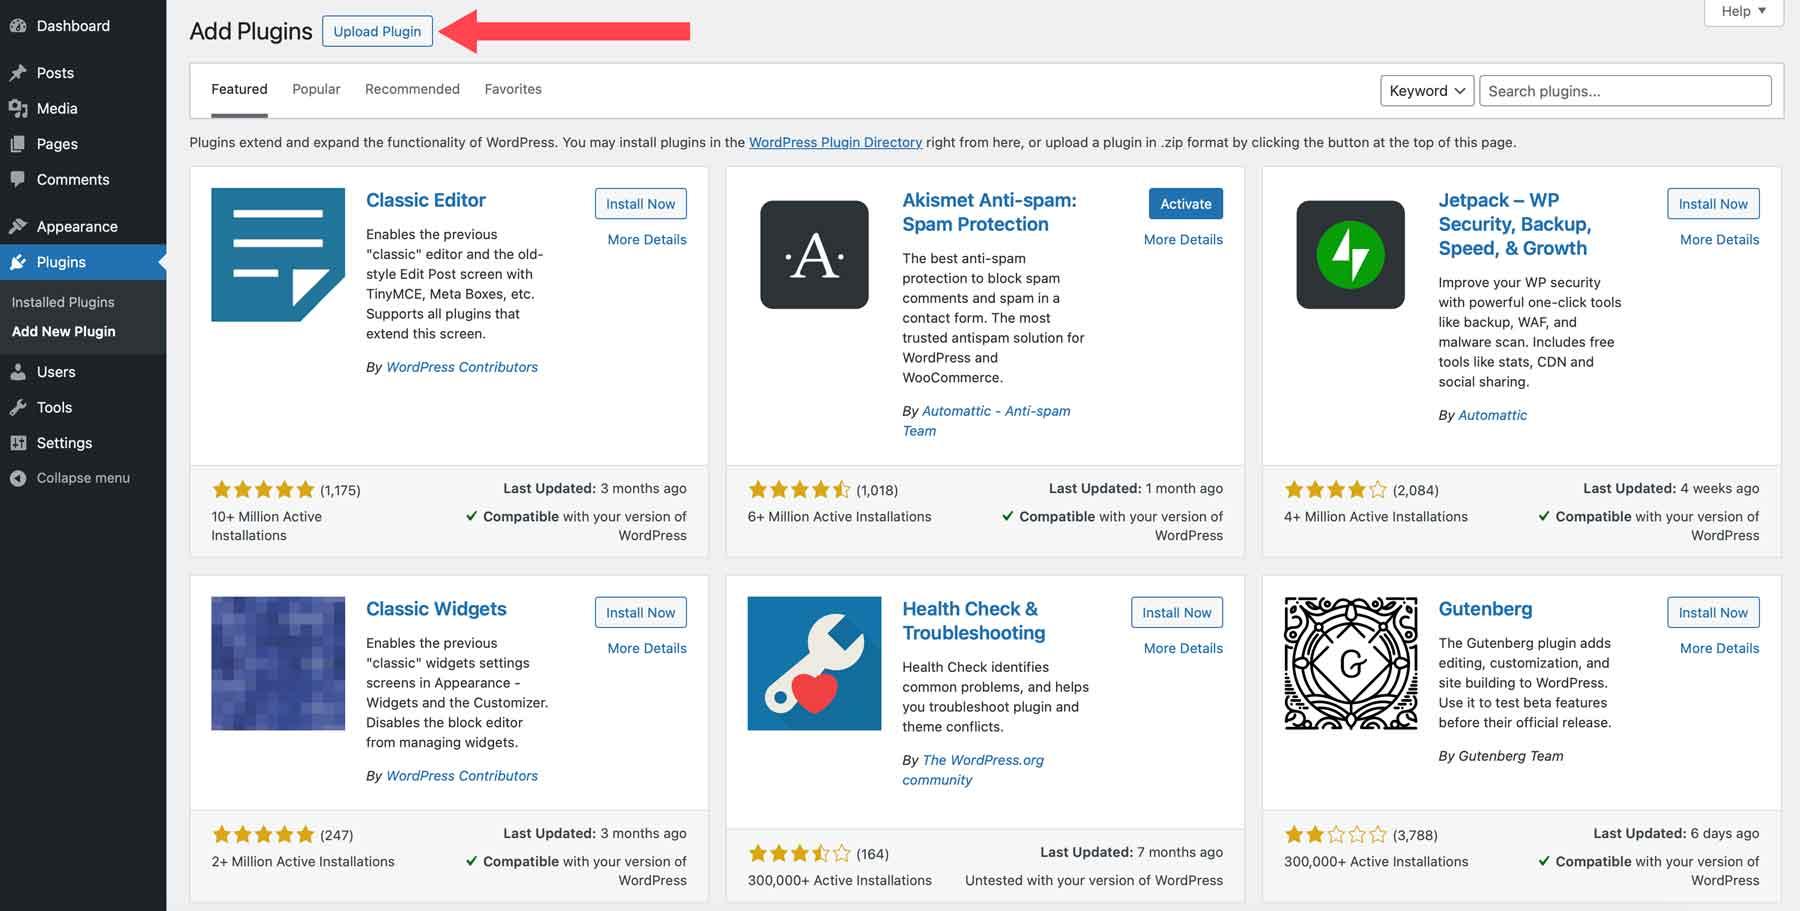
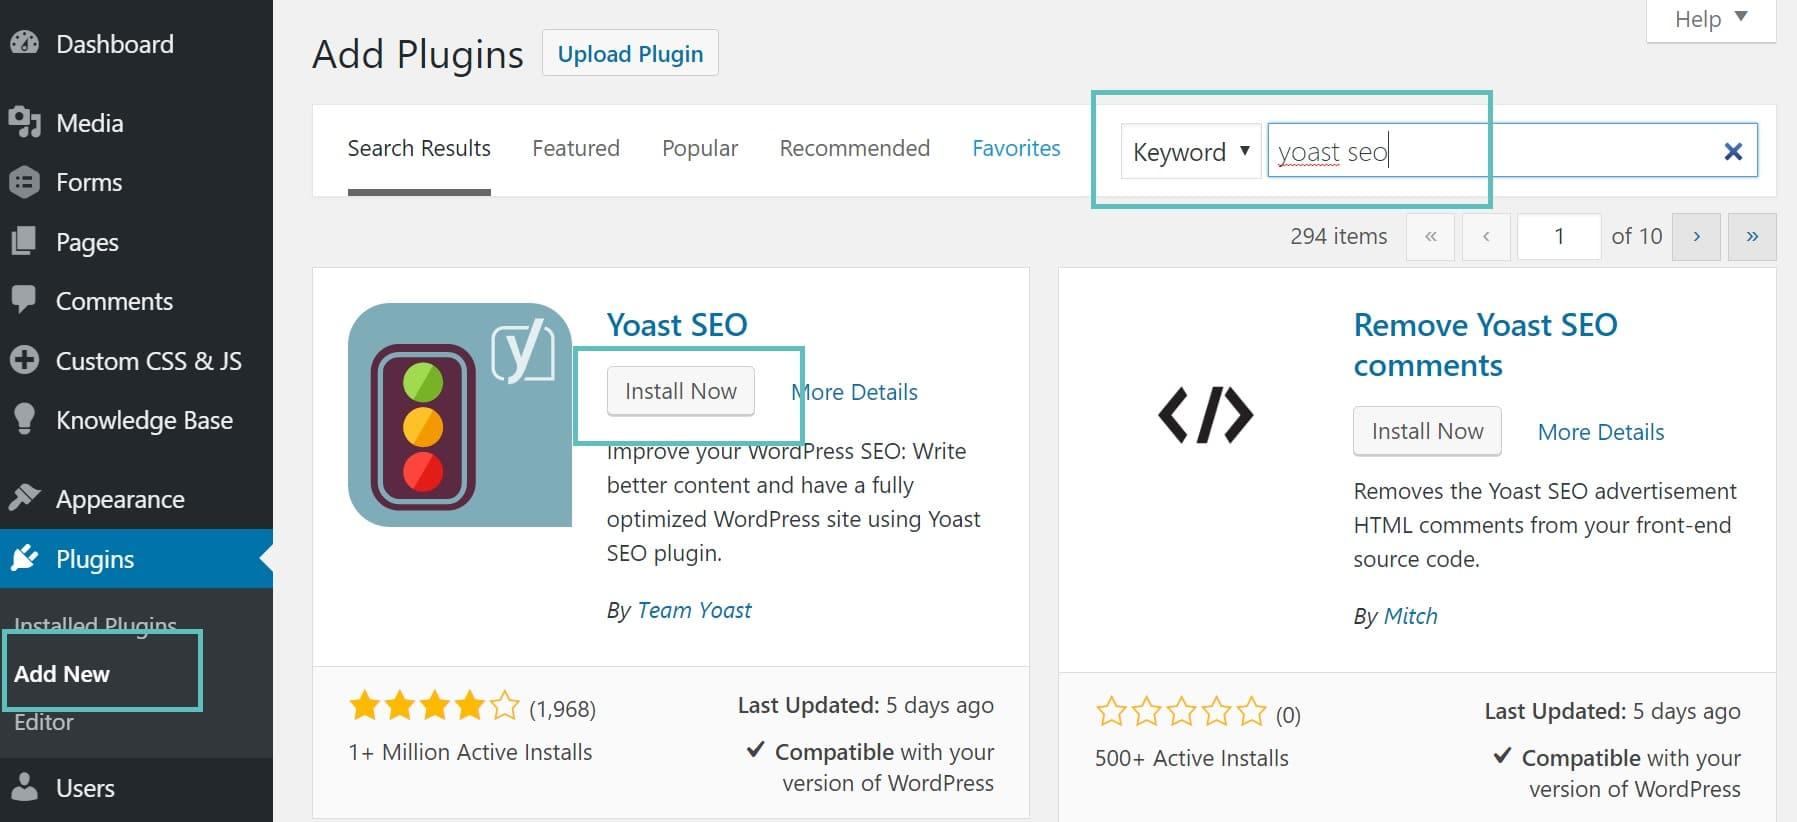
In the Add Plugins page, you can use the search bar to find a specific plugin, or you can browse popular, recommended, or favorite plugins.If you have a plugin in mind, simply type its name in the search field. Once you find the desired plugin, you’ll see an Install Now button. Click it to proceed.
After the installation is complete, the button will change to Activate. This is an essential step,as activating the plugin ensures that it starts functioning on your site.Some plugins might require additional configuration after activation, so be sure to check their settings if prompted.
If you prefer to upload a plugin directly, you can do so by clicking on the Upload Plugin button at the top of the Add Plugins page. Here’s how:
- Click Upload Plugin.
- select the plugin ZIP file from your computer.
- Click Install Now and wait for the process to finish.
- click Activate Plugin once installation is complete.
To help you visualize the differences between options, here’s a quick comparison table:
| Method | Steps | Best For |
|---|---|---|
| Search & Install | Search > Install > Activate | Quick access to popular plugins |
| Upload ZIP | Upload > Install > Activate | Custom or premium plugins |
With these steps completed, your new plugin is now a part of your WordPress arsenal! Explore its features and settings to fully leverage its capabilities and enhance your website’s performance.
Activating Your Plugin and Exploring Its Features
Once you’ve successfully installed your plugin, the next exciting step is to activate it and explore its features. Activating a plugin is as simple as clicking a button, and it opens up a world of possibilities for enhancing your WordPress site. simply navigate to your Plugins section in the WordPress dashboard, find the plugin you just installed, and click the Activate link below its name. Voila! Your plugin is now live and ready to use.
After activation, you’ll often notice a new menu item added to your dashboard or perhaps some additional settings under an existing menu. Take some time to explore these new options. Each plugin comes with its unique set of features, and understanding how to utilize them can significantly enhance your website’s functionality. Here are a few common features you might encounter:
- Settings Panel: Most plugins will have a dedicated settings panel where you can customize their behavior to suit your needs.
- Shortcodes: Some plugins provide shortcodes that you can use to embed functionalities or content easily into your posts and pages.
- Widgets: If your plugin adds new widgets, you can drag and drop them into your sidebar or footer through the Appearance > Widgets area.
- integration Features: Look for options to integrate your plugin with other services or plugins you’re already using.
To help you get started, here’s a quick reference table showcasing the types of plugins and their potential uses:
| Plugin Type | Common Uses |
|---|---|
| SEO Plugins | Improve site visibility on search engines. |
| Security Plugins | Enhance site protection against threats. |
| Performance Plugins | Boost site speed and performance. |
| Backup Plugins | Automate backups for safety. |
It’s essential to read the documentation provided by the plugin developers. Most plugins come with extensive guides that can definitely help you make the most of their features. Don’t hesitate to experiment with settings and options; after all, one of the best parts of using plugins is the ability to customize your site to your liking. The more you explore, the more confident you’ll become in utilizing these tools to create a robust and engaging WordPress site.
Troubleshooting Common Plugin Installation Issues
Installing a plugin on WordPress should be a straightforward process, but sometimes things don’t go as planned. Here are some common issues you might encounter and tips to resolve them:
- Plugin Compatibility: Ensure that the plugin is compatible with your current version of WordPress.Check the plugin’s page on the WordPress repository for compatibility details.
- Memory Limit: If you encounter a fatal error during installation, it may be due to insufficient memory. Increase your PHP memory limit by editing your
wp-config.phpfile and adding the line:define('WP_MEMORY_LIMIT', '256M');. - File Permissions: Incorrect file permissions can prevent plugin installation. Make sure the
wp-content/pluginsdirectory has the correct permissions set, typically 755.
Another common issue arises during the upload of plugins in .zip format. Here’s how to address it:
| Error Message | Possible Solution |
|---|---|
| “The package could not be installed. No valid plugins were found.” | Make sure the .zip file you’re uploading contains the plugin folder directly, not an extra folder. |
| “installation failed: Could not create directory.” | Check your file permissions and ensure your server allows file creation. |
If plugins are not showing up in the admin panel after accomplished installation, consider the following:
- Refreshing Your Site: Sometimes, a simple refresh can resolve visibility issues.
- Clearing Cache: If you’re using a caching plugin,clear your cache to ensure the newly installed plugin is recognized.
- Conflicting Plugins: Deactivate all other plugins to check if there’s a conflict.Reactivate them one by one to identify the culprit.
Should you still face issues, consulting the plugin’s support forum or documentation can provide additional insights. Remember, troubleshooting can be a step-by-step process, so don’t hesitate to reach out for help if needed!

Keeping Your Plugins Updated for optimal Performance
Keeping your plugins updated is crucial for ensuring your WordPress site runs smoothly and securely. When developers release updates, they frequently enough include enhancements, security patches, and bug fixes that can significantly improve performance. Ignoring these updates can lead to vulnerabilities, compatibility issues, and a degraded user experience.
Here are some compelling reasons to prioritize plugin updates:
- Security Enhancements: Regular updates often patch security holes that hackers might exploit. Keeping your plugins current reduces the risk of cyber-attacks.
- Performance Improvements: Developers continuously work on optimizing their plugins. Updates may lead to faster load times and better overall site performance.
- Bug Fixes: If you’ve been experiencing glitches or errors,updates frequently resolve these issues,providing a smoother user experience for your visitors.
- New Features: Updates can also introduce new functionalities that can enhance your site’s capabilities and improve engagement.
To stay on top of updates, consider implementing a routine check. Here’s a simple table to help you track your plugin update schedule:
| Plugin Name | Last Updated | Next Update Due | Status |
|---|---|---|---|
| Yoast SEO | March 1, 2023 | June 1, 2023 | Up to Date |
| WooCommerce | February 15, 2023 | May 15, 2023 | Update Needed |
| Contact Form 7 | January 10, 2023 | April 10, 2023 | Up to Date |
In WordPress, you can enable automatic updates for your plugins, ensuring you always benefit from the latest improvements without needing to manually check. Head to your plugin settings and toggle the auto-update feature to stay effortlessly updated.
Remember, while keeping your plugins updated is essential, you should always back up your site before performing updates.This way, if anything goes wrong, you can easily restore your site to its previous state. Regular updates, combined with backup practices, will help maintain your site’s health and performance effectively.
Best Practices for Plugin Management and Security
When managing plugins on your WordPress site,establishing a structured approach is crucial to ensure both functionality and security. Here are some best practices to enhance your plugin management:
- Regular Updates: Always keep your plugins up to date. Developers frequently release updates to patch vulnerabilities.
- Limit the Number of Plugins: Only install plugins that are essential for your site’s functionality. Fewer plugins reduce potential security risks.
- Research Before Installation: Before adding a plugin, read reviews, check ratings, and ensure it’s compatible with your current WordPress version.
- Backup Your Site: Regularly back up your site to avoid data loss in the event a plugin causes issues.
- Employ Security Plugins: consider using security plugins that can scan for vulnerabilities and monitor activity on your site.
Additionally, it’s wise to audit your plugins periodically. This means reviewing the plugins you have installed and assessing their functionality and security:
| Plugin Name | Status | Last Updated |
|---|---|---|
| Yoast SEO | Active | 1 week ago |
| Contact Form 7 | Active | 2 weeks ago |
| WP Super Cache | Inactive | N/A |
Monitoring plugin performance is essential as well.If a plugin is slow or causes your site to crash, it’s time to reconsider its necessity. Moreover,always remove any unused or outdated plugins to minimize potential entry points for attackers.
Lastly, consider using staging sites to test new plugins before implementing them on your live site. This approach allows you to catch any conflicts or issues without affecting your users.Incorporating these practices into your routine will significantly bolster your WordPress site’s security and efficiency.
Discovering Must-Have Plugins for Every WordPress Site
When it comes to enhancing your WordPress site, choosing the right plugins can make all the difference. From boosting SEO to improving site security, the right tools can elevate your website’s performance and user experience. Here are some essential plugins that every WordPress user should consider:
- Yoast SEO: A comprehensive tool that helps you optimize your content for search engines with real-time analysis and suggestions.
- Wordfence Security: This plugin provides robust security features, including firewall protection and malware scanning, to keep your site safe from threats.
- WooCommerce: If you’re looking to sell products online, WooCommerce transforms your site into a fully functional e-commerce store.
- Elementor: A powerful page builder that allows you to create stunning layouts with a simple drag-and-drop interface,perfect for users without coding skills.
- UpdraftPlus: An essential backup plugin that ensures your site’s data is safe and easily recoverable in case of emergencies.
Installing these plugins is straightforward.Simply navigate to the Plugins section of your WordPress dashboard, click on Add New, and use the search bar to find the plugins mentioned above.Once you find the desired plugin, click install Now and then Activate to start using it!
To help you decide, here’s a quick comparison of the top five plugins based on their purpose and features:
| Plugin | Primary Function | Key Features |
|---|---|---|
| Yoast SEO | SEO Optimization | Keyword analysis, readability check, XML sitemaps |
| Wordfence Security | Site Security | Live traffic view, firewall, malware scanning |
| WooCommerce | E-commerce | Product management, payment gateway integration, analytics |
| Elementor | Page Building | Drag-and-drop editor, responsive design, template library |
| UpdraftPlus | Backup & Restore | Scheduled backups, cloud storage options, easy restore |
By incorporating these plugins into your wordpress site, you not only enhance functionality but also improve overall user engagement. Each plugin serves a specific purpose, and together they create a well-rounded, effective site that meets the needs of you and your visitors. Start exploring these must-have tools today and watch your WordPress site flourish!
Tips for Uninstalling Plugins Safely and Effectively
When it comes time to uninstall a plugin from your WordPress site, doing it the right way can definitely help maintain optimal performance and avoid potential issues. Here are some essential tips to consider for a smooth uninstallation process.
- Back Up Your Site: Before making any changes, it’s crucial to create a full backup of your site. This ensures you can restore it if something goes wrong during the uninstallation process.
- Deactivate first: Always deactivate the plugin before uninstalling it. This action can prevent conflicts and issues while removing files and settings.
- Check for Dependencies: Some plugins might potentially be interconnected. Ensure that no other plugins or functionalities depend on the one you’re about to uninstall to avoid breaking your site.
- Review Settings and Data: Take note of any settings or data associated with the plugin. If the plugin stores user data or settings, consider whether you want to keep this facts or remove it as well.
After you have taken these precautionary steps, proceed with the uninstallation:
| Action | description |
|---|---|
| Deactivate Plugin | Navigate to the Plugins menu and deactivate the plugin you want to uninstall. |
| Uninstall | Click on ‘Delete’ after deactivation to permanently remove the plugin from your site. |
| check for Remnants | Review your site’s file structure or database to ensure all plugin-related files and data have been removed. |
Lastly, it’s good practice to monitor your site after uninstalling a plugin. Check for any unexpected behavior or errors that may arise post-uninstallation. This proactive approach allows you to address issues before they escalate and ensures your site remains efficient and effective.
Frequently Asked Questions (FAQ)
Q&A: How to Install a WordPress Plugin? (Beginner’s Guide)
Q: What is a WordPress plugin, and why should I care?
A: Grate question! A WordPress plugin is essentially a piece of software that adds specific functionality to your WordPress site. Think of it as an app for your website. Want to add a contact form, enhance SEO, or secure your site? There’s likely a plugin for that! Installing plugins can boost your site’s performance and capabilities without needing to code, making it an essential skill for any WordPress user.
Q: That sounds exciting! But how do I actually install one? Is it complicated?
A: Not at all! Installing a plugin is super user-friendly, even for beginners. It typically takes just a few clicks! You can install plugins directly from the WordPress dashboard or upload them manually. I’ll walk you through the steps in the article. Trust me; you’ll be a pro in no time!
Q: What are the steps to install a plugin from the WordPress dashboard?
A: It’s quite simple! Here’s a quick rundown:
- Log in to your WordPress dashboard.
- Navigate to the “Plugins” section on the left-hand menu.
- Click on “Add New.”
- Use the search bar to find the plugin you want.
- Once you find it, click “Install Now.”
- After installation, don’t forget to activate it by clicking “Activate.” Voilà! You’re all set!
Q: What if I want to install a plugin that I downloaded from another website?
A: No worries! You can easily upload it. Just follow these steps:
- Go to the “Plugins” section in your dashboard.
- Click on “Add New.”
- At the top,click on “Upload Plugin.”
- Choose the zip file of the plugin you downloaded and click “Install Now.”
- Once uploaded, activate it, and you’re good to go!
Q: Are all plugins safe to install? How can I ensure I’m choosing the right ones?
A: You’re right to be cautious! Not all plugins are created equal.Always check the following:
- Ratings and reviews from other users.
- The number of active installations.
- Last updated date (it should be recent).
- Support options available.
Doing your homework will help you avoid any security risks and keep your site running smoothly!
Q: How do I manage and update my installed plugins?
A: Keeping your plugins updated is crucial for security and performance. To manage them:
- Go to the “Plugins” section in your dashboard.
- Here, you’ll see a list of all your installed plugins. If there’s an update available,it will show an “Update now” button right beneath the plugin name.
- Click it, and you’re done! You can also deactivate or delete plugins you no longer need from this page.
Q: Any last tips for a beginner looking to use plugins effectively?
A: Absolutely! Start by using only the essential plugins to avoid bloating your site. Regularly review your plugins to ensure you’re only keeping what you need. And, of course, always back up your website before making changes. It’s better to be safe than sorry!
Q: Thanks for the guidance! Where can I find more resources to help me with WordPress?
A: You’re welcome! There are tons of great resources online, including the WordPress Codex, forums, and tutorials. Also, consider joining WordPress communities on social media or forums where you can ask questions and share experiences with fellow users.Happy WordPressing!
Final Thoughts
And there you have it! Installing a wordpress plugin is not just a simple task; it’s an empowering step towards enhancing your website’s functionality. Whether you’re adding features, improving performance, or optimizing for SEO, the right plugins can transform your site from average to exceptional.
Now that you’ve learned how to install a plugin, why not dive in and explore the vast world of options available? Don’t hesitate to experiment and see how different plugins can work for you. Remember,the right tools can help you realize your vision,and with the knowlege you’ve gained from this guide,you’re more than equipped to do just that.
So, why wait? Start exploring those plugins and watch your WordPress site flourish! If you have any questions or need further guidance, feel free to reach out. Happy blogging, and may your plugin journey be filled with creativity and success!