Are you ready to give yoru Eduma WordPress site a fresh new look? The header section is the first thing visitors see when they land on your website, and it’s your golden chance to make a lasting impression. Whether you want to showcase your brand, highlight vital links, or simply enhance user experience, customizing the header can make all the difference. In this article, we’ll walk you through the simple yet effective steps to edit the header section of your Eduma theme.Not only will you learn how to make these changes, but you’ll also discover tips to elevate your site’s overall aesthetic and functionality. So, let’s dive in and transform that header into a stunning gateway to your content!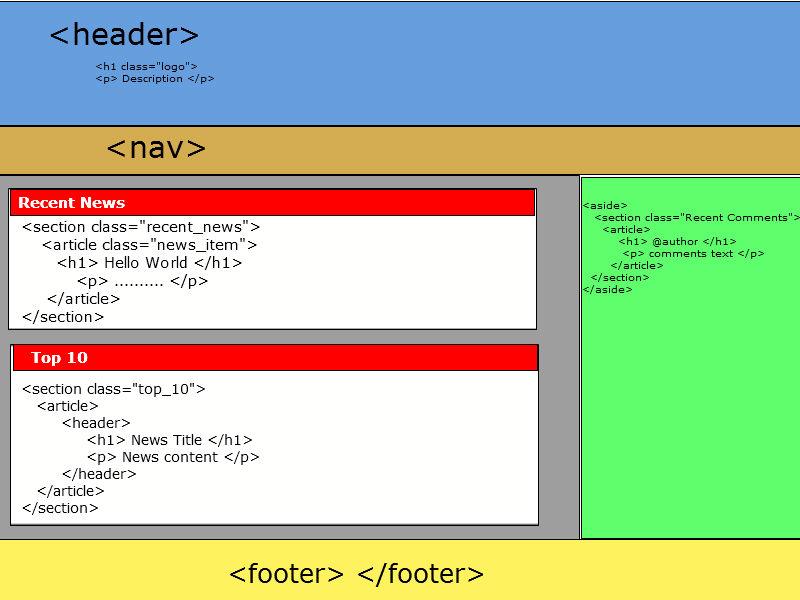
Understanding the Header Section in the Eduma WordPress Theme
The header section of the Eduma WordPress theme serves as the first impression for visitors, showcasing your brand identity and guiding users to key areas of your site. Understanding how to effectively edit this section can considerably enhance user experience and engagement. The header typically includes elements such as your site logo, navigation menu, search bar, and contact information—all crucial for smooth navigation.
To begin customizing your header, navigate to the WordPress dashboard and select “Appearance” followed by “Customize.” This opens the WordPress Customizer, where you can make live changes and see how they affect your site in real-time. Here are some key components you can modify:
- Site Identity: Here, you can upload or change your logo, add a site title, and include a tagline to provide context to your visitors.
- Menus: Creating and managing menus allows you to rearrange navigation items, ensuring that your most critically important pages are easily accessible.
- Header Layout: Eduma offers various layout options, enabling you to choose how elements are displayed, such as full-width or boxed layouts.
- Color Schemes: Adjust colors to align with your branding while ensuring readability and aesthetic appeal.
Additionally, the eduma theme provides options for adding social media icons directly in the header.This feature not only improves connectivity with your audience but also helps in promoting your social media presence. To do this, simply toggle the social media settings within the Customizer and insert the relevant URLs.
For more advanced users, you may also want to dive into header customization through custom CSS. this allows for unique styling that can set your site apart. Here’s a simple example:
.header-wrapper {
    background-color: #f8f9fa;
    padding: 20px;
}
.header-logo {
    max-width: 200px;
}
By focusing on these elements of the header section,you can create a visually appealing and functional space that enhances the overall performance of your eduma theme website. Remember, a well-designed header can lead to increased user retention and satisfaction, making it an essential aspect of your site’s layout.
Why Your Header Matters for User Experience and Branding
When it comes to creating an engaging user experience, the header of your website plays a pivotal role. It acts as the first impression for visitors, frequently enough determining whether they will stay or leave.A well-structured header not only provides essential navigation but also reflects your brand’s identity.Think of it as the face of your website,where you can communicate your mission,values,and style within seconds.
Consider the following elements that contribute to a compelling header:
- Logo Placement: Your logo should be easily recognizable and strategically placed, usually at the top left, making it a focal point that users associate with your brand.
- Navigation Menu: A clear and intuitive navigation menu enhances user experience,allowing visitors to find what they need quickly.
- Call to Action (CTA): Incorporate clear CTAs in your header for essential actions like signing up, contacting you, or accessing key resources.
- Search Bar: Including a search feature allows users to find specific content swiftly, improving their overall experience.
Moreover, the visual aesthetics of your header should align with your branding. The choice of colors, fonts, and images should resonate with your target audience and reinforce your brand message. A cohesive design not only enhances brand recognition but also fosters a sense of trust and professionalism that encourages visitors to explore further.
To illustrate these points, consider this simple comparison of effective vs. ineffective headers:
| Effective header | Ineffective Header |
|---|---|
| Clear logo and navigation | Cluttered with too many links |
| Consistent branding elements | Inconsistent colors and fonts |
| Prominent CTA buttons | Hidden or vague CTAs |
| Responsive design for mobile | Non-responsive, tough to navigate on mobile |
Ultimately, your header is not just a functional component; it’s a crucial part of your brand storytelling. A thoughtfully designed header can captivate users, guiding them through their journey on your site. So, when editing your header in the Eduma WordPress theme, keep in mind the importance of these elements in crafting an extraordinary user experience that aligns with your branding goals.
Exploring the Customization Options Available for Your Header
When it comes to making your website truly stand out, the header section is your first opportunity to capture your visitors’ attention. The Eduma WordPress theme offers a range of customization options that allow you to tailor your header to fit your brand identity and the needs of your audience. Let’s dive into some of these exciting features!
- Logo Upload: Easily upload your logo to create a unique brand identity.
- Header Styles: Choose from multiple header styles, including classic, modern, and minimalist designs.
- Navigation Menu Customization: Arrange your navigation items, add dropdown menus, and enable sticky headers for improved usability.
- Social Media Icons: Integrate your social media links directly in the header to enhance connectivity.
- Call-to-action Buttons: Add visually striking buttons in your header to guide users to take action, whether it’s signing up or exploring your courses.
One of the standout features of the Eduma theme is the header background options. You can customize the header’s background color, image, or even use a video background for a more dynamic feel. This adaptability allows you to create an atmosphere that reflects your educational brand perfectly. To change the background,simply navigate to the header settings in the customizer and upload your preferred choice.
Additionally, the Eduma theme supports custom CSS for those who want more control over the appearance of their header. By adding custom styles, you can fine-tune aspects like spacing, font sizes, and hover effects, ensuring your header looks just as you envision. This is particularly useful for those who have a specific design in mind that goes beyond the standard options.
| Customization Feature | benefit |
|---|---|
| Logo upload | Brand recognition and trust |
| Header Styles | Diverse looks for different needs |
| Navigation Menus | user-friendly site exploration |
| Social Media Integration | Enhanced community engagement |
| Custom CSS | Unique styling and branding |
With these customization options at your fingertips, your header can become not just a navigation tool but an engaging introduction to your website. Whether you’re a beginner or a seasoned web designer, the Eduma theme empowers you to create a header that truly reflects your educational institution’s mission and values.
Step-by-Step guide to Accessing the Header Editing Tools
Accessing the header editing tools in the Eduma WordPress theme is a straightforward process that can significantly enhance your site’s appearance and functionality. Follow these steps to make the most of your editing options:
- Login to your WordPress Dashboard: Start by navigating to your wordpress admin panel. Use your credentials to log in and gain access to the editing features.
- Go to the Appearance Menu: Once logged in,look for the Appearance option on the left sidebar. Click on it to reveal a dropdown menu where you can manage various aspects of your theme.
- Select Customize: In the Appearance menu, click on Customize. This action opens the WordPress Customizer, where you can see a live preview of your changes.
- Navigate to Header Options: Within the Customizer, locate the section labeled Header. This is where all the magic happens! Click on it to explore the editing tools available for your header.
- Make Your Edits: Here,you can adjust various elements of your header,including the logo,navigation menu,and even the header background. Experiment with different settings to see what works best for your brand.
After making your desired changes, don’t forget to click on the Publish button at the top of the Customizer to save your edits. This step is crucial as it ensures that all your hard work is reflected on the live site.
If you want to dive deeper into customizing specific elements, consider using the Elementor plugin (if installed) to achieve even more personalized designs. With Elementor, you can drag and drop elements to create a header that perfectly fits your vision.
Should you encounter any issues or need to revert back to your original header settings, the Customizer also provides a Reset option. This feature allows you to start fresh without losing all your previous configurations. Always remember that experimenting is key to discovering the best layout for your audience!
Tips for Designing a Catchy and Effective Header
Creating a striking header is your first step to capturing visitors’ attention. A well-designed header can enhance user experience and set the tone for your entire website. Here are some essential tips to consider:
- Keep It simple: A clean, uncluttered design allows visitors to focus on what matters most. use ample white space to make your header elements stand out.
- Choose the Right Fonts: Select fonts that are both readable and appropriate for your brand.Mixing two complementary fonts can add visual interest without overwhelming the viewer.
- Use Bold Colors: Incorporate colors that resonate with your brand identity. A bold color can draw attention and evoke emotions, making your header memorable.
- Include a Call to Action: Whether it’s a button to sign up for a newsletter or a link to learn more, having a clear call to action in your header can guide users towards their next steps.
In addition to aesthetics, functionality plays a crucial role. Ensure your header is responsive and looks great on all devices. Here are some technical considerations:
| Element | Best Practice |
|---|---|
| Logo Size | Optimal width: 250px; maintain aspect ratio for clarity. |
| Navigation Links | Limit to 5-7 links for cleaner navigation. |
| Mobile Responsiveness | Ensure elements stack vertically on smaller screens. |
Lastly, don’t forget about accessibility.A great header should be inclusive and easy to navigate for all users. Consider adding features like keyboard navigation and alt text for images. This not only helps users with disabilities but also improves your site’s SEO.
By following these tips,you’ll be well on your way to creating a captivating header that not only looks great but also functions seamlessly,drawing your visitors further into your site.

Best Practices for Mobile Optimization in Your Header
When optimizing your header for mobile users,it’s crucial to keep it simple and streamlined. A cluttered header can overwhelm visitors using smaller screens, leading to a poor user experience. Focus on displaying only the most essential elements, such as your logo, navigation menu, and a call-to-action button.
Consider using a hamburger menu for your navigation links. This keeps your header clean and allows users to access the menu with a single tap. Make sure that the menu is easily accessible and that it expands smoothly. A fast tip is to use a contrasting color for the hamburger icon to ensure it stands out against your background.
Another key aspect is ensuring that your header is responsive. Use CSS media queries to adjust the size and arrangement of header elements based on different screen sizes.For instance, on smaller devices, you might want to reduce the padding around your logo and navigation items to maximize available space.
Make sure that your tap targets, like buttons and links, are large enough to be easily clicked on a mobile device. A minimum recommended size is around 44×44 pixels. this helps avoid user frustration and improves overall usability. You can apply CSS styles to ensure your buttons have generous padding, enhancing their clickability.
| Element | Best Size |
|---|---|
| Logo | 100-200 pixels wide |
| navigation Links | 44 pixels high |
| Buttons | 44×44 pixels |
| Padding | 10-20 pixels |
Lastly, always test your header on various devices and screen sizes. Tools like Google’s Mobile-Friendly Test can help identify areas for improvement. Regularly checking how your header performs allows you to adapt and ensure a seamless experience for all users, irrespective of their device.

Incorporating Your Logo and Tagline for Maximum impact
When it comes to creating a memorable online presence, your logo and tagline play crucial roles in establishing your brand identity. The Eduma WordPress theme provides a user-friendly interface to ensure these elements are prominently featured in your header section,making it easy for visitors to recognise and remember your brand.
positioning is Key: The placement of your logo and tagline within your website’s header can significantly influence user perception. Here are some effective strategies:
- Top-left Corner: This is the most customary and expected location for logos, ensuring immediate recognition.
- Centered Header: A centered logo can create a balanced and harmonious feel, especially for educational or artistic themes.
- Tagline Underneath: Positioning your tagline directly beneath your logo helps reinforce your brand message without overwhelming the visual flow.
Choosing the Right Size: size matters when it comes to your logo and tagline; they should be clearly visible yet not overpowering. Consider the following:
| Element | Recommended Size |
|---|---|
| Logo | 150px – 300px width |
| Tagline | 20px – 30px height |
Color Coordination: The colors of your logo and tagline should complement the overall theme of your site. Utilize contrasting colors for your tagline to ensure it stands out against the background, drawing attention to your core message.Remember, the goal is to create a cohesive look that aligns with your brand’s personality.
Testing Your Design: Once you’ve incorporated your logo and tagline, it’s essential to test how they appear across various devices and screens. Make adjustments as necessary to ensure they maintain their impact on mobile, tablet, and desktop views. Ensuring a responsive design is vital for providing a seamless user experience.
Adding Navigation Menus to Enhance Site Usability
Enhancing your site’s usability starts with a well-structured navigation menu. A clear and intuitive navigation system helps users find what they need quickly and efficiently, improving their overall experience.In the eduma WordPress theme, you have ample options to create navigation menus that not only look great but also serve a functional purpose.
To get started,log into your WordPress dashboard and head over to Appearance > Menus. Here, you can create a new menu or edit an existing one. Consider adding key pages such as:
- Home – The central hub of your site.
- About Us – A brief introduction to your association.
- Courses – Showcase your educational offerings.
- Contact – Provide users with a way to reach out.
Once you’ve selected the pages, you can arrange them in a logical order. Drag and drop items to prioritize them based on their importance. It’s also a good idea to create submenus for more detailed sections. For instance, under Courses, you can list out categories or specific programs. This hierarchical navigation can significantly reduce clutter and guide users effortlessly through your site.
Don’t forget to take advantage of the theme options available in Eduma. You can customize the menu’s style, colors, and hover effects to match your brand identity. A visually appealing menu can catch users’ attention and encourage them to explore more. You can also include icons next to menu items to make navigation even more engaging.
consider testing your navigation menu. Gather feedback from users or conduct usability tests to see how effectively they can navigate your site. This step is crucial in determining if your menu structure is intuitive or if adjustments are needed. A well-crafted navigation menu is not just about aesthetics; it’s about guiding your users on their journey through your content.
Utilizing Widgets and Plugins to Enrich Your Header Experience
Enhancing your header experience in the Eduma WordPress theme can significantly improve user engagement and make your website stand out. One of the most effective ways to do this is by incorporating widgets and plugins tailored to your needs. These tools provide functionality that not only beautifies the header but also offers value to your visitors.
Consider using an array of widgets to diversify the information displayed in your header area. Here are some options that can add flair:
- Social media Icons: Instant access to your social profiles encourages visitors to connect with you on different platforms.
- Search Bar: Make it easier for users to find content by integrating a search feature front and center.
- navigation Menus: Organize your header with multiple menus that guide users to essential sections of your site.
Plugins are equally as valuable when it comes to enriching your header. You can find a multitude of plugins designed specifically for header customization. A few noteworthy examples include:
- Sticky Menu: Keep important links accessible as users scroll for a seamless browsing experience.
- Custom logo Upload: Easily replace the default logo to align with your brand identity.
- Header Background customizer: Change the header background color or image to match seasonal themes or promotions.
When selecting widgets and plugins, consider the user experience they provide.You want to ensure that every addition serves a purpose and does not clutter your header.Testing different combinations can yield the best results and help you determine what resonates with your audience.
For a clearer overview of some useful widgets and plugins,refer to the table below:
| type | Name | Purpose |
|---|---|---|
| Widget | Social Media Icons | Enhances connectivity |
| Plugin | Sticky Menu | Keeps navigation accessible |
| Widget | Search Bar | Facilitates content revelation |
| Plugin | Header Background Customizer | Allows for branding flexibility |
By thoughtfully selecting and implementing these tools,you can create a header that not only looks professional but also enhances the overall user experience.The key is to stay true to your brand while ensuring functionality and aesthetics work hand in hand.
Final Touches: Previewing and Saving Your Header Changes
Before you finalize your header changes in the Eduma WordPress theme,it’s essential to take a moment to preview how these modifications will look on your website. This step is crucial, as it allows you to ensure that your design choices align with your vision and enhance the overall user experience.
To preview your changes, navigate to the Customizer section of your WordPress dashboard.Here, you’ll find a live preview of your header, allowing you to see your updates in real time. Pay close attention to the following aspects:
- Layout: Ensure that your header elements are well-aligned and visually appealing.
- Color Schemes: Check if the colors complement your overall site design and are easy to read.
- Font Styles: Confirm that the font sizes and styles are consistent with your branding.
- Mobile Responsiveness: Test how your header looks on mobile devices to guarantee a seamless experience for all users.
Once you are satisfied with how everything looks, it’s time to save your changes. Simply click the Publish button in the Customizer to make your header updates live on your site. Remember, saving your changes doesn’t mean you can’t go back and tweak them later. The beauty of using WordPress is that you can continually refine your design until it perfectly fits your needs.
If you plan to share your site with others for feedback before going live, consider using the Draft feature to temporarily save your changes. This allows you to gather opinions and make any necessary adjustments before making your work public. For a smoother collaboration,you can create a simple table summarizing the key changes and their intended impacts:
| change | Intended Impact |
|---|---|
| New Logo | Enhance brand recognition |
| Adjusted Color Palette | Improve visual harmony |
| Updated Navigation Menu | Increase user accessibility |
By thoughtfully previewing and saving your header changes,you not only enhance your site’s aesthetics but also contribute to a more effective and engaging user experience. Enjoy the process of crafting a header that truly represents your brand!
Frequently asked Questions (FAQ)
Q&A: How To Edit Header Section In Eduma WordPress Theme?
Q1: What is the Eduma WordPress theme, and why is it popular?
A1: The Eduma WordPress theme is specifically designed for educational institutions, online courses, and e-learning platforms. It’s popular because it offers a user-friendly interface, customizable features, and responsive design, making it perfect for schools, colleges, and online educators looking to create a professional online presence.
Q2: Why should I edit the header section of my Eduma theme?
A2: The header is the first thing visitors see when they land on your website! By editing the header section,you can enhance your branding,improve navigation,and make a lasting impression. A well-designed header can increase user engagement and make it easier for your audience to find important information.
Q3: How can I access the header section for editing?
A3: Great question! To edit the header section in your Eduma theme, log in to your WordPress dashboard. Navigate to “Appearance” and then click on “Customize.” From there, look for “header Settings” to access various options for customizing your header.
Q4: What specific elements can I change in the header?
A4: You can customize several elements including your logo, site title, tagline, and even navigation menus. You can also change colors, fonts, and styles to match your brand identity. If you want to make your header more engaging, consider adding social media icons or a call-to-action button!
Q5: Can I add a custom logo to my header?
A5: Absolutely! In the “Header Settings” section, you’ll find an option to upload your custom logo. This is a fantastic way to establish your brand visually. Just make sure your logo is high-quality and fits well within the header space.
Q6: Is it possible to rearrange the menu items in the header?
A6: Yes! You can easily rearrange your menu items by going to “Appearance” and then “Menus.” From there, you can drag and drop the menu items to your desired order. A well-organized menu makes navigation seamless for your visitors.
Q7: What if I want to add a search bar to my header?
A7: Adding a search bar is a smart move! In the “Header Settings,” look for the option to enable a search form. This allows your users to find content quickly, enhancing their experience and keeping them on your site longer.
Q8: Can I preview my changes before publishing?
A8: Yes! The Customizer allows you to see a live preview of your changes as you make them. this way, you can tweak and adjust until you’re completely satisfied before hitting the “Publish” button.
Q9: What if I run into issues while editing the header?
A9: Don’t worry! If you encounter any issues, you can always refer to the Eduma documentation or support forums.The community is quite helpful, and you can also reach out to their support team for assistance.
Q10: Why should I take the time to customize my header?
A10: Customizing your header is a crucial step in creating a unique and professional-looking website. It not only reinforces your brand but also improves user experience. Plus, it only takes a bit of time and effort to make a significant difference in how your site is perceived!
Ready to transform your Eduma theme’s header? Dive in and make your website stand out!
Final Thoughts
And there you have it! Editing the header section in the Eduma WordPress theme is not just a task; it’s an opportunity to express your brand’s identity and make a lasting impression on your visitors. With the steps we’ve covered, you’re now equipped to customize your header to reflect your unique vision and enhance user experience.
Remember, your website’s header is often the first thing people see, so don’t underestimate its power! Take the time to experiment with different designs, layouts, and features until you find what resonates best with your audience. And don’t forget: If you run into any issues or have questions along the way, the Eduma community and support resources are just a click away.
So, roll up your sleeves and dive into the editing process! Your website is about to get a fabulous makeover, and you’re the one in the driver’s seat. Happy editing! If you found this guide helpful, feel free to share it with fellow Eduma users, and let’s create stunning websites together!

