Are you looking to boost your WooCommerce store’s appeal? One of the frequently enough-overlooked elements that can make or break your online shop is the image size of your product photos. You might be wondering: “What’s the best image size for WooCommerce products?” Well, you’re not alone! many store owners grapple with this question, not realizing how crucial it is to get those dimensions just right. The right image size can enhance your website’s loading speed, improve user experience, and ultimately drive sales. In this article, we’ll break down everything you need to know about optimizing your product images, ensuring they look stunning and perform flawlessly. Let’s dive into the best practices that will elevate your WooCommerce store to the next level!
Choosing the Right Image Size for Your WooCommerce Products
When it comes to selling products online, visuals play a pivotal role in attracting customers. is essential not just for aesthetic appeal but also for performance. A well-optimized image can significantly enhance user experience and increase conversion rates. Here are some key factors to consider:
- Site Speed: Larger images can slow down your site, leading to higher bounce rates. Aim for a balance between quality and load time.
- Responsive Design: Ensure your images look great on all devices. Using responsive images will allow WooCommerce to serve the right size based on the user’s device.
- Zoom Feature: If your product has a zoom feature, consider using larger images (at least 800 x 800 pixels) to provide a detailed view for potential buyers.
WooCommerce recommends specific dimensions for product images to ensure they display optimally across various devices and platforms.While the default size is typically set at woocommerce_thumbnail, which is 300 x 300 pixels, you can adjust these settings in your WordPress dashboard to suit your store’s needs.
| image Type | Recommended Size | Notes |
|---|---|---|
| Product Thumbnail | 300 x 300 px | Default size; should maintain aspect ratio. |
| Single Product Image | 800 x 800 px | Ideal for zoom functionality. |
| Product Gallery Images | 800 x 800 px | Maintain consistency with single images. |
Additionally, it’s crucial to consider the file format and compression. Use formats like JPEG for photographs and PNG for images with transparency. Keep file sizes under 100KB whenever possible to ensure faster loading times, without compromising on quality.
always test your images.Use tools like Google PageSpeed Insights to analyze how your images affect loading speeds and adjust accordingly. Remember, the clearer and more visually appealing your images are, the more likely potential customers will be to make a purchase.
Understanding the Importance of Image Quality in E-commerce
In the fast-paced world of e-commerce, where consumers are just a click away from countless options, the significance of high-quality images cannot be overstated. A potential buyer frequently enough makes a split-second judgment based on the visual presentation of a product. This means that your product images must not only be appealing but also effectively communicate the details of what you are selling. Poor image quality can lead to decreased trust and, ultimately, lost sales.
When it comes to WooCommerce, the recommended image size plays a crucial role in how your products are displayed.A well-optimized image enhances the overall aesthetic of your online store, making it more inviting and professional. Here are a few key points to consider:
- Resolution Matters: A resolution of at least 800 x 800 pixels is often recommended for product images, ensuring that details are visible without compromising loading speed.
- Aspect Ratio: Maintaining a consistent aspect ratio across your product images helps create a cohesive look, improving user experience.
- Thumbnail Size: For your catalog pages, a thumbnail size of 300 x 300 pixels is generally optimal for rapid browsing without sacrificing quality.
Additionally, high-quality images can help reduce return rates. When customers can see every detail, from texture to color accuracy, they are less likely to be dissatisfied with their purchase. This transparency builds trust and encourages repeat business. Consider including multiple views of each product, as well as lifestyle images that showcase the item in use. This offers customers a better understanding of how the product fits into their lives.
The use of proper image formats also contributes to the overall experience. JPEGs are ideal for photographs, while PNGs work best for images that require transparency. As an inevitable result, knowing when to use each format can further enhance the visual storytelling of your products.
| Image Type | Recommended Size | Best Format |
|---|---|---|
| Product Image | 800 x 800 px | JPEG |
| Thumbnail | 300 x 300 px | JPEG |
| Banner Image | 1200 x 600 px | PNG or JPEG |
Investing time and resources into optimizing your product images can yield substantial returns. As the visual representation of your brand,they are essential in converting visitors into loyal customers.Ensure that your images not only look stunning but also convey the right information to facilitate informed purchasing decisions.
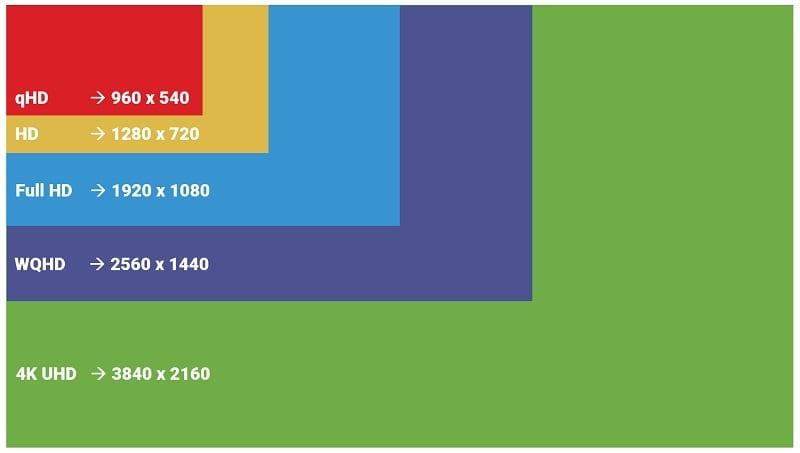
Ideal Image dimensions for Product Listings
When it comes to showcasing your products in woocommerce, the right image dimensions are crucial for both aesthetics and functionality. A well-optimized image not only enhances the look of your online store but also positively impacts user experience, leading to higher conversion rates. Here are some key dimensions and considerations to keep in mind:
- Product Images: aim for a size of 800 x 800 pixels for square images. This dimension strikes a balance between quality and loading speed, ensuring your customers can see each product clearly.
- Thumbnail Images: For thumbnails, a size of 300 x 300 pixels is recommended. These smaller images are perfect for category pages and provide a quick view without sacrificing clarity.
- Gallery Images: if you’re using multiple images for a single product, consider dimensions of 1200 x 1200 pixels. This allows for zooming features and detailed views, essential for high-end products.
It’s also important to consider the aspect ratio of your images. Consistency in aspect ratio across your product listings not only provides a uniform look but also helps maintain a clean layout. A standard ratio such as 1:1 or 4:3 works well for most e-commerce sites.
| Image Type | Recommended Size | aspect Ratio |
|---|---|---|
| Product Images | 800 x 800 pixels | 1:1 |
| Thumbnail Images | 300 x 300 pixels | 1:1 |
| Gallery Images | 1200 x 1200 pixels | 1:1 |
Additionally, consider optimizing your images for faster loading times. Compressing images without losing quality can significantly improve your website’s performance. Tools like ImageOptim or TinyPNG can help achieve the best results.
Lastly, always remember to use descriptive, keyword-rich file names and alt text for your images. This improves SEO, making it easier for potential customers to find your products through search engines.By following these guidelines, you’ll ensure that your product listings not only look great but also perform exceptionally well.
optimizing Image File Size for Faster Load Times
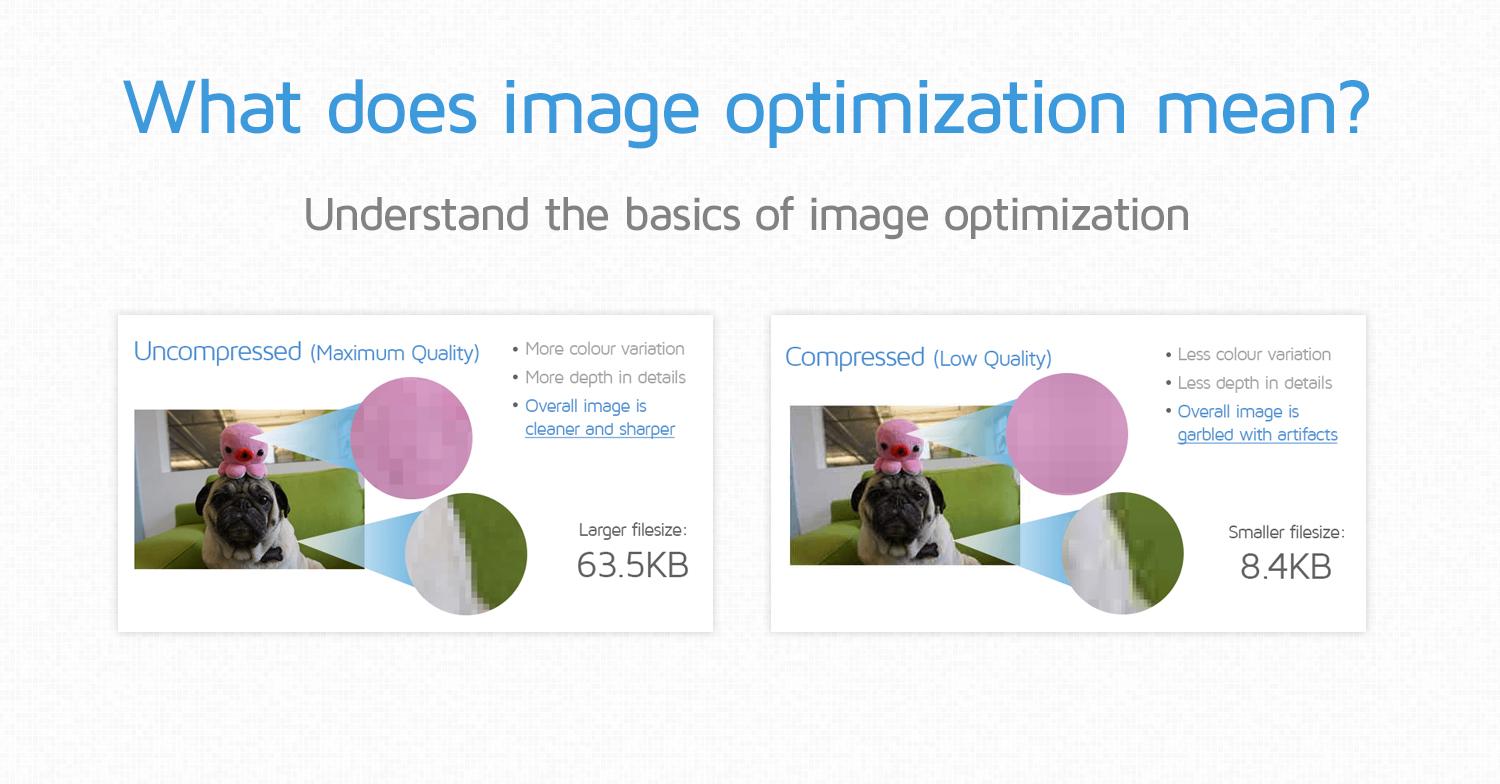
when it comes to e-commerce, particularly on platforms like WooCommerce, ensuring your images load quickly is crucial for retaining customer interest. Large image files can significantly slow down load times, leading to higher bounce rates and lost sales. Therefore,optimizing image file sizes is not just a technical necessity; it’s a strategic move that can boost your site’s performance and user experience.
to achieve the best results, consider the following techniques:
- Choose the Right Format: Use JPEG for photographs and PNG for images that require transparency. WebP is also a great option as it provides superior compression.
- Adjust Image Dimensions: Make sure your images are not larger than needed. For product displays,a size of around 800×800 pixels typically works well.
- Compress Images: Use tools like TinyPNG or ImageOptim to reduce file sizes without sacrificing quality.
- Utilize responsive Images: Implement the
srcsetattribute for your images, ensuring the right size is loaded based on the user’s device.
For a clearer understanding of how different image sizes affect loading times, refer to the table below:
| Image Size | File Type | Average Load Time | Recommended Use |
|---|---|---|---|
| 800×800 px | JPEG | 0.5 seconds | Product Images |
| 400×400 px | PNG | 0.3 seconds | Thumbnails |
| 1920×1080 px | WebP | 0.7 seconds | Full-Width Banners |
Additionally, leverage caching plugins such as WP Rocket or W3 Total Cache to ensure that your optimized images are served quickly.These plugins help minimize loading times by storing static versions of your website, including images, which reduces the load on your server during peak traffic times.
Implementing these strategies will not only improve your site’s load speed but will also enhance the overall shopping experience for your customers. A fast-loading website can lead to higher conversion rates, increased customer satisfaction, and ultimately, greater sales. So go ahead,optimize those images,and watch your WooCommerce store thrive!

How Image size Affects SEO and User experience
When it comes to online businesses, the size of your images can significantly impact both SEO and user experience. Large, high-resolution images may seem appealing, but they can hinder your site’s performance. Page load speed is a critical factor for SEO, as search engines prioritize sites that offer quick loading times. If your product images are too large, they can slow down your website, leading to higher bounce rates and lower search engine rankings.
On the flip side, overly compressed images can affect the quality of your visuals. Blurry or pixelated images can deter potential customers, making them less likely to purchase. Therefore,it’s crucial to find a balance. Here’s how you can optimize your images effectively:
- Use appropriate Dimensions: Ensure your images are the right size for the space they occupy.For product images in WooCommerce, aim for dimensions around 800×800 pixels.
- Format Matters: JPEG is often best for photographs, while PNG works well for images that require transparency. Choose wisely based on your image type.
- Optimize File Size: Utilize tools like TinyPNG or ShortPixel to compress images without sacrificing quality. Ideally, keep file sizes under 100KB.
Additionally, consider the impact of responsive design. Images should be adaptable to different screen sizes to enhance user experience across devices. Responsive images not only improve aesthetics but also play a role in SEO, as search engines favor mobile-friendly sites. Implementing a responsive design can be as simple as using the
Another key factor is the use of alt text. Properly describe your images with relevant keywords. This not only aids SEO but also enhances accessibility for visually impaired users. Including alt text can help search engines understand the content of your images, further boosting your chances of ranking higher in search results.
always keep an eye on your analytics. Monitor the performance of your product images concerning load time, bounce rates, and conversion rates.Make adjustments based on data-driven insights to continually improve both SEO and user experience.
Best Practices for Image Formats and Compression
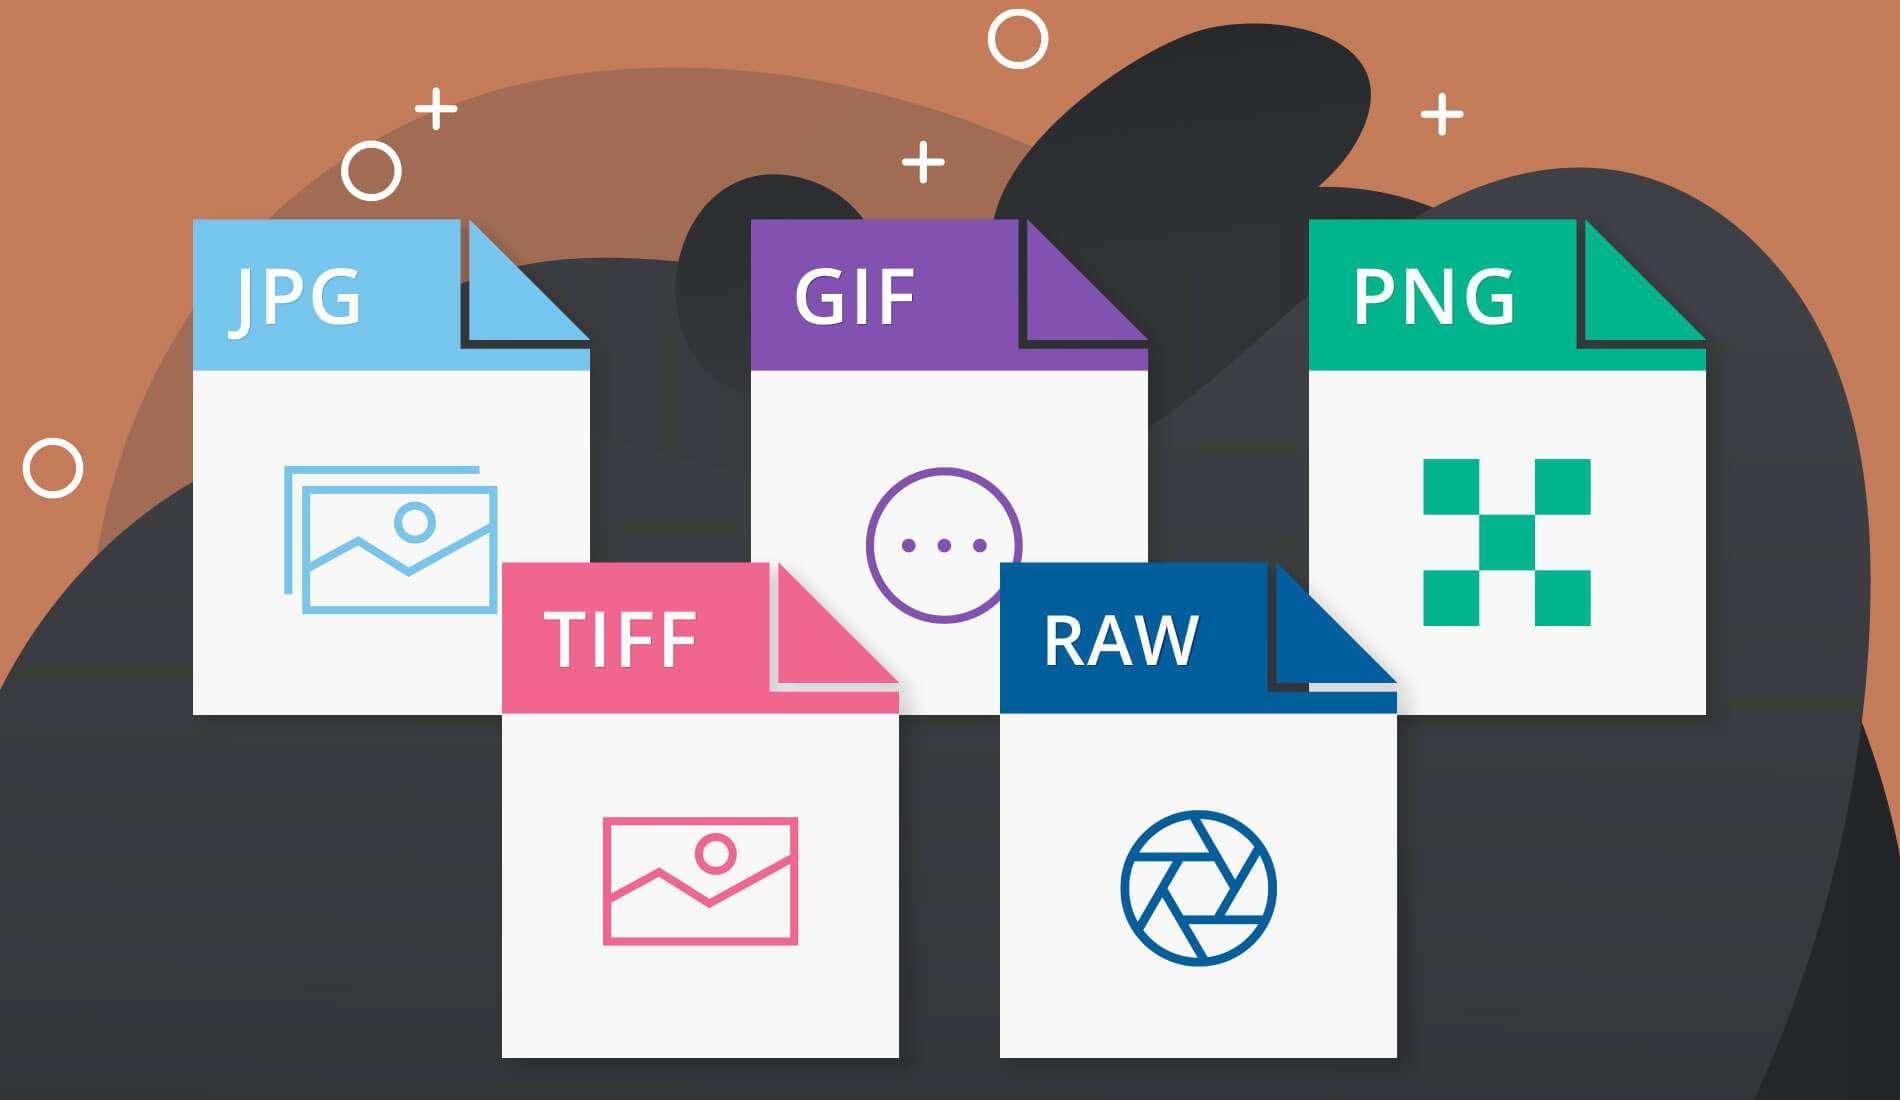
When it comes to optimizing images for your WooCommerce store, selecting the right format and applying the correct compression are crucial for maintaining both quality and performance. The choice of image format can significantly affect loading times, SEO, and the overall user experience. Here are some best practices to consider:
- Use JPEG for Photographic Images: JPEG is ideal for product photos due to its balance of quality and file size. Compress images to around 70-80% quality to achieve a good compromise between clarity and loading speed.
- Opt for PNG for Graphics: If your product images include text, logos, or other graphics, PNG is a better choice. This format supports transparency and maintains crispness, making it perfect for images with sharp edges.
- Consider WebP for Advanced Optimization: WebP is a modern format that provides superior compression,resulting in smaller file sizes without sacrificing quality. This format is supported by most modern browsers and can significantly improve your site’s performance.
Compression is equally important, as it can drastically reduce image file sizes while retaining quality. There are various tools available that can definitely help you compress images effectively:
| Tool | Type | Key Features |
|---|---|---|
| TinyPNG | Online | Free tool, batch processing, supports PNG and JPEG. |
| ImageOptim | Desktop | Mac application, lossless compression, drag-and-drop. |
| ShortPixel | WordPress Plugin | Automatic optimization, bulk compression, WebP conversion. |
In addition to choosing the correct formats and compressing images,consider implementing lazy loading techniques. This approach delays the loading of images until they are in the viewport, enhancing the initial load speed of your pages. Coupled with responsive images that adapt to different screen sizes, this can dramatically improve the user experience on mobile devices.
always test your images across various devices and browsers to ensure they render correctly. Tools like Google PageSpeed Insights can help you identify issues related to image optimization and provide suggestions tailored to your store’s needs. By following these best practices, you can enhance both the visual appeal and performance of your WooCommerce products, ultimately driving more conversions.
Tips for Creating Consistent Product Imagery
Creating consistent product imagery is essential for establishing a strong brand identity and enhancing the shopping experience for your customers. When your images look cohesive, it not only boosts your professional appearance but also builds trust with potential buyers. Here are some practical tips to achieve that uniformity in your product photos:
- Use a consistent Background: Opt for a simple and uniform background that complements your products. White or light gray are popular choices as they keep the focus on your items.
- maintain Similar Lighting: Use the same lighting setup for all your shoots. Natural light is excellent, but if you prefer studio lighting, ensure it’s consistent in color temperature and intensity.
- Stick to a Color Palette: Choose a color palette that resonates with your brand and use it throughout your product imagery. This could be the colors of your products or the backdrops you select.
- Standardize Angles and composition: Decide on the best angles for your products and stick to them. Whether it’s a straight-on shot or a 45-degree angle, consistency in composition will create a harmonious look.
- Utilize Editing Software: After capturing your images, use editing software to adjust brightness, contrast, and saturation consistently across all photos. This will help in giving a professional finish.
To further illustrate the importance of consistency, consider the following table showcasing various aspects of product photography that should remain uniform:
| Aspect | Recommended Practice |
|---|---|
| Background | Solid colors or subtle textures |
| Lighting | soft, diffused light |
| Aspect Ratio | 1:1 or 4:3 for product images |
| Editing Style | Minimal adjustments for uniformity |
| File Format | JPEG for web; PNG for transparency |
By keeping these elements in mind, you can create a visually appealing product catalog that not only draws customers in but also keeps them engaged. Remember, consistency is key in making your products stand out and ensuring a seamless shopping experience.
Leveraging Zoom and Hover Effects with Proper Sizing
When it comes to enhancing user experience on your WooCommerce store, combining zoom and hover effects with the right image sizing can significantly impact how potential customers interact with your products. These interactive features not only make your product images more engaging but also help in showcasing the finer details that might otherwise go unnoticed. Properly optimized images paired with these effects can lead to higher conversion rates.
To achieve the perfect balance, it’s essential to consider the following factors when implementing zoom and hover effects:
- Image Resolution: High-resolution images (at least 800 x 800 pixels) ensure that details remain sharp when zoomed in.
- Aspect Ratio: Maintain consistent aspect ratios (like 1:1 or 4:5) across your product images for a cohesive look.
- File Format: Use JPEG for photographs and PNG for images requiring transparency. This choice will help with load times and quality.
Incorporating these effects can be straightforward with WordPress plugins or custom CSS. As a notable example, you can easily implement CSS transitions for hover effects:
.product-image:hover {
    transform: scale(1.1);
    transition: transform 0.3s ease;
}
Moreover, defining the right dimensions for your product images is crucial for optimal display. A well-structured approach to sizing your images will greatly enhance your site’s layout:
| Device Type | Recommended Image Size |
|---|---|
| Desktop | 1200 x 1200 pixels |
| Tablet | 800 x 800 pixels |
| Mobile | 600 x 600 pixels |
by leveraging zoom and hover effects while adhering to proper image sizing, you can create a visually appealing and user-friendly shopping experience. This not only attracts potential buyers but also encourages them to explore your products in greater detail, ultimately leading to increased sales. Prioritize these strategies to elevate your WooCommerce store’s design and functionality.
Adapting Image Sizes for Mobile Versus Desktop Views
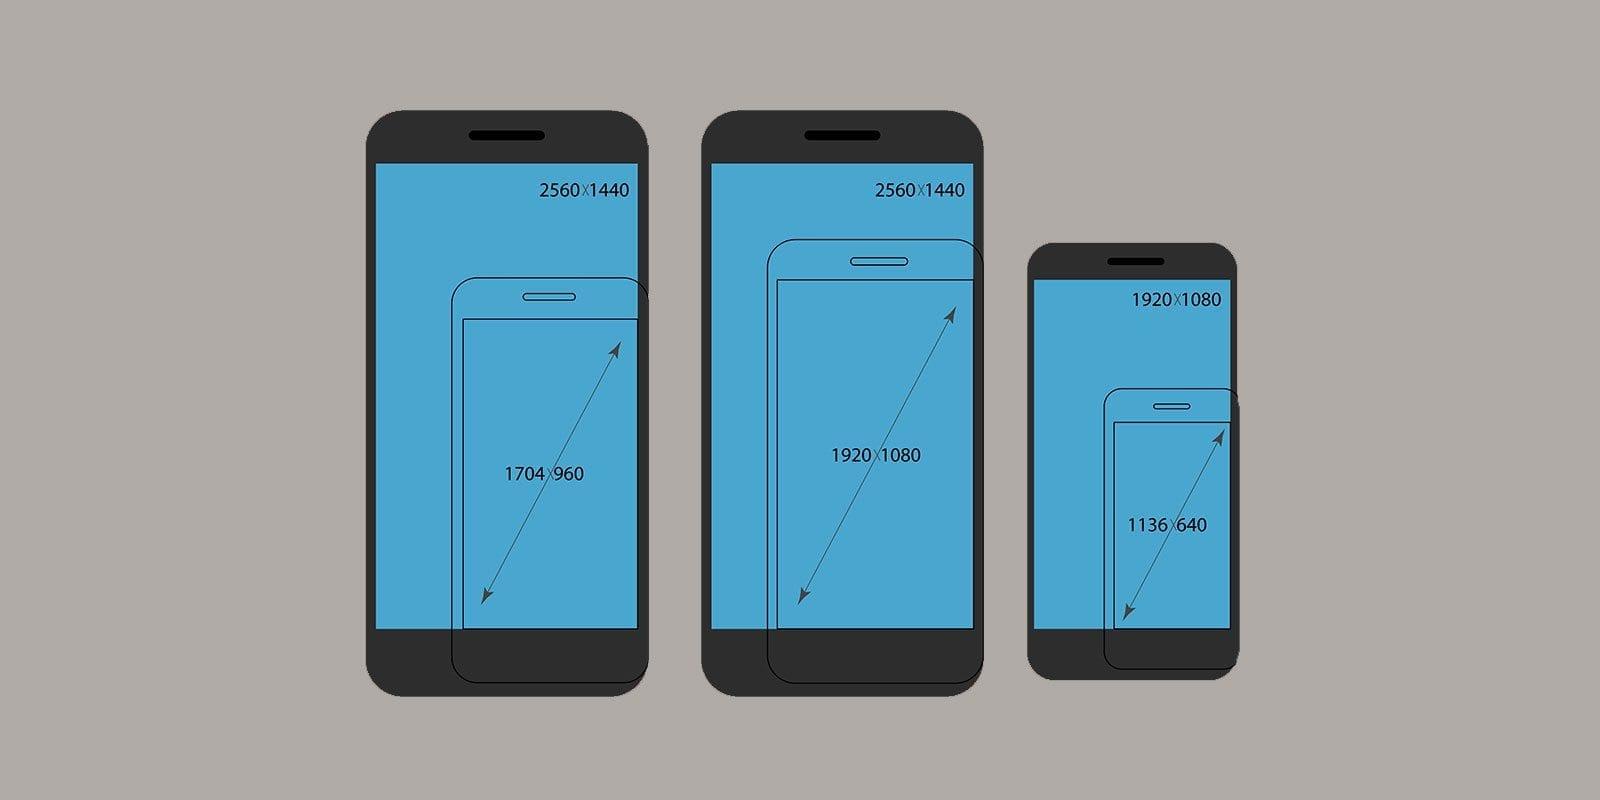
When it comes to displaying your woocommerce products effectively, understanding the differences in image size requirements for mobile versus desktop is crucial. Mobile devices typically have smaller screens, which means that images should be optimized not just for clarity, but also for loading speed. Conversely, desktop views allow for larger images that can emphasize the details of your products. Striking the right balance is pivotal in creating a seamless shopping experience.
For mobile views, the recommended image size typically falls around 640 x 640 pixels. This size ensures that images load quickly without compromising quality, making it easier for users to browse your site on-the-go. On the other hand, for desktop views, a larger image size like 1200 x 1200 pixels allows for better detail visibility, enhancing the overall presentation of your products.
| Device Type | Optimal Image Size |
|---|---|
| Mobile | 640 x 640 pixels |
| Desktop | 1200 x 1200 pixels |
Additionally, it’s essential to consider image formats when adapting sizes for different devices. jpegs are often ideal for product images due to their balance between quality and file size, while PNGs work well for images requiring transparency. By selecting the right format, you not only improve your site’s loading speed but also enhance the visual appeal of your products.
Moreover,utilizing responsive design techniques can help adapt images dynamically to various screen sizes.This means that instead of having a fixed image size, you can implement CSS properties that allow your images to resize fluidly. by doing this, your website will not only look great on any device, but it will also contribute to better SEO rankings, as search engines favor mobile-friendly sites.
tailoring your image sizes and formats for mobile and desktop views can significantly impact user experience and sales conversions.Emphasize clarity, optimize loading times, and ensure your images complement the overall design of your WooCommerce store. By doing so, you’ll create an engaging shopping habitat that keeps customers coming back.
Tools and Resources for Managing Your WooCommerce Images
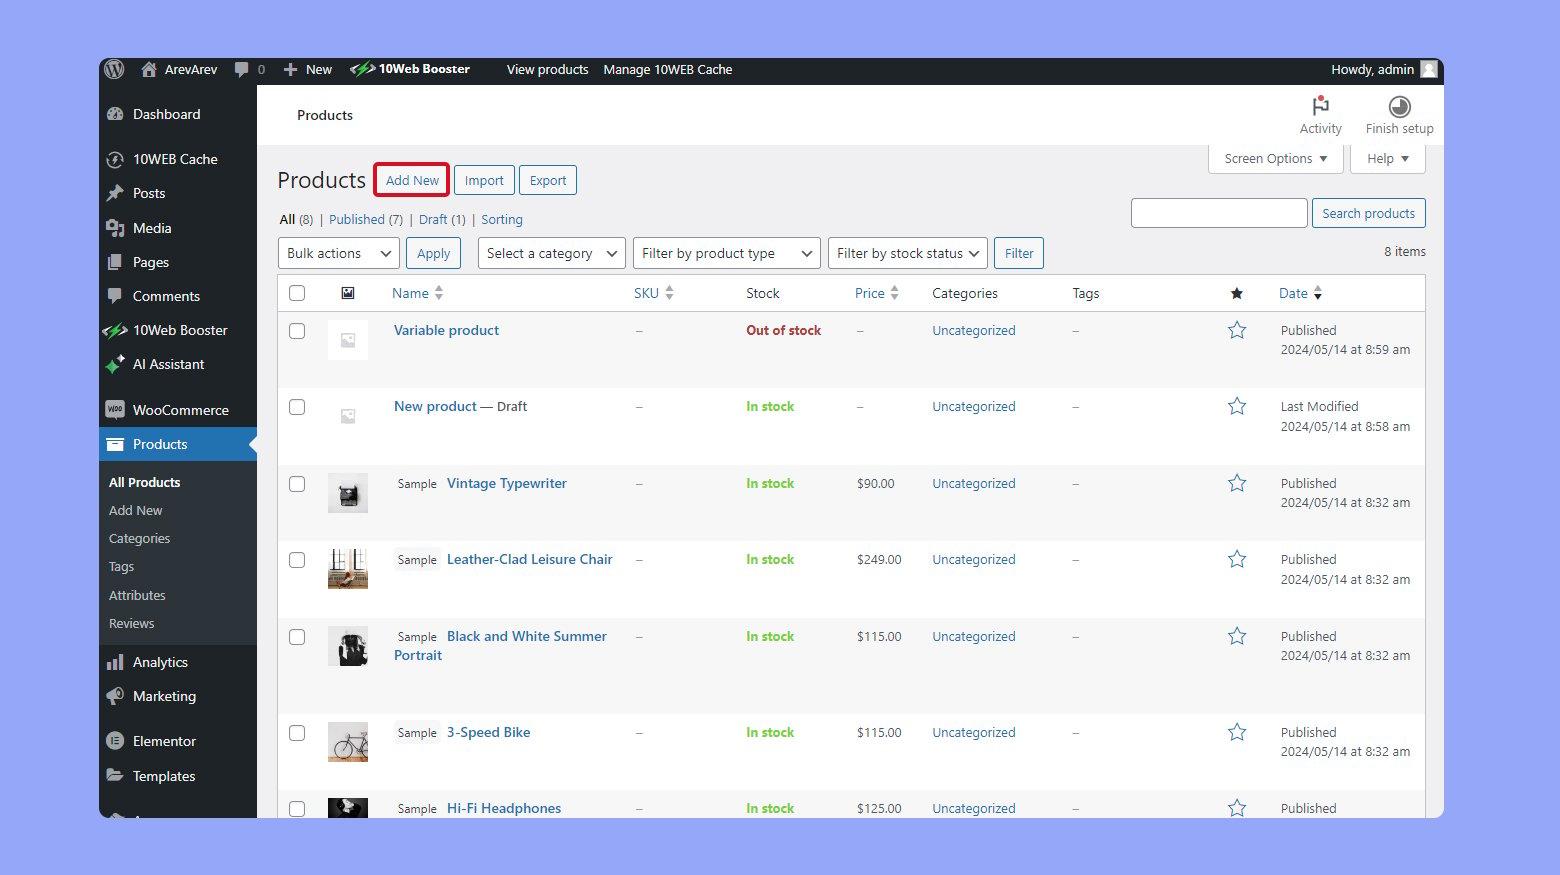
Managing images effectively is crucial for any WooCommerce store owner.The right tools and resources can streamline your workflow, ensuring your product images look stunning while also being optimized for faster loading times. Here are some essential tools that can help you manage your WooCommerce images efficiently:
- image Compression Plugins: tools like WP Smush or Imagify can significantly reduce the file size of your images without compromising quality. This helps in improving page load times, a critical factor for e-commerce success.
- Image Editing Software: Software like Adobe Photoshop or free alternatives like GIMP allows you to resize and edit your images. Creating a consistent look across your product images not only enhances your brand but also improves user experience.
- Bulk Upload Plugins: If you have a large inventory, consider using bulk upload plugins such as WP All Import. These tools can help you upload multiple images at once, saving you invaluable time.
In addition to these tools, utilizing the right resources can further enhance your image management strategy. here are some valuable resources you might consider:
- Stock Photo Websites: Websites like Unsplash and Pexels are excellent for finding high-quality images that can complement your product photos, especially if you need lifestyle shots.
- Image Guidelines: Most platforms,including WooCommerce,provide guidelines for optimal image sizes. Familiarizing yourself with these can prevent you from uploading images that are too large or too small for your product listings.
consider implementing a systematic approach to your image management. Creating a style guide that details your preferred image dimensions,editing styles,and naming conventions can make it easier for you and any team members to maintain consistency. Below is a simple table to help you establish a baseline for your product images:
| Image Type | Recommended Size |
|---|---|
| Catalog Images | 800 x 800 px |
| single Product Image | 1200 x 1200 px |
| Thumbnail Images | 300 x 300 px |
By leveraging these tools and resources, you’re not only enhancing the visual appeal of your WooCommerce store but also improving the overall shopping experience for your customers. Don’t underestimate the power of effective image management; it can truly make a difference in your online sales performance.
Frequently asked Questions (FAQ)
Q: What is the best image size for WooCommerce products?
A: The best image size for WooCommerce products is typically 800 x 800 pixels for the main product image. This size strikes a great balance between quality and loading speed, ensuring that your images look sharp without slowing down your website.
Q: Why is the image size so important for WooCommerce?
A: Image size is crucial for several reasons. First, high-quality images attract customers and showcase your products effectively. Second, the right size helps with page loading speed, which is vital for user experience and SEO. Google loves fast-loading sites, and so do your customers—they’re more likely to bounce if your images take too long to load!
Q: Can I use larger images, like 1200 x 1200 pixels?
A: Absolutely! Using larger images, such as 1200 x 1200 pixels, can enhance the detail and quality of your product photos. Just be mindful of file size; if the image is too large, it can slow down your website. Consider optimizing your images using tools like TinyPNG or WP Smush. This way, you can have stunning visuals without compromising speed.
Q: What about secondary images or thumbnails? What size should they be?
A: Great question! For secondary images and thumbnails, a size of around 400 x 400 pixels usually works well. These images should still look good, but since they’re smaller, they should load faster, helping maintain a smooth browsing experience for your customers.
Q: Should I consider different sizes for mobile users?
A: Yes, definitely! With more shoppers using mobile devices, it’s essential to ensure your images are responsive. Most WooCommerce themes automatically adjust image sizes based on the device, but it’s good practice to start with images that are at least 800 pixels wide. This way, your products will look great on any screen!
Q: How can I ensure my product images look good across different platforms?
A: Consistency is key! use the recommended sizes across all your product images and maintain a uniform style—think lighting, background, and angles. This not only improves your brand image but also creates a seamless shopping experience for your customers. Plus, consider testing how your images appear on various devices to ensure they look just as good everywhere.
Q: Is there anything else I should know about images for my WooCommerce store?
A: Definitely! don’t forget about alt text for your images. It’s not just good for SEO; it also helps improve accessibility for users with disabilities. Make sure to describe each product in your alt text—this can boost your visibility in search engine results and enhance the overall shopping experience on your site.
Q: what’s the takeaway for WooCommerce image sizes?
A: The main takeaway is to use images that are at least 800 x 800 pixels for the main image, optimize them for quick loading, and keep your secondary images around 400 x 400 pixels. Ensure they are responsive and consistently styled for the best results. With high-quality images, you’ll not only attract customers but also drive sales. Happy selling!
Concluding Remarks
choosing the right image size for your WooCommerce products is more than just a technical detail—it’s a vital component that can significantly impact your online store’s success. By optimizing your images, you’re not only enhancing the visual appeal of your products but also improving load times and user experience, which can lead to higher conversion rates.
Remember,striking the perfect balance between quality and performance is key. So, whether you’re a seasoned e-commerce pro or just starting out, take the time to adjust your image sizes to ensure they fit perfectly within your store’s design and functionality.
don’t underestimate the power of a well-optimized image! It’s your digital storefront, and first impressions matter. So go ahead, invest a little time into your images, and watch your sales soar. Your customers—and your bottom line—will thank you for it! Happy selling!

