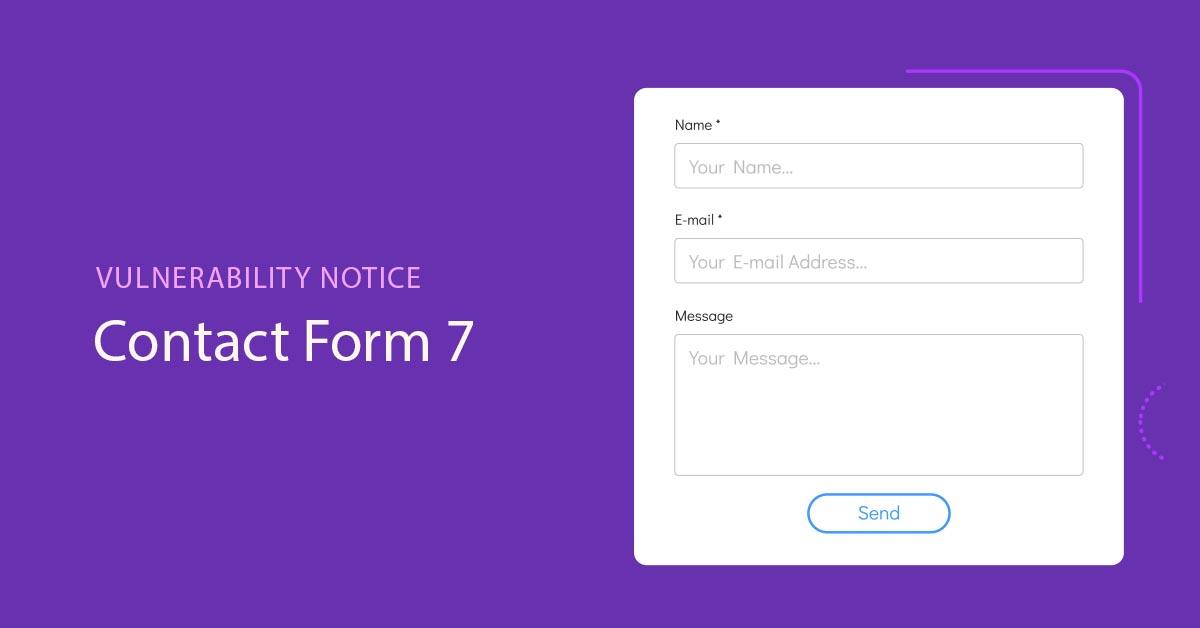
Are you looking to enhance your website’s interaction with visitors? If so, you’re in the right place! Today, we’re diving into the world of Contact Form 7, one of the most popular WordPress plugins out there. Setting it up might seem daunting at first,especially if you’re new to web design or blogging. But don’t worry—we’ve got your back! In this beginner’s guide, we’ll walk you through the steps to create a sleek, user-amiable contact form that will make it easy for your audience to reach out. By the end of this article, you’ll feel empowered to set up your form like a pro, ensuring you never miss a message again.So grab a cup of coffee, and let’s get started on transforming your website’s communication game!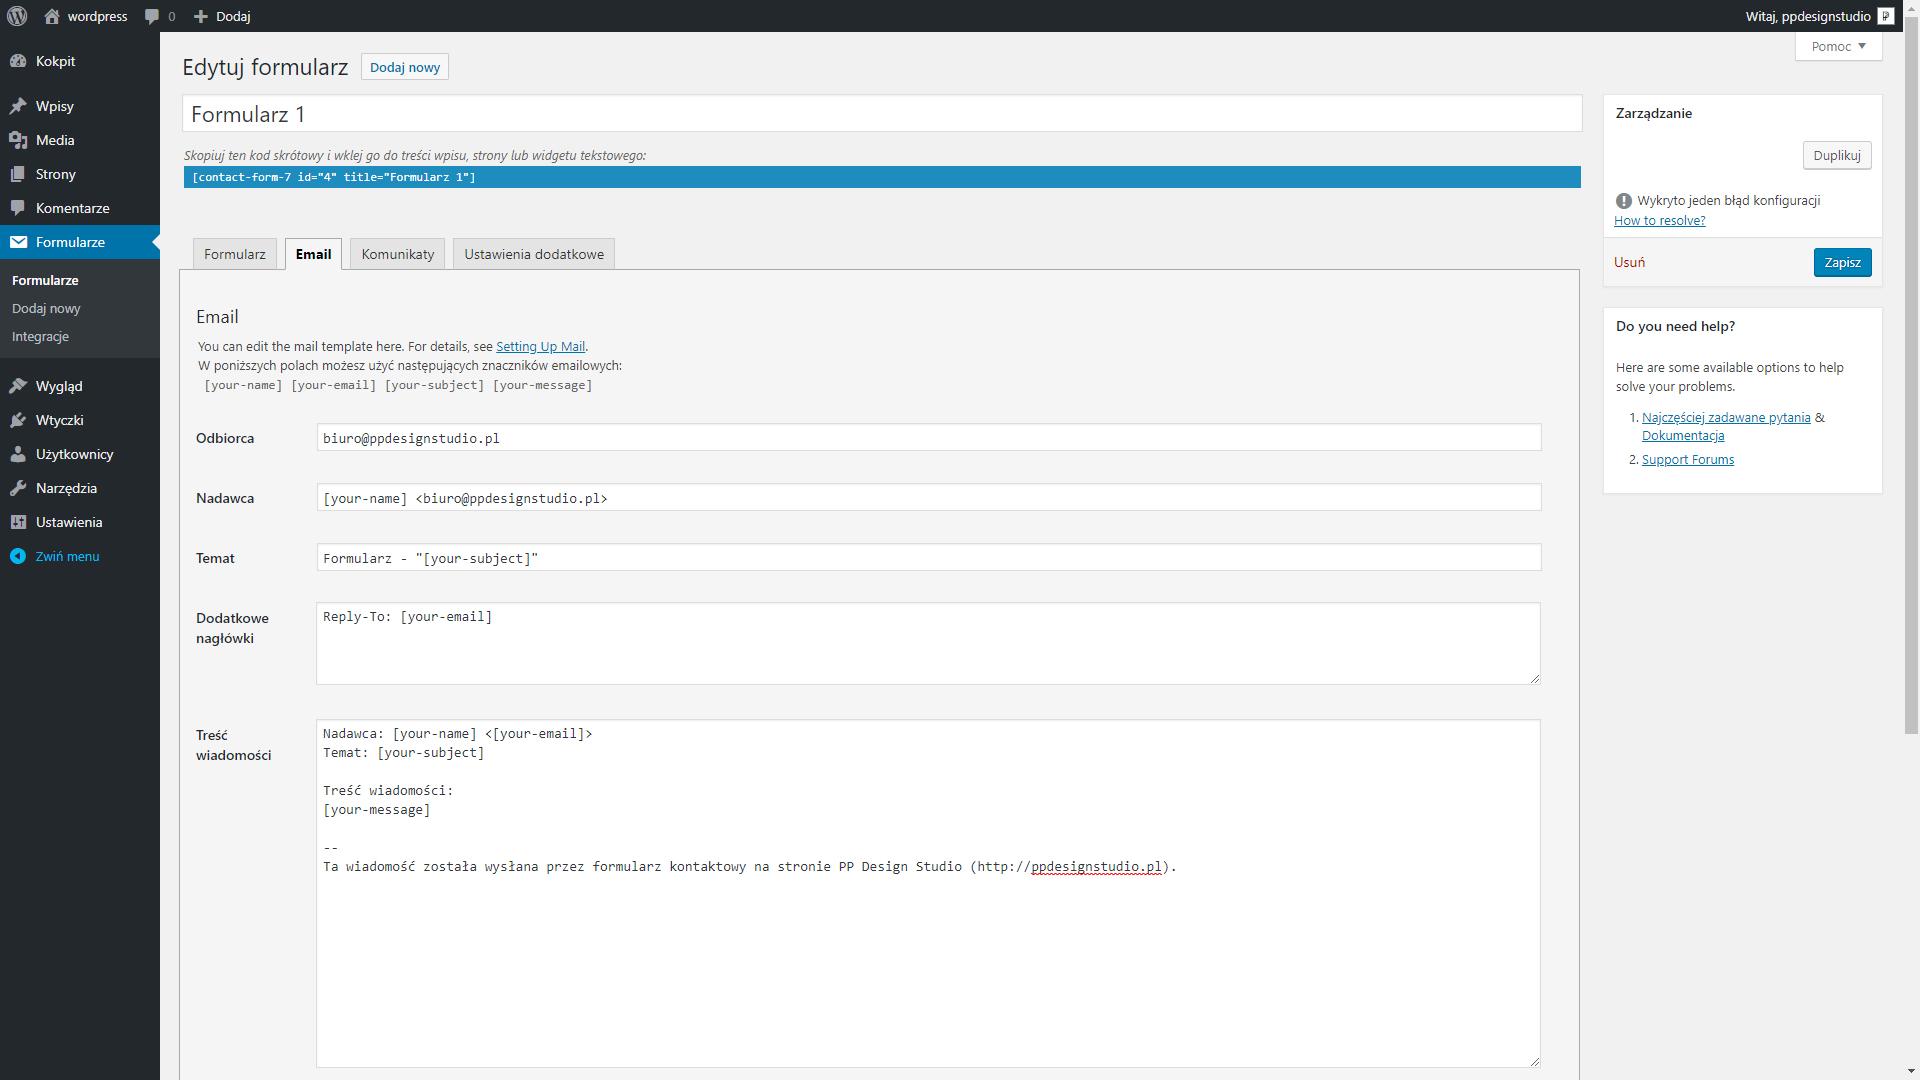
Understanding the Basics of Contact Form 7 and Its Benefits
contact Form 7 is one of the most popular plugins for wordpress, and for good reason. It simplifies the process of creating customizable contact forms, allowing website owners to engage with their visitors easily and efficiently. Whether you’re running a blog, business site, or online portfolio, having a well-designed contact form can significantly enhance the user experience.With its intuitive interface, you don’t need to be a coding expert to set it up and make it work effectively for your needs.
One of the standout features of Contact Form 7 is its versatility. You can create multiple forms, making it suitable for various purposes such as feedback, inquiries, or even newsletter sign-ups. Users can customize form fields to gather the exact data they need, whether it’s a simple name and email address or more complex data like phone numbers or product inquiries. The flexibility to tailor forms means that you can align them perfectly with your brand and objectives.
Additionally, Contact Form 7 integrates seamlessly with other plugins and tools, enhancing its functionality. As an example, you can connect it to email marketing services, anti-spam measures like Akismet, and even payment processors for e-commerce. This integration capability means that you won’t have to juggle multiple tools; everything can be managed from your WordPress dashboard. Here are some key benefits of using this plugin:
- Easy to Use: User-friendly interface for creating forms without coding.
- Customizable: Flexible fields and styles to match your site’s design.
- Multi-Form Capability: Create as many forms as needed for different purposes.
- Spam Protection: Built-in features to reduce spam submissions.
- Extensive Documentation: Access to thorough guides and community support.
Moreover, you can easily manage submissions and configure notifications so that you never miss an critically important message from your visitors. The ability to send customized auto-responses can also be a fantastic way to acknowledge inquiries immediately, fostering a connection with your audience. Below is a simple comparison of features to show how Contact Form 7 stands out:
| Feature | Contact Form 7 | other Plugins |
|---|---|---|
| Custom Fields | ✔️ | Varies |
| Multi-Form Support | ✔️ | Limited |
| Email Notifications | ✔️ | ✔️ |
| Spam Protection | ✔️ | Varies |
| Integration Options | ✔️ | Limited |
the ease of use, extensive features, and customization options make Contact Form 7 an excellent choice for any WordPress site. By setting it up properly,you can create a powerful communication channel that not only helps you gather valuable information but also enhances the overall experience for your visitors. So, if you haven’t yet explored the benefits of this plugin, now is the perfect time to dive in!
Getting Started: Installing and Activating Contact Form 7
To begin your journey with Contact Form 7, the first step is to install the plugin from your WordPress dashboard. Don’t worry, it’s a straightforward process! follow these simple steps:
- Log in to your WordPress admin area.
- Navigate to Plugins > Add New.
- In the search bar, type Contact form 7.
- Once you see it in the search results, click on Install now.
- After the installation is complete, click on Activate to enable the plugin.
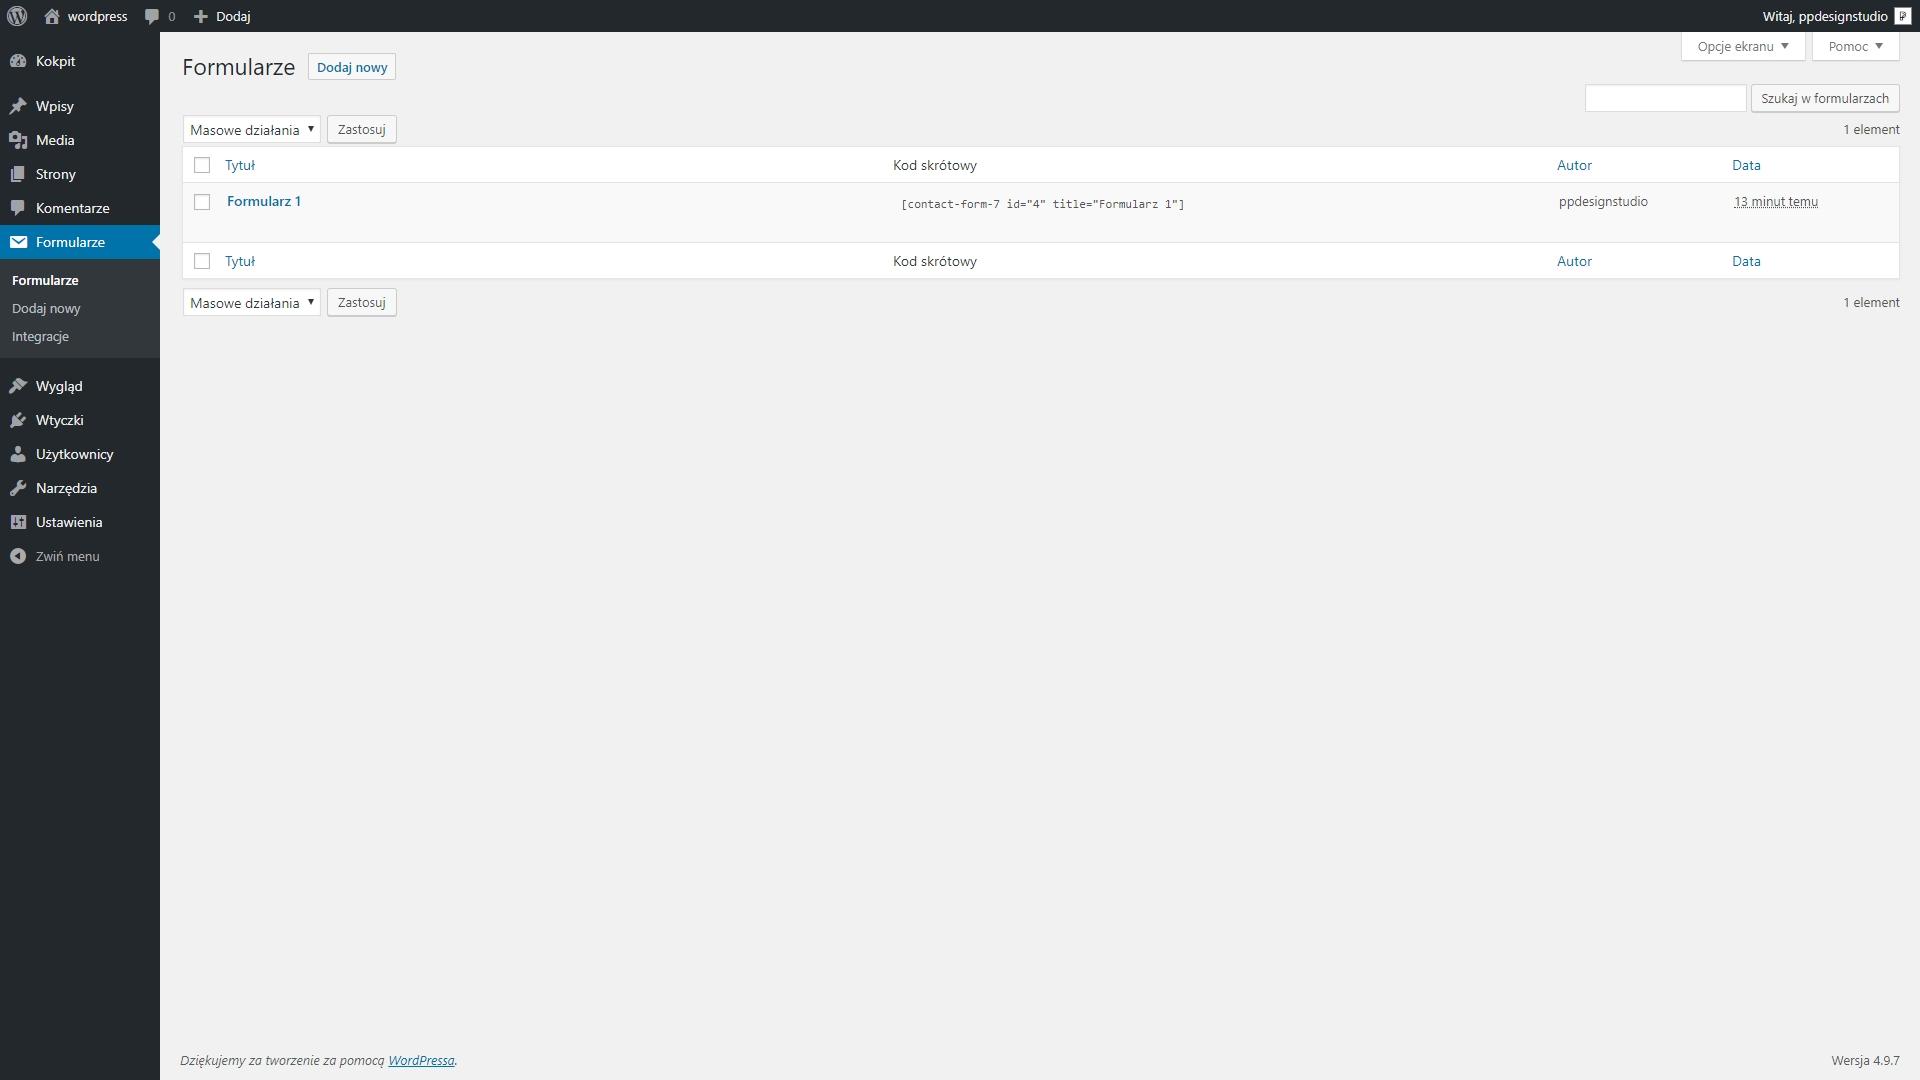
With Contact Form 7 activated, you’ll notice a new menu item labeled Contact on the left side of your dashboard. Clicking on this will take you to a page where you can manage your forms. By default, there’s a sample contact form already created for you, which you can use as a starting point or customize to your liking.
To customize your contact form,click on the form name and you’ll enter a user-friendly interface where you can add or modify fields. You’ll find various tags on top, such as text fields, email fields, checkboxes, and more.Just insert the tags you need to create a form that meets your requirements.
| Field Type | Description |
|---|---|
| text | Single line input for names or other short text. |
| Input for email addresses, ensures format validation. | |
| Textarea | Multi-line input for longer messages or comments. |
| Checkboxes | Multiple choice selection for user preferences. |
After setting up your desired fields, make sure to customize the Mail tab to determine how form submissions will be sent to your email. You can specify the recipient address, subject line, and even customize the message body. This flexibility ensures that you capture all the information you need from your users.
Once you’ve perfected your form,don’t forget to save your changes! You’ll receive a shortcode that you can place anywhere on your website,such as in posts,pages,or widgets,to display the form.Just copy the shortcode, paste it where needed, and voila! Your contact form is ready to start accepting inquiries.
Creating Your First Contact Form: A Step-by-step Guide
Creating your first contact form can be a game-changer for your website. Not only does it streamline communication with your visitors, but it also enhances user experience. Follow these simple steps to set up Contact Form 7, one of the most popular plugins for WordPress.
First,you need to install and activate the Contact form 7 plugin. Here’s how:
- Navigate to your WordPress dashboard.
- Go to Plugins > Add New.
- Search for Contact Form 7.
- Click Install Now, then activate once the installation is complete.
Once activated, you can start creating your form. Head to Contact > Add New. You’ll be greeted with a simple interface that allows you to customize your form according to your needs. Here are some common fields you might want to include:
- Name – Essential for identifying your correspondents.
- Email – To ensure you can reply to inquiries.
- Message – A text area for users to express their thoughts or questions.
After setting up the fields, it’s time to configure the email settings.This is crucial as it determines where the form submissions will be sent. Under the Mail tab, fill in the details:
| Field | Description |
|---|---|
| To | Your email address where messages will be sent |
| From | Email address of the sender (usually the user’s email) |
| Subject | Subject line for the email (e.g., “New contact Form Submission”) |
Don’t forget to customize the Messages tab to reflect your brand’s voice. This way,your users get a friendly confirmation after submitting the form. add the contact form to your website. You can do this by copying the generated shortcode and pasting it into any post or page where you want the form to appear.
With these steps,you’re well on your way to having a fully functional contact form on your site. Remember to test the form after publishing it to ensure everything works smoothly. Good luck, and watch as your website’s engagement starts to grow!
Customizing Form Fields: Making It Work for Your Needs
When it comes to building a user-friendly contact form, customizing your form fields is key to enhancing user experience and gathering the information you truly need. Contact Form 7 is a versatile tool that allows you to tailor your forms to meet specific requirements without needing to dive into complex coding. Here’s how to make it work for your needs.
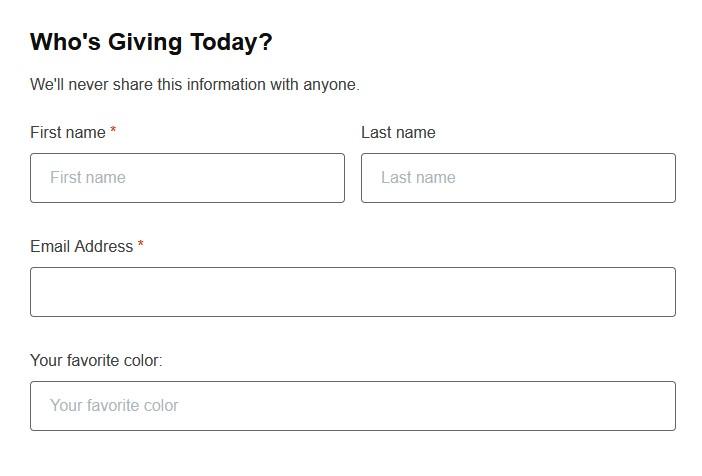
Start by identifying what information is essential for your purposes. Consider adding fields that not only collect basic data but also provide context about your users. Useful fields might include:
- Name: A simple text field to capture the user’s name.
- Email: Essential for follow-up communication.
- phone Number: Optional, but useful for urgent inquiries.
- Message: A larger textarea for detailed messages.
- Subject: A dropdown to categorize inquiries.
Customizing field types can significantly enhance the functionality of your forms. use checkboxes for multiple-choice questions or radio buttons for single-choice options. You can also implement a file upload field if you’re expecting users to send documents or images. This flexibility allows you to create a more dynamic interaction with your visitors.
Another critically important aspect of customization is setting field validation rules.For example, ensuring that the email field is properly formatted or making certain fields required can definitely help you collect clean, actionable data. Use the built-in validation features of Contact Form 7 to enforce these rules effortlessly.
Lastly, consider the aesthetics of your form. Use CSS to style the fields and buttons to match your brand. A well-designed form not only attracts users but also instills confidence in your professionalism. Here’s a simple example of how you might structure the styling:
| Field Type | Example Style |
|---|---|
| Text Field | Border: 1px solid #ccc; Padding: 10px; Width: 100%; |
| Textarea | Border: 1px solid #ccc; Height: 100px; Width: 100%; |
| Button | Background: #0073aa; Color: white; padding: 10px 15px; |
By thoughtfully customizing your form fields, you ensure that you collect all the necessary information while providing a seamless experience for your users. Embrace the flexibility of Contact Form 7 and create forms that are not only functional but also visually appealing.
Configuring Email Notifications: Ensuring You Never Miss a Message
When setting up Contact Form 7, one critical aspect that often gets overlooked is the configuration of email notifications. By ensuring that your email notifications are tailored to your needs, you can stay ahead of inquiries and never miss an critically important message from potential clients or customers.
To get started, navigate to the Mail tab in the Contact Form 7 settings. Here, you can customize the email notifications that will be sent out when someone submits a form. You’ll want to pay close attention to the following fields:
- To: This is where you’ll input the email address that should receive the notifications. Make sure this address is monitored regularly.
- From: It’s advisable to use an email address that matches your domain (e.g., [email protected]). This boosts deliverability and helps avoid your emails landing in spam folders.
- Subject: A clear and concise subject line will help you quickly identify the type of inquiry in your inbox.Consider using a format like “New Inquiry from [Your Website Name]”.
- message Body: Customize the message to include relevant information from the form submission.You can use the form tags to pull in details like the sender’s name, email, and message content.
Additionally, you may want to implement a few best practices to ensure your notifications are as effective as possible:
- Test your email notifications to confirm they are being sent and received correctly.
- Consider using a plugin that enhances email delivery, especially if you find emails aren’t reaching your inbox.
- Set up an autoresponder to acknowledge receipt of the message, letting users know their inquiry is being processed.
Taking the time to configure your email notifications correctly can significantly improve your communication efficiency. by ensuring every message reaches you and is properly organized, you’ll enhance your responsiveness and overall customer satisfaction.
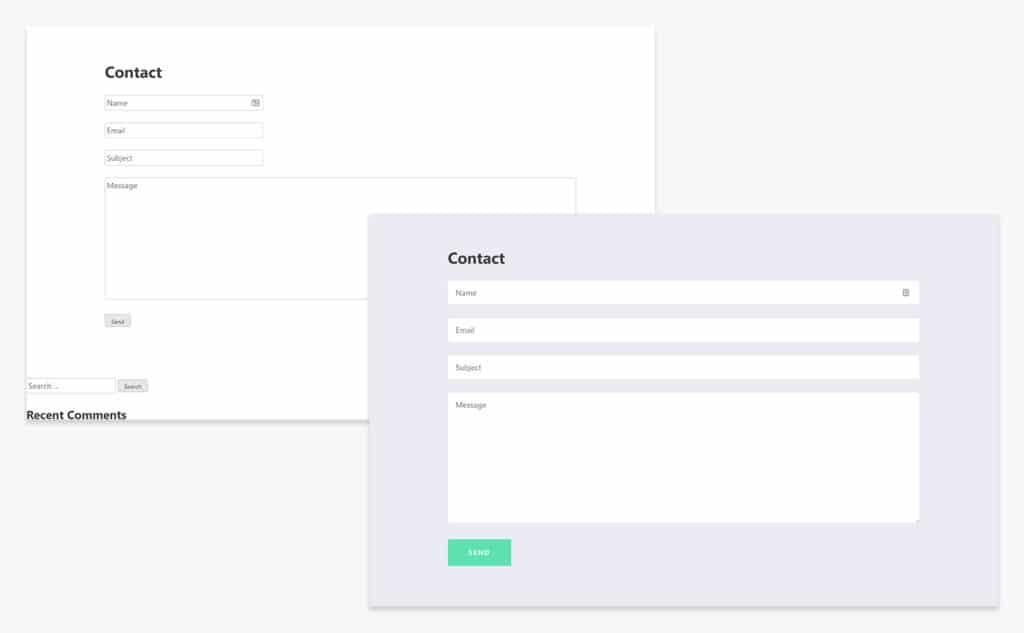
Styling Your Contact Form: Tips for a Professional Look
Styling your contact form is essential to create a seamless user experience. A well-designed form not only attracts attention but also encourages users to fill it out. Here are some actionable tips to elevate the appearance of your Contact Form 7:
- Consistent Colors: Use colors that match your website’s theme. Stick to 2-3 complementary colors to maintain visual balance.
- Font Choices: Opt for easy-to-read fonts.Use web-safe fonts such as Arial, Verdana, or Google Fonts for a modern look.
- Spacing Matters: Ensure adequate padding and margin around your form elements. This creates a clean layout that guides users through the form.
- Button design: Style your submit button to stand out. Use contrasting colors and subtle hover effects to make it inviting to click.
Adding simple CSS can transform your contact form dramatically. Consider using the following CSS code snippets to enhance your form:
| Property | Value |
|---|---|
| Background Color | #f7f9fc |
| Input Field Border | 1px solid #ccc |
| input Field Focus Border | 1px solid #0073aa |
| Submit Button Hover Color | #005177 |
Don’t forget about mobile responsiveness. Ensure that your contact form looks great on all devices. You can achieve this by using percentage widths and adjusting margins based on screen size. Here’s a quick tip:
- Set a width of 100% for input fields to make them easily accessible on mobile devices.
- Use media queries to adjust font sizes and button dimensions on smaller screens.
Lastly, make your form user-friendly. Label each field clearly and consider adding placeholder text to guide users on what information is needed. This small touch can significantly improve form usability and, in turn, boost conversion rates.
Troubleshooting Common Issues: How to Solve Form Problems
Setting up Contact Form 7 can feel a bit daunting,especially when issues arise that interrupt your site’s functionality. Though,most common problems have straightforward solutions. Here are a few troubleshooting tips to help you get back on track.
first and foremost, make sure that you are using the latest version of contact Form 7. Outdated plugins can frequently enough lead to compatibility issues. To check for updates:
- Navigate to your WordPress dashboard.
- Click on “Plugins” and look for Contact Form 7.
- If an update is available, simply click “Update Now.”
If your form is still not sending emails after the update, the next step is to verify your email settings. Ensure that you have provided a valid email address in the “To” field of your form settings. It’s also essential to use an email address that corresponds to your domain. Here’s a quick checklist:
| Email Setting | Correct Format |
|---|---|
| To | [email protected] |
| From | [email protected] |
| Reply-To | [email protected] |
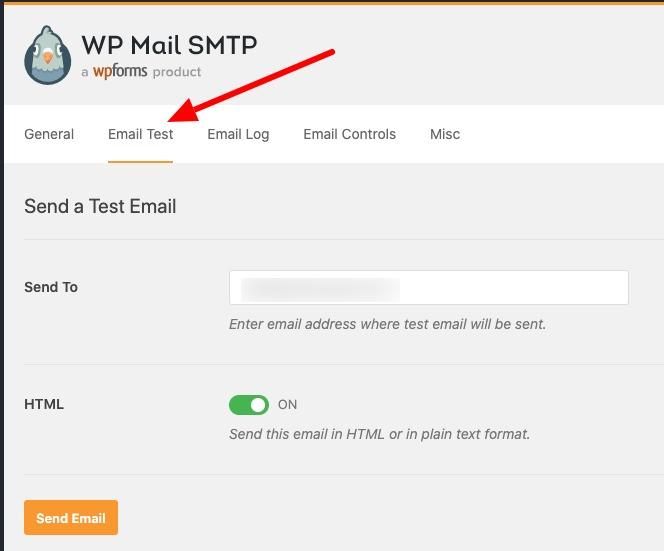
Another frequent issue involves spam filters. if your emails are being marked as spam,consider installing an SMTP plugin to improve email deliverability. SMTP plugins can ensure that your emails are sent securely and reach the intended inbox. Popular options include:
- WP Mail SMTP: This plugin allows you to configure SMTP settings easily.
- Easy WP SMTP: A straightforward plugin that ensures your emails are delivered correctly.
Lastly, if fields in your form are not validating properly, double-check the field settings within your form configuration. Ensure you’ve set any required fields correctly and that you’re using the proper syntax for custom validations. Sometimes, a simple typo or misplaced setting can cause your form to malfunction.
Enhancing Functionality with Add-Ons: Making Your Forms More Powerful
To unlock the full potential of your forms, consider integrating various add-ons that enhance functionality and improve user experience.With Contact Form 7, you’re not just limited to basic fields; you can extend its capabilities significantly through a variety of plugins tailored to meet diverse needs.
Here are some popular add-ons to consider:
- Contact Form 7 Conditional Fields: This add-on allows you to create dynamic forms that change based on user input, making your forms more interactive and tailored to specific situations.
- Contact Form 7 MailChimp Extension: Effortlessly sync your form submissions with your MailChimp account, allowing you to grow your email list seamlessly.
- Contact Form 7 Google reCAPTCHA: Protect your forms from spam submissions while maintaining a smooth user experience.
- Contact Form 7 Dynamic Text Extension: Use this tool to populate form fields dynamically based on the current URL or other parameters, providing a personalized touch for your users.
Each add-on offers unique features that can transform a simple contact form into a powerful tool for engagement and data collection. To install an add-on, simply navigate to the “plugins” section in your WordPress dashboard, search for the desired add-on, and click “Install Now.” Once activated, these plugins typically integrate seamlessly with your existing forms, often requiring minimal additional configuration.
for a clearer understanding, here’s a quick comparison table of some essential add-ons:
| Add-on | Key Feature | Best For |
|---|---|---|
| Conditional Fields | Dynamic form behavior | Custom user experiences |
| MailChimp Extension | Email list integration | Email marketing |
| Google reCAPTCHA | Spam protection | security enhancement |
| Dynamic Text Extension | Custom text fields | Personalized interactions |
By leveraging these add-ons, you can create forms that not only collect information but also provide value and reassurance to your users. A well-structured form with enhanced capabilities can significantly increase user engagement and satisfaction, leading to a more triumphant website overall.

Best Practices for Optimizing Your Contact Form for Conversions
To enhance the effectiveness of your contact form and boost conversions, consider implementing these essential strategies. A well-optimized contact form is not just about aesthetics; it plays a crucial role in turning visitors into leads.
- Simplify Your Form: Keep your form fields to a minimum. Only ask for essential information such as name,email,and message. The fewer the fields, the higher the chance of completion.
- Use Clear Call-to-Actions: Make your submission button stand out with persuasive text, such as “Get My Free Quote” or “Send My Request.” This directs the user’s intent and encourages action.
- Provide Visual Cues: Use contrasting colors for your form and call-to-action button. Visual hierarchy helps direct attention where it’s needed most, making it easier for users to interact.
Another key aspect is ensuring your form is mobile-friendly. With an increasing number of users accessing websites via mobile devices, it’s vital that your contact form is easy to navigate on smaller screens. Implement responsive design principles to create a seamless experience.
Consider adding a success message or a redirect to a thank-you page after form submission.This not only assures users that their message has been received but also opens up the possibility for further engagement, such as offering a downloadable resource or inviting them to follow your social media channels.
| Tips for Form Optimization | Benefits |
|---|---|
| minimize Fields | Increases completion rates |
| Clear Call-to-Actions | enhances user engagement |
| Mobile Responsiveness | Improves accessibility |
| Success Messages | Boosts user satisfaction |
Lastly, don’t forget to test different variations of your contact form. A/B testing allows you to experiment with different layouts, wording, and placements to find the combination that maximizes your conversion rates. Use analytics to track user behavior and continually refine your approach based on data-driven insights.
Wrapping Up: Your Next Steps for Effective Communication
Now that you’ve successfully set up Contact Form 7, it’s time to focus on enhancing your communication strategy. Effective communication isn’t just about having a contact form; it’s about leveraging it to build relationships with your audience. Here are some actionable steps you can take:
- Regularly Monitor Submissions: Make it a habit to check your form submissions frequently. A quick response can nurture leads and foster trust.
- Customize Auto-Responses: Use auto-responses to acknowledge receipt of messages.Personalize these messages to make your audience feel valued.
- Integrate with Other Tools: Connect your form with email marketing services or CRM tools to streamline follow-ups and manage your leads more efficiently.
- Encourage Feedback: After resolving inquiries, ask for feedback on their experience. This can help improve your services and show you value their opinion.
Additionally,consider tracking the performance of your contact form. tools like Google Analytics can provide insights into user interaction, helping you optimize your form for better results. Here’s a simple table to demonstrate key metrics you might want to track:
| Metric | Description |
|---|---|
| Form Submissions | Total number of submissions received. |
| Conversion Rate | Percentage of visitors who fill out the form. |
| Response Time | Average time taken to respond to inquiries. |
| User Feedback | Ratings or comments from users about their experience. |
remember that communication is a two-way street. While it’s crucial to provide information and resolve issues, also be open to listening to your audience. Engaging with your followers on social media or through email can complement your contact form efforts. By taking these steps, you can ensure that your communication is not only effective but also impactful in building lasting relationships.
Frequently Asked Questions (FAQ)
Q&A: How to set Up Contact form 7: Beginner’s Guide
Q1: What is Contact Form 7, and why should I use it?
A1: Great question! Contact form 7 is one of the most popular WordPress plugins for creating contact forms. It’s user-friendly, flexible, and completely free! By using it, you can easily allow your visitors to get in touch with you, gather feedback, or even receive inquiries without cluttering your inbox. Plus, it supports various form types, so you can customize it to fit your needs perfectly!
Q2: How do I install Contact Form 7 on my WordPress site?
A2: Installing Contact Form 7 is a breeze! Just log in to your WordPress dashboard, go to the “Plugins” section, and click “Add New.” in the search bar, type “Contact Form 7.” Once you find it, click “Install Now,” and then “Activate.” Voilà! You’re ready to create your first form!
Q3: Can you walk me through the process of creating my first contact form?
A3: Absolutely! After activating the plugin, go to the “Contact” section in your dashboard and click “Add New.” You’ll see a default form already created for you. You can customize it by adding or removing fields as needed! Want to collect names and emails? There are easy-to-use tags on the right that you can click to add directly to your form. Don’t forget to save your changes!
Q4: How do I add the contact form to my website?
A4: Simple! After saving your form, you’ll see a shortcode generated at the top of the page. Just copy that shortcode, and then go to the page or post where you want your form to appear. Paste the shortcode into the content area, and you’re all set! When you preview or publish the page, your form will magically appear!
Q5: What if I want to customize the look of my contact form?
A5: Customizing your form is easy peasy! You can use CSS to style your form according to your website’s theme. Plus, many WordPress themes already provide options for styling forms. if you’re not comfortable with coding, consider using a plugin that offers visual customization options!
Q6: Can I set up notifications to know when someone submits the form?
A6: Yes, and this is one of the best features! When you’re in the form editor, navigate to the “Mail” tab. Here, you can specify the email address where you’d like to receive submissions, subject lines, and even a message body. This way, you’ll never miss an important inquiry!
Q7: What about spam? Is there a way to prevent it?
A7: Definitely! Contact Form 7 has built-in features like CAPTCHA to help prevent spam submissions. You can simply enable the AJAX-powered reCAPTCHA feature. This adds an extra layer of protection while still keeping the user experience smooth!
Q8: Is there any support if I run into issues?
A8: Yes, absolutely! The Contact Form 7 community is vibrant and helpful. You can find documentation, FAQs, and forums where you can ask questions. Additionally, many WordPress forums cover common issues and solutions if you ever feel stuck!
Q9: Can I integrate Contact Form 7 with other services?
A9: Yes! One of the fantastic features of Contact Form 7 is its ability to integrate with various third-party services. You can connect it with email marketing tools, CRM systems, or even Google Sheets using additional plugins or add-ons. This flexibility really enhances your form’s functionality!
Q10: Is it worth the time and effort to set this up?
A10: Absolutely! A well-designed contact form not only improves communication with your audience but also enhances your website’s professionalism. It’s a small investment of your time with big rewards in terms of engagement and leads. plus, once you get the hang of it, you’ll find it’s incredibly satisfying to see your forms working seamlessly on your site!
Feel free to dive in and start setting up your Contact Form 7 today! Your visitors will appreciate the easy way to reach out to you. Happy form building!
Closing remarks
And there you have it! Setting up Contact Form 7 might seem a bit daunting at first, but with the steps we’ve covered, you’re well on your way to creating a seamless communication channel for your website visitors.Remember, a well-functioning contact form not only enhances user experience but also helps you connect with your audience more effectively.
So, why wait? dive in, implement what you’ve learned, and watch your engagement soar! If you hit any bumps along the way, don’t hesitate to revisit this guide or reach out to the vibrant WordPress community. We’re all here to help each other succeed.
Now go ahead—make those connections happen! Your audience is waiting to hear from you, and with Contact Form 7, you’ll be just a click away. Happy form building!