Are you tired of scrolling through endless photo editing apps that promise the world but leave you feeling more confused then creative? Well, it’s time to put those frustrations behind you! Introducing the free Canva Photo Editor—a game-changer in the world of photo editing. Whether you’re looking to touch up your vacation snaps, create stunning social media posts, or just unleash your inner artist, Canva makes it easier than ever. In just three simple steps, you can transform your photos into eye-catching masterpieces that will leave your friends and followers in awe.Ready to unlock your creativity? Let’s dive into how you can effortlessly edit your photos with Canva!
Unlock Your Creativity with the Free Canva Photo Editor
Are you ready to transform your photos into stunning visual stories? With the free Canva Photo Editor,you can unleash your creativity and make every image pop! Below are three simple steps to get you started on your photo editing journey.
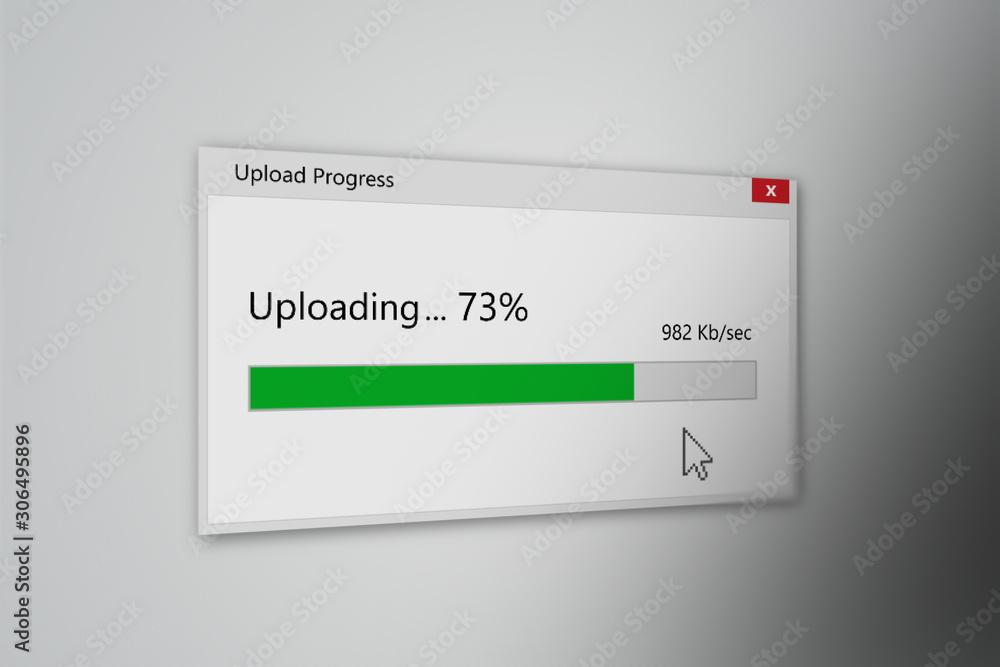
1. Upload Your Photos
Kick off your editing adventure by uploading your images. Canva makes this process incredibly simple:
- click on the “upload” button in the left sidebar.
- Select photos from your device or drag and drop them directly into the editor.
- Organize your photos in folders for easy access later on.
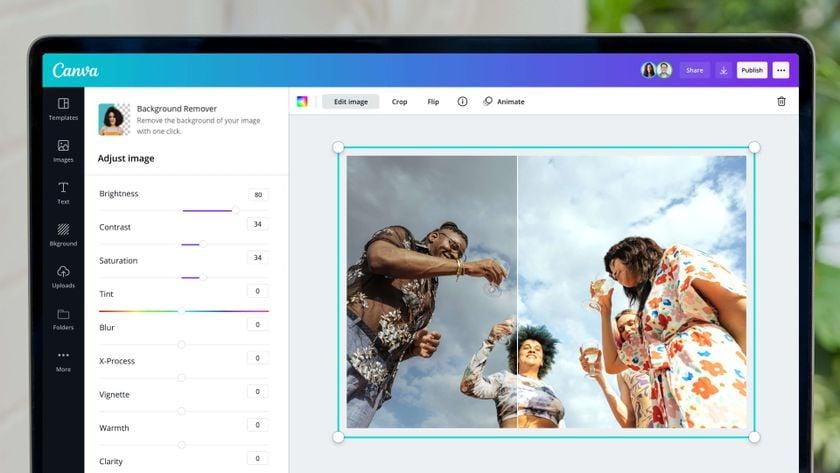
2. Enhance with Filters and Effects
Once your photos are uploaded, it’s time to add some flair! Canva offers a range of filters and effects to elevate your images:
- Explore various filter options to create the mood you desire.
- Adjust brightness, contrast, and saturation to make your images shine.
- Apply blur or focus effects to draw attention to specific areas.
With just a few clicks, your photos can look like they were taken by a professional photographer!
3.Add Text and Graphics
Last but not least, personalize your images by adding text and graphics. This step is where your creativity truly shines:
- Choose from a variety of stylish fonts to convey your message.
- Add shapes, icons, or stickers to make your photos more engaging.
- Utilize Canva’s templates for social media, posters, or cards for quick designs.
Your edited photos will not only stand out visually but will also tell a story that resonates with your audience.
| Feature | Description |
|---|---|
| Filters | Instantly change the mood of your photo. |
| Text Options | Add quotes, titles, or captions easily. |
| Graphics | Enhance your images with shapes and icons. |
Getting Started: A Quick guide to Accessing Canva
To dive into the creative world of photo editing with Canva, the first step is to ensure you have access to the platform. Getting started is a breeze; you can choose between using the web version or downloading the mobile app, available on both iOS and Android. Here’s how you can quickly get set up:
- visit the Canva Website: Open your preferred web browser and navigate to www.canva.com.
- Download the App: Alternatively, head to the App Store or Google Play Store and search for “Canva” to download the app on your device.
- create an Account: Sign up for free using your email address, Google account, or Facebook.This will enable you to save your projects and access them anytime,anywhere.
Once you’re logged in,you’ll find a user-pleasant interface that caters to both beginners and seasoned designers. The dashboard displays various templates and design types, including social media graphics, presentations, and of course, photo editing.To access the photo editor,simply click on the “Create a design” button located at the top right corner of the dashboard,and select “Edit a photo.”
After selecting your photo, you’ll be taken to the editing workspace. Here, you can explore a variety of tools to enhance your images. Canva provides an array of features such as filters, cropping options, and text overlays. You can also adjust brightness,contrast,and saturation to make your photos pop. The intuitive drag-and-drop functionality allows you to easily add elements, making your editing experience seamless and enjoyable.
As you edit, remember to save your work frequently. Canva automatically saves your project, but it’s wise to give it a manual save using the download options. You can export your edited photos in various formats, ensuring they’re ready for sharing on social media or for personal use.
To give you a clearer picture, here’s a breakdown of the essential tools you’ll encounter in the Canva photo editor:
| Tool | Function |
|---|---|
| Filters | Apply pre-set styles to enhance the look of your photo. |
| Text | Add captions or overlays with customizable fonts. |
| elements | Incorporate graphics, stickers, and shapes to your design. |
| Adjust | fine-tune brightness,contrast,and saturation for perfect results. |
With these tools at your disposal, you’re well on your way to creating stunning visuals with Canva. Happy editing!
Step One: Uploading Your Photos Made Easy
Getting started with your photo editing journey has never been easier.The first step in harnessing the power of the free Canva Photo Editor is to upload your images seamlessly. With just a few clicks, you can transform your raw snapshots into stunning visuals that pop!
To upload your photos, follow these simple steps:
- Visit Canva.com: Begin by navigating to the canva website. If you haven’t created an account yet,it only takes a minute to sign up!
- Select “Create a design”: This option will led you to a variety of design templates,but don’t worry,we’ll focus on uploading your photos first.
- Click on “Uploads”: On the left sidebar, you’ll find the “Uploads” tab. Click on it to reveal your options.
- Drag and Drop: Simply drag your photos from your folder and drop them into the designated area in Canva, or click the “Upload an image or video” button to browse through your files.
Once you’ve uploaded your images, they will be stored in your Canva library, making it easy to access them whenever you need. You can upload a variety of file types, including JPG, PNG, and even GIFs!
| File Type | Compatible with canva |
|---|---|
| JPG | ✔️ |
| PNG | ✔️ |
| GIF | ✔️ |
| SVG | ❌ |
With your images uploaded, you’re ready to dive into editing! Canva’s user-friendly interface allows you to drag images into your designs effortlessly, making it easy to create eye-catching graphics in no time. Get ready to unleash your creativity!
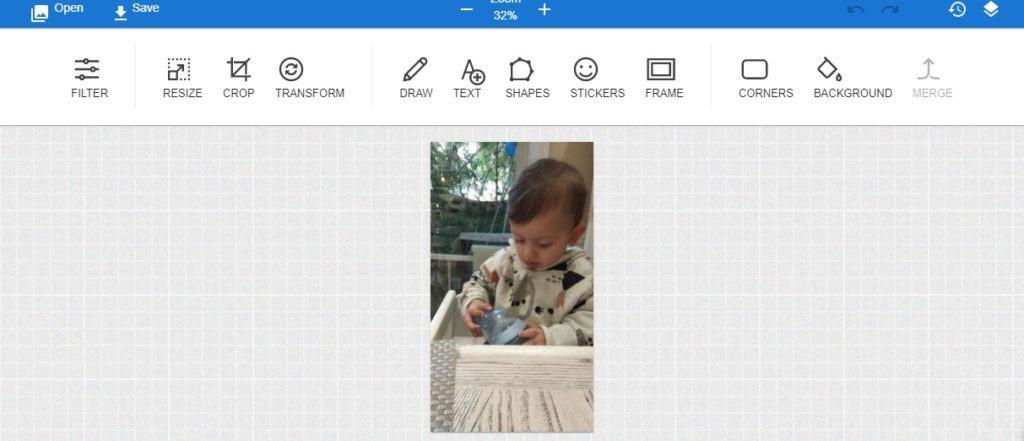
Step Two: Exploring Canvas Editing Tools for Stunning Results
Once you’ve uploaded your photos, it’s time to dive into the exciting world of editing tools that Canva offers. The platform is packed with features designed to help you transform your images into visually stunning pieces. Whether you’re a beginner or have some experience, these tools can help you achieve professional-looking results with ease.
start by exploring the basic editing tools. You can adjust brightness, contrast, and saturation to enhance the overall look of your photo.Need to crop or resize? Canva makes it easy with its intuitive drag-and-drop interface. Here’s a quick list of essential adjustments you can make:
- Brightness: Increase or decrease the light in your photo.
- Contrast: Make the dark areas darker and the light areas lighter for more depth.
- Saturation: Boost or mute the colors for a more vibrant or subtle image.
Next, take advantage of filters and effects. These can dramatically change the mood of your photo with just a click. Canva offers a variety of filters—ranging from vintage to modern—that can give your images a unique feel.You can also apply effects like blur or vignette to draw focus to specific areas of your photo. Experiment with these to see how they can elevate your work!
Don’t overlook the power of text and graphics. Adding text overlays can personalize your images and make them more engaging. Choose from Canva’s extensive library of fonts and adjust the size, colour, and alignment to fit your style. You can also incorporate graphics, such as icons or illustrations, to complement your photos. Here’s a simple breakdown of how to do this effectively:
| Tip | Description |
|---|---|
| Choose Readable Fonts | Ensure that your text is easy to read against the background. |
| Use Contrast | High contrast between text and image enhances visibility. |
| Keep It Simple | Avoid clutter by using minimal text and graphics. |
Lastly, don’t forget to save your edits frequently.Canva’s auto-save feature is handy,but it’s always a good practice to manually save your progress. Once satisfied with your masterpiece, consider sharing directly from Canva or downloading it in various formats, ensuring you have the perfect version for your needs. Get ready to watch your photos transform into stunning visuals that capture attention!
Step Three: saving and Sharing Your Masterpieces Effortlessly
Once you’ve crafted your stunning edits in Canva’s photo editor, it’s time to showcase your work! Saving and sharing your creations is a breeze, ensuring that your masterpieces reach your audience without any hassle. Follow these simple steps to ensure that your work gets the attention it deserves.
First, let’s tackle saving your photos. Canva offers several options to save your edited images,allowing you to choose the perfect format for your needs. You can select from:
- PNG: Ideal for images with obvious backgrounds.
- JPEG: Great for high-quality photos with a smaller file size.
- PDF: Perfect for print-ready documents or high-resolution graphics.
To save your masterpiece, simply click the Download button located in the top right corner.Choose your preferred format, and voila! Your edited image will be saved to your device, ready for use.
Next, let’s discuss sharing your creations. Canva makes it incredibly easy to share your photos directly from the platform. You can:
- Share via social media: Post your work directly to platforms like Instagram, facebook, or Twitter.
- Send via email: Share your edited images with friends, family, or clients instantly.
- Get a shareable link: Create a link that anyone can use to access your designs.
If you want to keep your audience informed about your artistic journey, consider the following table for effective sharing strategies:
| Platform | best Use | Recommended Format |
|---|---|---|
| Community Engagement | JPEG | |
| Visual Showcase | PNG | |
| professional Sharing |
By utilizing these saving and sharing options, you can effortlessly spread your creativity far and wide. Whether you’re sharing with friends, promoting your work online, or sending it to clients, Canva ensures that your masterpieces are just a click away from making an impact!

Tips and Tricks to Enhance Your Photo Editing Experience
enhancing your photo editing experience can be both enjoyable and rewarding,especially when utilizing tools like Canva. Here are some effective strategies to maximize your editing efforts:
- Familiarize Yourself with the Interface: Take a little time to explore Canva’s user-friendly interface. Knowing where tools and features are located can save you precious time and help you navigate the editor efficiently.
- Utilize Templates: Canva offers a wide range of templates tailored for various purposes. Whether you’re creating social media posts or a flyer, using templates can streamline your editing process and inspire creativity.
- Experiment with Filters: Don’t shy away from trying out different filters. They can dramatically change the mood of your photos and set the tone for your project.
another great tip is to keep your editing consistent. Establish a style guide for your photography to maintain a cohesive aesthetic across your work. Here’s a quick reference table you can use for consistency:
| Style Element | Guideline |
|---|---|
| Color Palette | Choose 3-5 colors to represent your brand or style. |
| Font Choices | Stick to 2-3 fonts for all text elements. |
| Image Filters | Select 1-2 preferred filters for uniformity. |
always remember to save your work regularly. Canva automatically saves your edits, but creating backup copies of your original images and your edited works can prevent loss and allow you to revisit earlier versions if needed.This not only secures your hard work but also opens up new creative possibilities.
By incorporating these tips and tricks, your photo editing experience can be much more enjoyable and productive. Embrace the creative journey and watch your editing skills flourish!
Why Canva stands Out Among Other Free Photo Editors
When it comes to free photo editing tools, Canva truly shines with its user-friendly interface and an extraordinary array of features that cater to both amateurs and professionals alike. Unlike many free editors that can be clunky or overwhelming, Canva streamlines the editing process, making it approachable for everyone.The intuitive drag-and-drop functionality allows users to easily manipulate images, making it feel more like a creative playground than a task.
One of the standout features of Canva is its extensive library of templates and design elements. Users can choose from thousands of free templates tailored for various social media platforms, marketing materials, and personal projects. This means you don’t just edit your photos; you can transform them into stunning graphics that capture attention. Whether you’re creating a stunning Instagram post or an eye-catching flyer, the possibilities are virtually limitless.
Moreover,Canva’s collaborative capabilities set it apart from other editors. With just a few clicks, you can invite friends or colleagues to edit your project together in real-time. This is particularly beneficial for teams working on branding or marketing campaigns where collective input can make all the difference.Everyone can contribute their ideas, making the final product much richer and more engaging.
Additionally, Canva offers robust educational resources. Users can access tutorials,design tips,and inspiration directly within the platform,helping them to not only edit photos effectively but also to enhance their overall design skills. This commitment to user education is a game-changer, especially for those who may feel intimidated by the world of graphic design.
the combination of usability, versatility, collaboration, and education makes Canva a premier choice among free photo editors. It empowers users to create visually striking content without the steep learning curve typically associated with professional design software. This makes it an invaluable tool for anyone looking to elevate their visual storytelling, whether for personal use or buisness purposes.
Real-life Examples: Transforming Ordinary Photos into Extraordinary Art
Imagine looking through your camera roll and spotting a photo that, at first glance, seems unremarkable. With just a few edits in Canva, that ordinary snapshot can be transformed into a stunning piece of art. The magic lies in the powerful tools available at your fingertips, allowing anyone to become a creative genius, nonetheless of their experience level.
One of the simplest yet moast effective transformations involves adjusting the brightness and contrast. A dull photo can come alive with just the right touch. By enhancing the brightness, you can illuminate shadows and bring out details that were previously hidden. Meanwhile, adjusting the contrast helps in defining edges and elevating the overall visual impact. This technique works wonders for landscapes, portraits, and even urban shots.
Next, consider playing with filters and effects. Canva’s extensive library offers a variety of filters that can instantly change the mood of your image. Whether you’re aiming for a vintage vibe, a cinematic feel, or a pop-art explosion, the right filter can transport your photo into a whole new realm. Combine filters with effects like blur or vignette to draw attention to your subject and create a more artistic composition.
Lastly, don’t underestimate the power of text and graphics. Adding a quote or a creative caption can elevate your photo from mere image to a storytelling piece. Canva provides a range of fonts and graphic elements that let you personalize your photos effortlessly.Imagine posting a travel photo with an inspiring quote overlay; it doesn’t just show a moment, it communicates a feeling, an experience.
As you explore these techniques, remember that creativity knows no bounds. Here’s a quick look at how simple adjustments can lead to extraordinary outcomes:
| Adjustment | Transformative Effect |
|---|---|
| Brightness + Contrast | Enhances clarity and adds depth |
| Filters | Creates mood and atmosphere |
| text + Graphics | Personalizes and adds a narrative |
With just three simple steps, you can turn any ordinary photo into a captivating piece of art that tells your story. Dive into Canva and unleash your creativity today!
Maximizing Your Canva Experience with Templates and Resources
When diving into the world of photo editing with Canva, utilizing templates and resources can significantly enhance your creative process. with a wide array of customizable templates at your fingertips, you can transform your photos into stunning visuals in just a few clicks. This not only saves time but also ensures a professional finish that can captivate your audience. Here’s how you can leverage these resources effectively.
Explore Canva’s Extensive Template Library
Canva offers a vast collection of pre-designed templates tailored for different purposes, from social media posts to flyers and more. These templates serve as a fantastic starting point, allowing you to:
- Quickly find inspiration for your projects.
- Customize layouts to fit your unique style.
- Maintain consistency across your various designs with ease.
By exploring these templates, you can seamlessly edit photos while ensuring they align with your branding or personal aesthetic.
Utilize Built-in Stock Images and Elements
Another way to enhance your designs is by taking advantage of Canva’s built-in stock images and design elements. With millions of free images and graphics available, you can easily:
- Add depth to your photos by layering elements.
- Incorporate unique graphics for a distinctive touch.
- Find images that complement your photos beautifully.
This resource is invaluable for those who want to elevate their designs while keeping the process simple and enjoyable.
Leverage Community and Educational Resources
Lastly,don’t overlook the power of community and educational resources available through Canva. Engaging with tutorials, forums, and design challenges can help you:
- Stay updated on the latest design trends.
- Learn new techniques to refine your editing skills.
- Connect with fellow creators for feedback and ideas.
By participating in these resources, you’ll not only enhance your Canva experience but also grow as a designer.
| Resource Type | Description |
|---|---|
| Templates | Pre-designed layouts for various purposes. |
| Stock Images | A vast library of free and premium images. |
| tutorials | Step-by-step guides to improve your skills. |
| Community Forums | Connect with other Canva users for support. |

Join the Community: Sharing Your Edits and Gaining Inspiration
Join the Conversation
Editing photos can be a solitary endeavor, but it doesn’t have to be! By sharing your edits, you not only showcase your creativity but also contribute to a vibrant community of like-minded individuals. Imagine the thrill of seeing your work appreciated and critiqued by others who share your passion. Sharing isn’t just about receiving feedback; it’s about learning from each other, exchanging ideas, and growing together.
Engaging with the community allows you to discover new techniques and trends. you can explore various styles and approaches that can inspire your next project. Consider participating in online forums or social media groups dedicated to photo editing. Here are some ways to get involved:
- Share your edits: Post before-and-after photos to showcase your skills.
- Seek feedback: Ask for constructive criticism from fellow editors.
- Inspire others: Create tutorials based on your editing process.
Don’t forget to celebrate the achievements of others too! By liking, commenting, and sharing the work of fellow community members, you foster a supportive environment that benefits everyone. This mutual encouragement can spark new ideas and push you to experiment with your edits. who knows? You might just discover a new editing style that resonates with you!
To help organize your thoughts and share your insights, consider creating a simple table to track your progress and interactions with the community. Here’s a quick format you can use:
| Activity | Date | Notes |
|---|---|---|
| shared photo edit | March 1, 2023 | Gained feedback on color correction. |
| Commented on a tutorial | March 5, 2023 | Learned new layering techniques. |
| Joined a photo editing challenge | March 10, 2023 | Motivated to try new styles! |
By actively participating in the community, not only will you enhance your editing skills, but you’ll also create lasting friendships. So, don’t hesitate to dive in and start sharing! You never know what inspiration awaits just around the corner.
Frequently Asked Questions (FAQ)
Q&A: Free Canva Photo Editor – 3 Steps to Edit Your Photos
Q: What is Canva, and why should I use it to edit my photos?
A: Canva is an incredibly user-friendly graphic design tool that allows you to create stunning visuals without any prior design experience. The best part? It’s free! Whether you want to enhance your social media posts, update your blog images, or just make your personal photos look amazing, Canva has got you covered. With its intuitive interface and a plethora of editing options, you can easily transform your images into eye-catching masterpieces.
Q: What are the three simple steps to edit my photos in Canva?
A: Great question! Editing photos in Canva is a breeze. Here are the three easy steps:
- Upload Your Photo: Start by creating a free account on Canva (if you haven’t already). Once you’re in, simply drag and drop your photo into the Canva workspace. You can also upload images from your device or even import them directly from social media!
- Customize Your Photo: After you’ve uploaded your image, it’s time to get creative! Click on your photo, and you’ll see a range of editing options. You can adjust brightness, contrast, saturation, and apply filters. Play around with the tools until your photo looks just the way you want.
- Download and Share: Once you’re satisfied with your edits, hit the download button and choose your preferred file format. Voila! Your beautifully edited photo is ready to be shared with the world on social media or your website.
Q: Do I need any design skills to use Canva?
A: Not at all! Canva is designed for everyone, from beginners to seasoned designers.The interface is straightforward, and ther are tons of templates and resources to help guide you. Plus, you can always explore tutorials and tips within Canva to enhance your skills as you go along. You’ll be amazed at what you can create with just a little practice!
Q: Can I use Canva on my mobile device?
A: Absolutely! Canva has a mobile app available for both iOS and Android.This means you can edit your photos on the go,whether you’re at a coffee shop or relaxing at home. The mobile app retains most of the features of the desktop version, making it super convenient for editing anytime, anywhere.
Q: Is there a cost associated with using Canva?
A: Canva offers a free version that includes many fantastic features, making it perfect for casual users. Though, there are premium options available if you want access to advanced tools, additional stock images, or exclusive templates. For most users, the free version is more than sufficient to create stunning and professional-looking edits.
Q: How can I ensure my photos stand out after editing?
A: Great question! Here are a few tips to make your edited photos pop:
- Use Contrast: Adjusting the contrast can definitely help your subject stand out against the background.
- Experiment with Filters: Don’t hesitate to explore different filters to find one that enhances your photo’s mood.
- Add Text or Graphics: Adding a catchy quote or graphic elements can make your images more engaging and shareable.
With these tricks, your photos will be ready to impress!
Q: Why should I start editing my photos today?
A: In today’s visually driven world, having eye-catching, edited photos can make a huge difference! Whether you’re looking to enhance your personal brand, attract more followers, or simply showcase your memories in their best light, editing your photos can elevate your content.With Canva’s free photo editor, you have everything you need at your fingertips to get started right away. So why wait? Dive in and start creating stunning visuals today!
In retrospect
And there you have it! Editing your photos has never been easier, thanks to the free Canva Photo Editor. With just three simple steps, you can transform your images into stunning visuals that grab attention and tell your story. Whether you’re sprucing up your social media posts, creating eye-catching graphics for your blog, or just having fun with your personal photos, Canva has you covered.
So why not give it a shot? Dive in and unleash your creativity! With an intuitive interface and a treasure trove of tools at your fingertips, you’ll be amazed at what you can achieve—even if you’re a total beginner. Remember, the best part is that it’s fully free! So, what are you waiting for? Start editing your photos today and see how a little touch-up can make a world of difference. Happy editing!