Are you looking to enhance your WordPress website and make it more engaging for your visitors? One of the most effective ways to do this is by adding a contact form. Imagine your audience being able to reach out to you effortlessly, whether to ask questions, provide feedback, or inquire about your services. A contact form not only streamlines interaction but also adds a professional touch to your site.
In this step-by-step guide, we’ll walk you through the process of adding a contact form to your WordPress site, no coding skills required! Whether you’re a seasoned website owner or just starting out, our easy-to-follow instructions will have you set up and ready to connect with your audience in no time. Let’s dive in and turn your website into a more interactive and user-pleasant platform!
Understanding the Importance of a Contact Form for Your Website
when it comes to running a successful website,having a reliable means of communication with your visitors is crucial. A contact form serves as a bridge between you and your audience, allowing them to reach out with questions, comments, or inquiries. It not only enhances user experience but also encourages engagement, making visitors feel valued and heard.
One of the primary reasons for incorporating a contact form is convenience. Users can easily fill out a form rather than searching for your email address or phone number. This streamlined process reduces friction and makes it more likely that they will reach out. Additionally, a well-designed contact form can help you gather specific details in a structured format, allowing you to address their needs more effectively.
Moreover, a contact form can considerably improve your website’s credibility. When visitors see a professional-looking form, it conveys that you care about communication and customer service. This perception builds trust, which is essential for retaining visitors and converting them into loyal customers. Remember,trust is a key component of online transactions,and a simple contact form can go a long way in establishing that trust.
Another critically important aspect to consider is the security that a contact form provides. Displaying your email address publicly can lead to spam and unwanted solicitations. A contact form shields your email from bots and spammers, ensuring that you only receive genuine inquiries.This not only keeps your inbox clean but also allows you to focus on meaningful interactions with your audience.
contact forms can serve as valuable tools for data collection. By incorporating fields for specific information such as name, email, and query type, you can gather insights into your audience’s interests and concerns. This data can be instrumental in shaping your content strategy, marketing efforts, and overall business approach. Here’s a simple table to illustrate key benefits:
| Benefits of a Contact Form | Description |
|---|---|
| Convenience | Easy for users to contact you without extensive searching. |
| Credibility | Enhances trust and professionalism of your website. |
| Security | Protects your email from spam and unwanted messages. |
| Data Collection | Insights into user interactions for improved strategy. |
Choosing the Right Contact Form Plugin for Your Needs
When it comes to adding a contact form to your WordPress site, selecting the right plugin is crucial for ensuring seamless communication with your visitors. With numerous options available, it’s essential to consider key factors that align with your specific needs. Here are some critically important aspects to ponder:
- User-Friendliness: Look for plugins that offer intuitive interfaces, enabling you to create and customize forms without any coding knowledge.
- Customization Options: A good plugin should allow you to tailor your forms to match your site’s branding, including colors, fonts, and layout.
- Spam Protection: Ensure that the plugin provides effective spam filtering options, such as reCAPTCHA, to keep unsolicited messages at bay.
- Integrations: Choose a form plugin that can easily integrate with your favorite email marketing tools, CRM systems, or other third-party services.
- Support and Updates: Reliable customer support and regular updates are essential for maintaining security and functionality over time.
To help you make a more informed decision,here’s a speedy comparison of some popular contact form plugins:
| Plugin Name | User-Friendly | Spam Protection | Customization | Price |
|---|---|---|---|---|
| Contact Form 7 | Yes | Basic | Limited | Free |
| WPForms | Very Easy | Advanced | Highly Customizable | starting at $39.50 |
| Ninja Forms | Easy | Advanced | Moderately Customizable | Free with Premium Options |
Ultimately, the best contact form plugin for your site is one that not only meets your functional requirements but also enhances the user experience. Take the time to explore different options and test out their features, as this can significantly affect how effectively you connect with your audience.

Installing and Activating Your Contact Form Plugin Made easy
Getting started with your contact form plugin is a breeze. Frist, navigate to your WordPress dashboard and head over to Plugins > Add New. Here, you can search for the popular contact form plugins such as Contact Form 7, WPForms, or ninja Forms. Choosing the right plugin is crucial, as each offers unique features that can cater to your specific needs.
Once you’ve found your preferred plugin,click the Install Now button,and then follow it up with a click on Activate. This will seamlessly integrate the plugin into your WordPress habitat, making it ready for configuration. It’s a straightforward process that takes just a few moments.
after activation, most plugins will take you directly to their settings page. If not, you can find the plugin settings in your dashboard menu. Here, you can customize the form fields, modify the appearance, and set up email notifications.Most plugins offer a user-friendly interface, allowing you to drag and drop elements to create a form that fits your site’s aesthetic.
To give you a better idea of what to expect, here’s a quick comparison table of popular contact form plugins:
| Plugin | Features | Price |
|---|---|---|
| Contact Form 7 | Basic form creation, supports CAPTCHA | Free |
| WPForms | Drag and drop builder, templates, email marketing integration | Starts at $39.50/year |
| Ninja Forms | Customizable fields, conditional logic, payment integrations | Free with paid add-ons |
After customizing your form, it’s time to integrate it into your site. Most plugins provide a shortcode that you can simply copy and paste into any post or page where you want the form to appear.Alternatively, you may find a dedicated block in the WordPress block editor, allowing for quick placement without the need for shortcodes.This adaptability makes it easy to incorporate your contact form anywhere on your site.
don’t forget to test your form to ensure that it’s functioning correctly. Fill it out as a visitor would and check that you receive the submissions in your inbox. This verification step is crucial as it ensures that users can easily reach out to you without any hitches, enhancing user experience and engagement on your site.

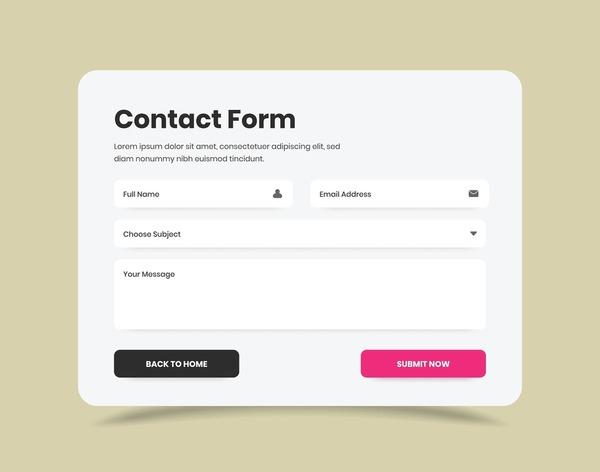
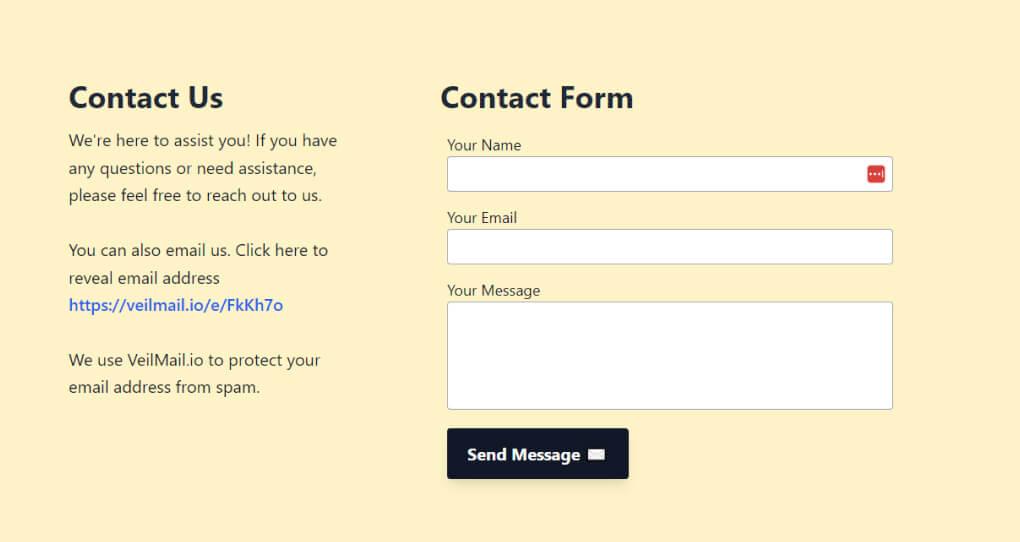
Customizing Your Contact Form for Maximum Engagement
Creating a contact form is just the beginning; the real magic lies in how you customize it to capture your audience’s attention. An attractive and functional form can significantly enhance user engagement and drive conversions. Here are some strategies to ensure your contact form isn’t just another field on your website but a gateway to valuable interactions.
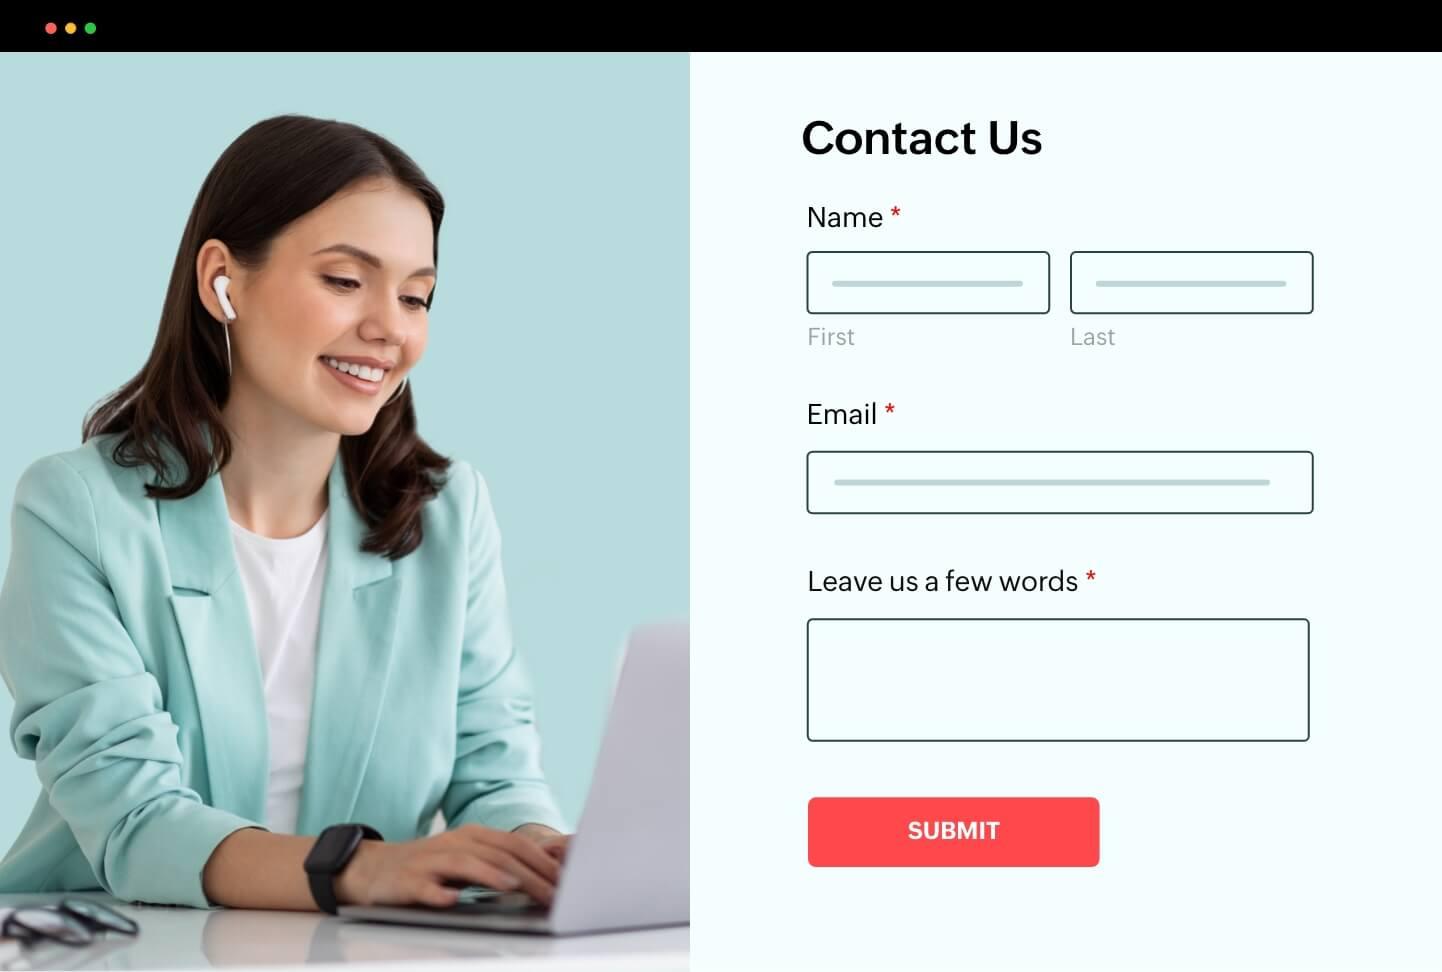
- Keep It Simple: Users appreciate simplicity. Limit the number of fields to only those necessary to gather essential information. Consider using placeholders that provide examples of the required information to make filling out the form intuitive.
- Use Engaging Labels: Rather of generic labels,use conversational language that resonates with your audience. As an example, instead of “Name,” try “What should we call you?” This personalized approach makes the experience feel more inviting.
- Add a Personal Touch: Include a friendly message or a brief introduction above your form explaining the benefits of reaching out. This can help users feel more cozy and encouraged to get in touch.
Design matters as well. A visually appealing form can draw users in. Here are some design tips:
| Design Element | Description |
|---|---|
| Color Scheme | Choose colors that align with your branding and create a contrast to make the form stand out. |
| Button Style | Make your submit button prominent with rounded edges and a contrasting color to encourage clicks. |
| Responsive Design | Ensure your form looks great on all devices by using responsive design techniques. |
don’t forget about follow-up! After users submit their information, consider setting up an automated confirmation email that thanks them for reaching out and informs them of what to expect next. This small touch can enhance the user experience and keep your brand at the forefront of their minds.
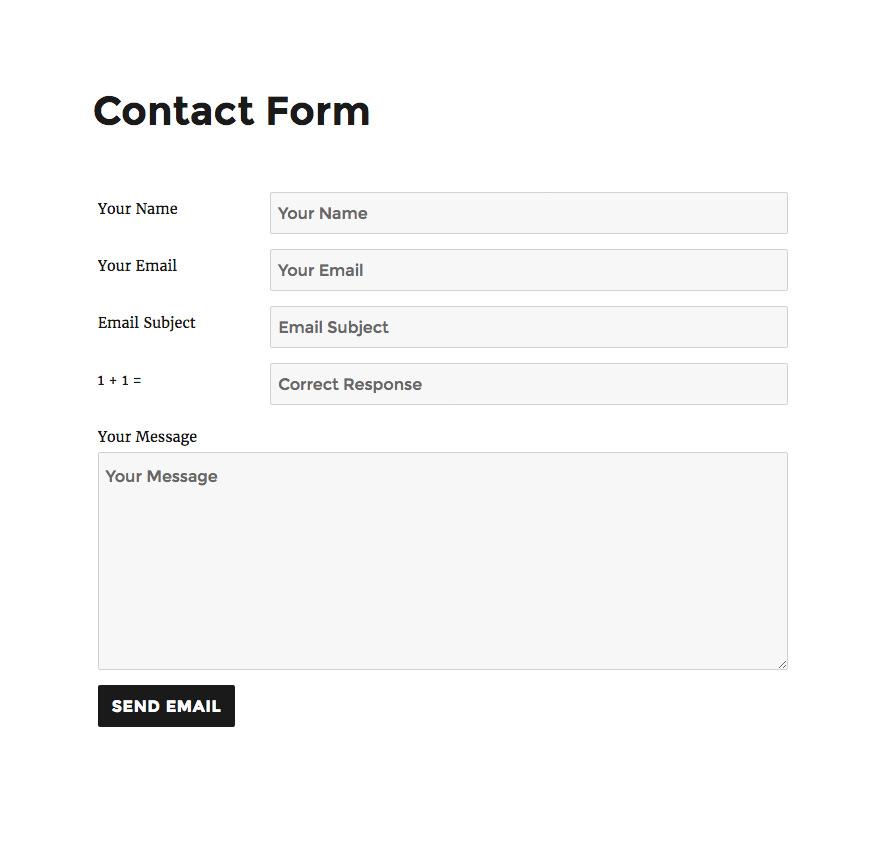
Adding your Contact Form to a Page or Post Effortlessly
Adding a contact form to your WordPress page or post is a seamless process that can greatly enhance user interaction. By following these simple steps, you can ensure that visitors can easily reach you or inquire about your services. here’s how to do it without any hassle:
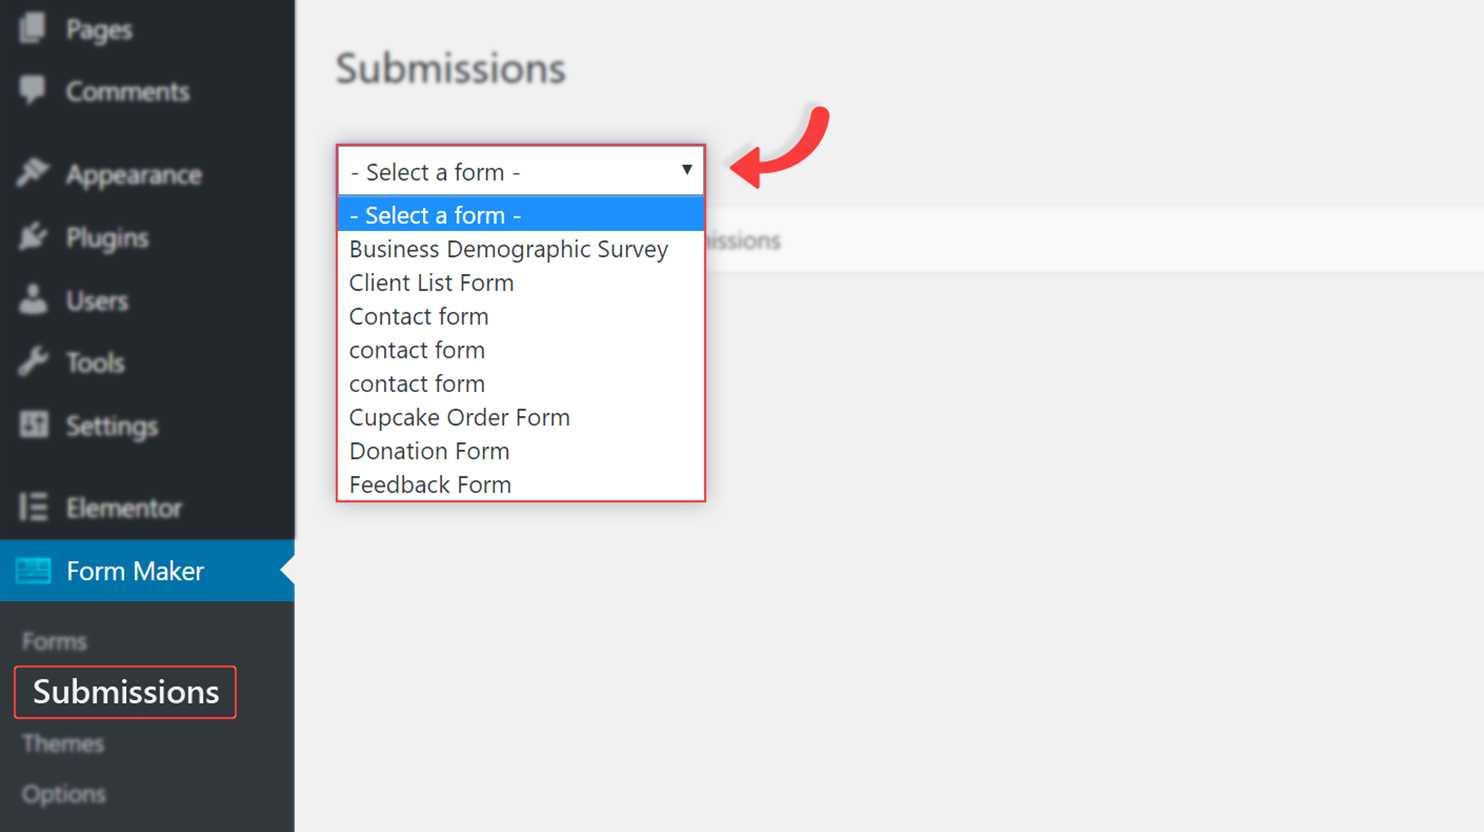
First, navigate to the page or post where you want to add your contact form. Once there, you can utilize a block editor or a classic editor, depending on your WordPress setup.If you’re using the block editor, simply click on the plus (+) icon to add a new block.
Next, search for your contact form plugin. Many popular plugins like Contact Form 7,WPForms,or Ninja Forms offer a convenient block option. After selecting your contact form block, you can choose the specific form you want to display from a dropdown menu.if you haven’t created a form yet, most plugins will provide a quick link to set one up.
Once you’ve inserted the form block,you can customize the display settings. Consider using the following options to enhance user experience:
- Form Width: Adjust the width for better alignment with your content.
- Button Color: Choose a color that matches your website’s theme.
- Success Message: craft a friendly message to reassure users their message was sent.
If your contact form plugin allows it, you may also want to add some additional styling. Here’s a basic table to illustrate some common customization options:
| Customization option | Description |
|---|---|
| Form Title | Display a catchy title to draw attention. |
| Field Labels | Make sure labels are clear and concise for users. |
| Privacy Checkbox | Add a checkbox for users to consent to terms and conditions. |
once you’re satisfied with your form, click the Publish or Update button to make your changes live. After that, it’s an excellent idea to test the form yourself to ensure everything works correctly. with your contact form now embedded in your page or post, you’re well on your way to improving communication with your audience.
Enhancing Your Contact Form with Advanced Features
Once you’ve set up your basic contact form, consider incorporating advanced features to enhance user experience and streamline your communication. These enhancements not only improve functionality but also help maintain a professional image for your brand.
Conditional Logic is a powerful feature that allows you to customize the form based on user responses. For example, if a user selects “Support,” you can display additional fields specific to technical issues. This not only reduces clutter but also guides users to provide relevant information, making it easier for you to respond effectively.
Another captivating addition is File Upload capability. By enabling users to attach files, you can gather critically important documents, images, or screenshots that can assist you in addressing their inquiries. This feature is particularly beneficial for businesses that require detailed visual assistance or documentation.
| Feature | Benefit |
|---|---|
| Multi-step Forms | Reduce overwhelm by breaking long forms into manageable steps. |
| Spam Protection | Utilize CAPTCHA or honeypots to keep your inbox clean. |
| Custom Notifications | Set tailored responses to acknowledge submissions and set expectations. |
Incorporating Custom Notifications ensures your users feel valued. Sending an automated response after submission can reassure them that their message has been received. You can personalize these notifications with user data, enhancing the interaction and building a stronger connection.
Ultimately, enhancing your contact form with these advanced features not only improves functionality but also elevates user experience. By taking the time to implement these options, you’re not just adding aesthetic value but also fostering a more efficient communication process that benefits both you and your users.
Testing Your Contact Form to Ensure It Works Perfectly
Once you’ve added your contact form to your WordPress site, it’s crucial to test it thoroughly. Ensuring that your form works flawlessly can prevent frustrating scenarios where inquiries go unanswered. Here are a few key steps to follow:
- Submit a test Entry: Fill out the form as a visitor would. Include all fields to see if they are functioning correctly.
- Check Email Notifications: Confirm that you receive an email alert for every submission. This is vital for timely responses.
- Validate field Inputs: Try submitting the form with incorrect data, such as an invalid email format, to ensure the validation settings are working.
Next, it’s important to evaluate how your site handles error messages. Users should receive clear feedback if something goes wrong. A well-structured error message not only improves user experience but also encourages them to try resubmitting the form.Consider these aspects:
- Clear Instructions: Ensure that users know what went wrong and how to fix it.
- User-Friendly Layout: Design your form with a clean layout that prevents confusion.
Lastly, don’t forget to check the functionality on different devices and browsers. Your audience will access your site from various platforms, so it’s critically important to confirm that your contact form is responsive and easy to navigate.
| Device | Test Result |
|---|---|
| Desktop | Works Perfectly |
| Tablet | Minor Alignment Issues |
| Mobile | Fully Responsive |
By following these steps, you’ll not only ensure that your contact form functions properly but also enhance the overall user experience on your site. Remember, a reliable contact form can significantly boost your conversion rates, making it an essential component of your online presence.
Best Practices for Managing and Responding to Form Submissions
When managing form submissions, ensuring a seamless process is crucial for both you and your users. A well-structured approach can help you respond promptly and effectively, enhancing user experience and trust in your brand. Here are some best practices to consider:
- Timely Responses: Aim to respond to submissions within 24 hours. Quick replies reinforce trust and demonstrate your commitment to customer service.
- Automated Acknowledgements: Set up automated confirmation messages to inform users that their submission has been received. This keeps them in the loop and reduces anxiety about whether their message was sent.
- Organized Data Management: Use a reliable system to categorize and manage form submissions. This can be a plugin that helps you sort submissions by type, urgency, or topic, making it easier to track and respond.
- Personalize Your responses: Whenever possible, personalize your replies. Referencing the user’s name or specific details from their submission can make your response feel more genuine and engaging.
Additionally, consider implementing a feedback mechanism. After your interaction, encourage users to share their thoughts on the response process. This not only provides valuable insights into your service but also shows that you value their opinions.
| Submission Type | Response Time | Follow-up Action |
|---|---|---|
| General Inquiry | within 24 hours | Provide detailed information |
| Support Request | Within 12 hours | Assign to support team |
| Feedback | Within 48 hours | Thank and acknowledge |
Lastly, regularly review your form submission processes and responses. Analyze common queries and adjust your forms to address frequently asked questions or concerns. This proactive approach not only streamlines your workflow but also enhances user satisfaction, making your website a more welcoming space for visitors.
Troubleshooting Common issues with Contact Forms
Even after setting up your contact form with care, you may encounter some hiccups. Here’s how to tackle the most common issues you might face:
- emails Not Received: This is one of the most frustrating issues. Make sure to check your spam folder first. If emails are still missing,consider using an SMTP plugin to configure email settings properly. Plugins like WP Mail SMTP can significantly improve email deliverability.
- Form Submissions Not Working: If users report that the form isn’t submitting, ensure that all required fields are correctly filled. Also, check for JavaScript errors on your site that might be preventing submission. Use browser developer tools to identify any issues.
- Captcha problems: If you’re using a CAPTCHA plugin and it’s not displaying correctly, users may have trouble submitting the form. Double-check your API keys and make sure they are correctly integrated. You can also try disabling the CAPTCHA temporarily to see if that resolves the issue.
- Styling Issues: Occasionally, your contact form may not match the overall design of your website. Look into your theme’s CSS to adjust styles. Adding custom CSS can enhance the visual appeal. as a notable example, use the following CSS to give your form a modern look:
        .contact-form {
            background-color: #f9f9f9;
            padding: 20px;
            border-radius: 5px;
            box-shadow: 0 2px 5px rgba(0,0,0,0.1);
        }
        .contact-form input,.contact-form textarea {
            width: 100%;
            padding: 10px;
            margin-bottom: 10px;
            border: 1px solid #ccc;
            border-radius: 3px;
        }
Lastly, if you notice that forms aren’t working on mobile devices, responsive design issues could be the culprit. Test your form across various devices and browsers to ensure compatibility.using a plugin that is optimized for mobile can make a critically important difference.
Keeping Your Contact Form Secure and Spam-Free
When it comes to online forms, security and spam protection are paramount. A contact form can be a prime target for spammers looking to flood your inbox with unwanted messages. By implementing a few strategic measures, you can keep your form secure and your interactions genuine.
One effective way to enhance your form’s security is by using CAPTCHA or reCAPTCHA.These tools add an extra layer of verification that distinguishes between human users and automated bots. Here’s how you can integrate them:
- Install a CAPTCHA plugin compatible with your form builder.
- Activate and configure the plugin settings according to your needs.
- Add the CAPTCHA field to your form using the form editor.
Another method to reduce spam submissions is to utilize honey pot techniques. This involves adding an invisible field to your form that regular users won’t fill out but bots will. If this field is completed, you can safely ignore the submission. Here’s a simple implementation:
- Add a hidden text input field in your form.
- Set your backend to check if this field is filled before processing the form.
Additionally, using email validation can significantly enhance your form’s integrity. By ensuring that users submit valid email addresses, you can prevent fake submissions. Here’s a basic validation table you can use to outline acceptable formats:
| Type | Example |
|---|---|
| Standard Email | [email protected] |
| Common Domains | [email protected], [email protected] |
regularly monitor the entries you receive through your contact form. This can help you identify any suspicious patterns or repeated spam attempts. Consider setting up filters in your email client to manage incoming messages more effectively. By taking these proactive steps, you’ll not only enhance the security of your contact form but also improve the overall user experience, leading to meaningful connections with your audience.
frequently Asked Questions (FAQ)
Q: Why should I add a contact form to my WordPress site?
A: adding a contact form to your WordPress site is crucial for fostering communication with your visitors. It provides a structured way for them to reach out, whether they have questions, feedback, or inquiries about your services.Plus, it enhances user experience, making it easier for you to capture leads and connect with your audience directly!
Q: Is it difficult to set up a contact form in WordPress?
A: Not at all! Setting up a contact form in WordPress is incredibly straightforward, even if you’re not tech-savvy. With user-friendly plugins, you can have a professional-looking contact form up and running in just a few minutes. Trust me, once you follow our step-by-step guide, you’ll wonder why you didn’t do it sooner!
Q: what’s the best plugin to use for creating a contact form?
A: There are several excellent plugins out there, but two of the most popular ones are Contact Form 7 and WPForms. Contact Form 7 is highly flexible and completely free, while WPForms offers a drag-and-drop builder that’s super intuitive, making it perfect for beginners. Choose the one that fits your needs best!
Q: Do I need any coding skills to use these plugins?
A: Nope! One of the best parts about these plugins is that they require zero coding knowledge. Their interfaces are designed for users of all skill levels. Just follow our guide, and you’ll be able to customize your form easily—no tech degree needed!
Q: Can I customize the contact form to match my website’s branding?
A: Absolutely! Most contact form plugins allow you to customize colors, fonts, and layout to align with your website’s branding. This way, your contact form will look cohesive with the rest of your site, enhancing your brand’s professionalism and making a great impression on your visitors.
Q: What kind of fields can I add to my contact form?
A: You can add a variety of fields to your contact form based on your needs! Common options include name, email, phone number, message, dropdowns, checkboxes, and even file uploads. This flexibility allows you to collect the information that’s most relevant to you and your business.
Q: Is it safe to receive messages through a contact form?
A: Yes, it is indeed safe! Though, you should always ensure that the plugin you choose complies with data protection regulations like GDPR. Additionally,implementing anti-spam measures,such as CAPTCHA,can protect your forms from unwanted spam messages,keeping your communication secure.
Q: What if I need more advanced features later on?
A: Many contact form plugins offer premium versions with advanced features, such as conditional logic, multi-page forms, and integrations with email marketing services. This means you can start simple and easily upgrade as your needs grow. It’s a flexible solution that can grow alongside your business!
Q: How can I track the messages I receive through the contact form?
A: Most contact form plugins have built-in notification systems that alert you via email whenever someone fills out your form. Additionally, some plugins allow for integrations with CRM systems, so you can manage and track messages more efficiently. It’s a great way to keep everything organized!
Q: Ready to get started with your contact form?
A: Absolutely! Adding a contact form to your WordPress site is a game-changer for engaging with your visitors.It’s time to enhance your communication and build stronger connections. Follow our step-by-step guide, and you’ll have your contact form set up in no time! Don’t miss out on the chance to hear from your audience. Go for it!
Key Takeaways
And there you have it! Adding a contact form to your WordPress site is not just a technical upgrade; it’s a smart move that opens the door to better communication with your audience. Whether you’re a blogger, a business owner, or just looking to connect with your visitors, having an easy way for them to reach out is essential.
By following the steps we’ve outlined, you can create a user-friendly contact form that encourages your visitors to get in touch. Remember, each inquiry could lead to new opportunities, collaborations, or even customer conversions. So, don’t wait any longer!
Dive in, customize your form, and watch those messages start to flow. If you have any questions or run into any hiccups along the way, feel free to drop a comment below. We’re here to help you every step of the way. Happy WordPressing!