Are you ready to give your online presence a fresh new look? If you’re using the Eduma theme for your website, changing your logo is one of the easiest ways to make a statement and enhance your brand identity. Whether you’re a seasoned web designer or just starting out, customizing your logo can set the tone for your entire site and create a memorable impression on your visitors. In this step-by-step guide, we’ll walk you through the simple process of updating your logo in the Eduma theme. By the end of this article, you’ll be equipped with all the knowledge you need to transform your site’s appearance and connect more effectively with your audience. Let’s dive in and get your logo looking just the way you want it!
Understanding the Eduma Theme and Its Customization Options
When it comes to creating a unique identity for your educational website, the logo is frequently enough the first thing your visitors will notice. The Eduma theme,renowned for its flexibility and user-friendliness,allows you to customize your logo quickly and effectively. Understanding how to leverage these customization options can considerably enhance your brand presence online.
To get started with changing your logo in the Eduma theme,follow these simple steps:
- access the wordpress Dashboard: Begin by logging into your WordPress admin panel.
- Navigate to Appearance: Click on ‘Appearance’ in the left sidebar,and then select ‘Customize.’ This will take you to the wordpress Customizer, where you can make various adjustments to your theme.
- Find the Site Identity Section: In the Customizer menu, locate the ‘Site identity’ option. This area is where you can add or change your logo.
- Upload Your Logo: Click on the ‘Select Logo’ button. You can either choose an existing image from your media library or upload a new one. Make sure your logo is optimized for web use!
- Adjust logo Settings: Once your logo is uploaded, you can resize it and position it as needed. This ensures it fits perfectly within your site’s header.
- Save Changes: After making adjustments, don’t forget to click the ‘Publish’ button at the top. This will save all your changes and make them live on your site.
Here’s a handy table summarizing the logo customization options in the Eduma theme:
| Option | Description |
|---|---|
| Logo Upload | Select and upload a logo image from your computer or media library. |
| Logo Size | Adjust the dimensions of your logo for optimal placement. |
| Alt Text | Add descriptive text for accessibility and SEO purposes. |
| Site Title Visibility | Choose to display or hide your site title alongside the logo. |
Customizing your logo in the Eduma theme not only enhances visual appeal but also strengthens brand recognition. Ensure that your logo reflects the essence of your educational institution, making a lasting impression on visitors. Remember, a well-crafted logo is a vital part of your website’s overall aesthetics and functionality!
![]()
Why Changing Your Logo Matters for Your Brand Identity
Changing your logo is a pivotal moment for any brand. It’s more than just a fresh design; it’s an opportunity to redefine how your audience perceives your business. A well-crafted logo can encapsulate your brand’s values, mission, and personality, creating an emotional connection with your customers. When you decide to refresh your logo, you are signaling growth, innovation, and a commitment to evolving with the times.
Here are some compelling reasons why a logo change can be beneficial:
- Modernization: Trends change, and what was once cutting-edge can quickly become outdated. A contemporary logo can enhance your brand’s relevance.
- Audience Expansion: as your business grows, your target audience may change. A new logo can attract a different demographic and appeal to a broader market.
- Brand Clarity: A refreshed logo can help clarify your brand’s message and values, ensuring that they resonate with your audience.
- Competitive Edge: In a crowded marketplace, a standout logo can set you apart from competitors and make a lasting impression on potential customers.
It’s crucial to approach a logo change thoughtfully, as it can impact your brand identity significantly. Consider conducting market research to understand how your current logo is perceived and what changes your audience desires. This insight can guide your design process, ensuring your new logo aligns with both your vision and your customers’ expectations.
When executed effectively, your updated logo can rejuvenate your brand identity, enhancing customer loyalty and engagement. It’s not just about aesthetics; it’s about creating a symbol that embodies your brand’s journey and future direction.Therefore, take the time to craft a design that resonates, and you’ll find that a logo change can breathe new life into your brand.
Getting Started: Preparing your Logo for Upload
Before you dive into the logo upload process, it’s essential to ensure that your logo is perfectly prepared. A well-optimized logo not only enhances your website’s aesthetic but also boosts brand recognition. Here are the key steps you shoudl follow:
- Choose the Right Format: The most common formats for logos are PNG and SVG. PNG is ideal for images with clarity, while SVG is perfect for vector graphics that need scaling.
- Set the Correct Dimensions: Depending on the design of your website, you’ll want to choose dimensions that fit well. Typically, logos should be around 250-300 pixels wide to maintain clarity without being too large.
- Optimize for File Size: Large files can slow down your website. Use tools like TinyPNG or ImageOptim to compress your logo without losing quality.
Once your logo is in the right format and optimized, it’s time to consider the visual aspects. Make sure the colors align with your brand identity and that the logo is easily recognizable even at smaller sizes. A logo that’s too intricate may lose detail when scaled down, so simplicity is key.
Here’s a fast table summarizing the essential logo specifications:
| Aspect | Advice |
|---|---|
| File Type | PNG or SVG |
| File Size | Under 100 KB |
| Dimensions | 250-300 pixels wide |
always preview your logo on different devices to ensure it looks stunning on mobile, tablet, and desktop views. A well-prepared logo is the first step toward a professional-looking website,making it an investment worth your time and effort.
Navigating the WordPress Dashboard for Eduma Theme Settings
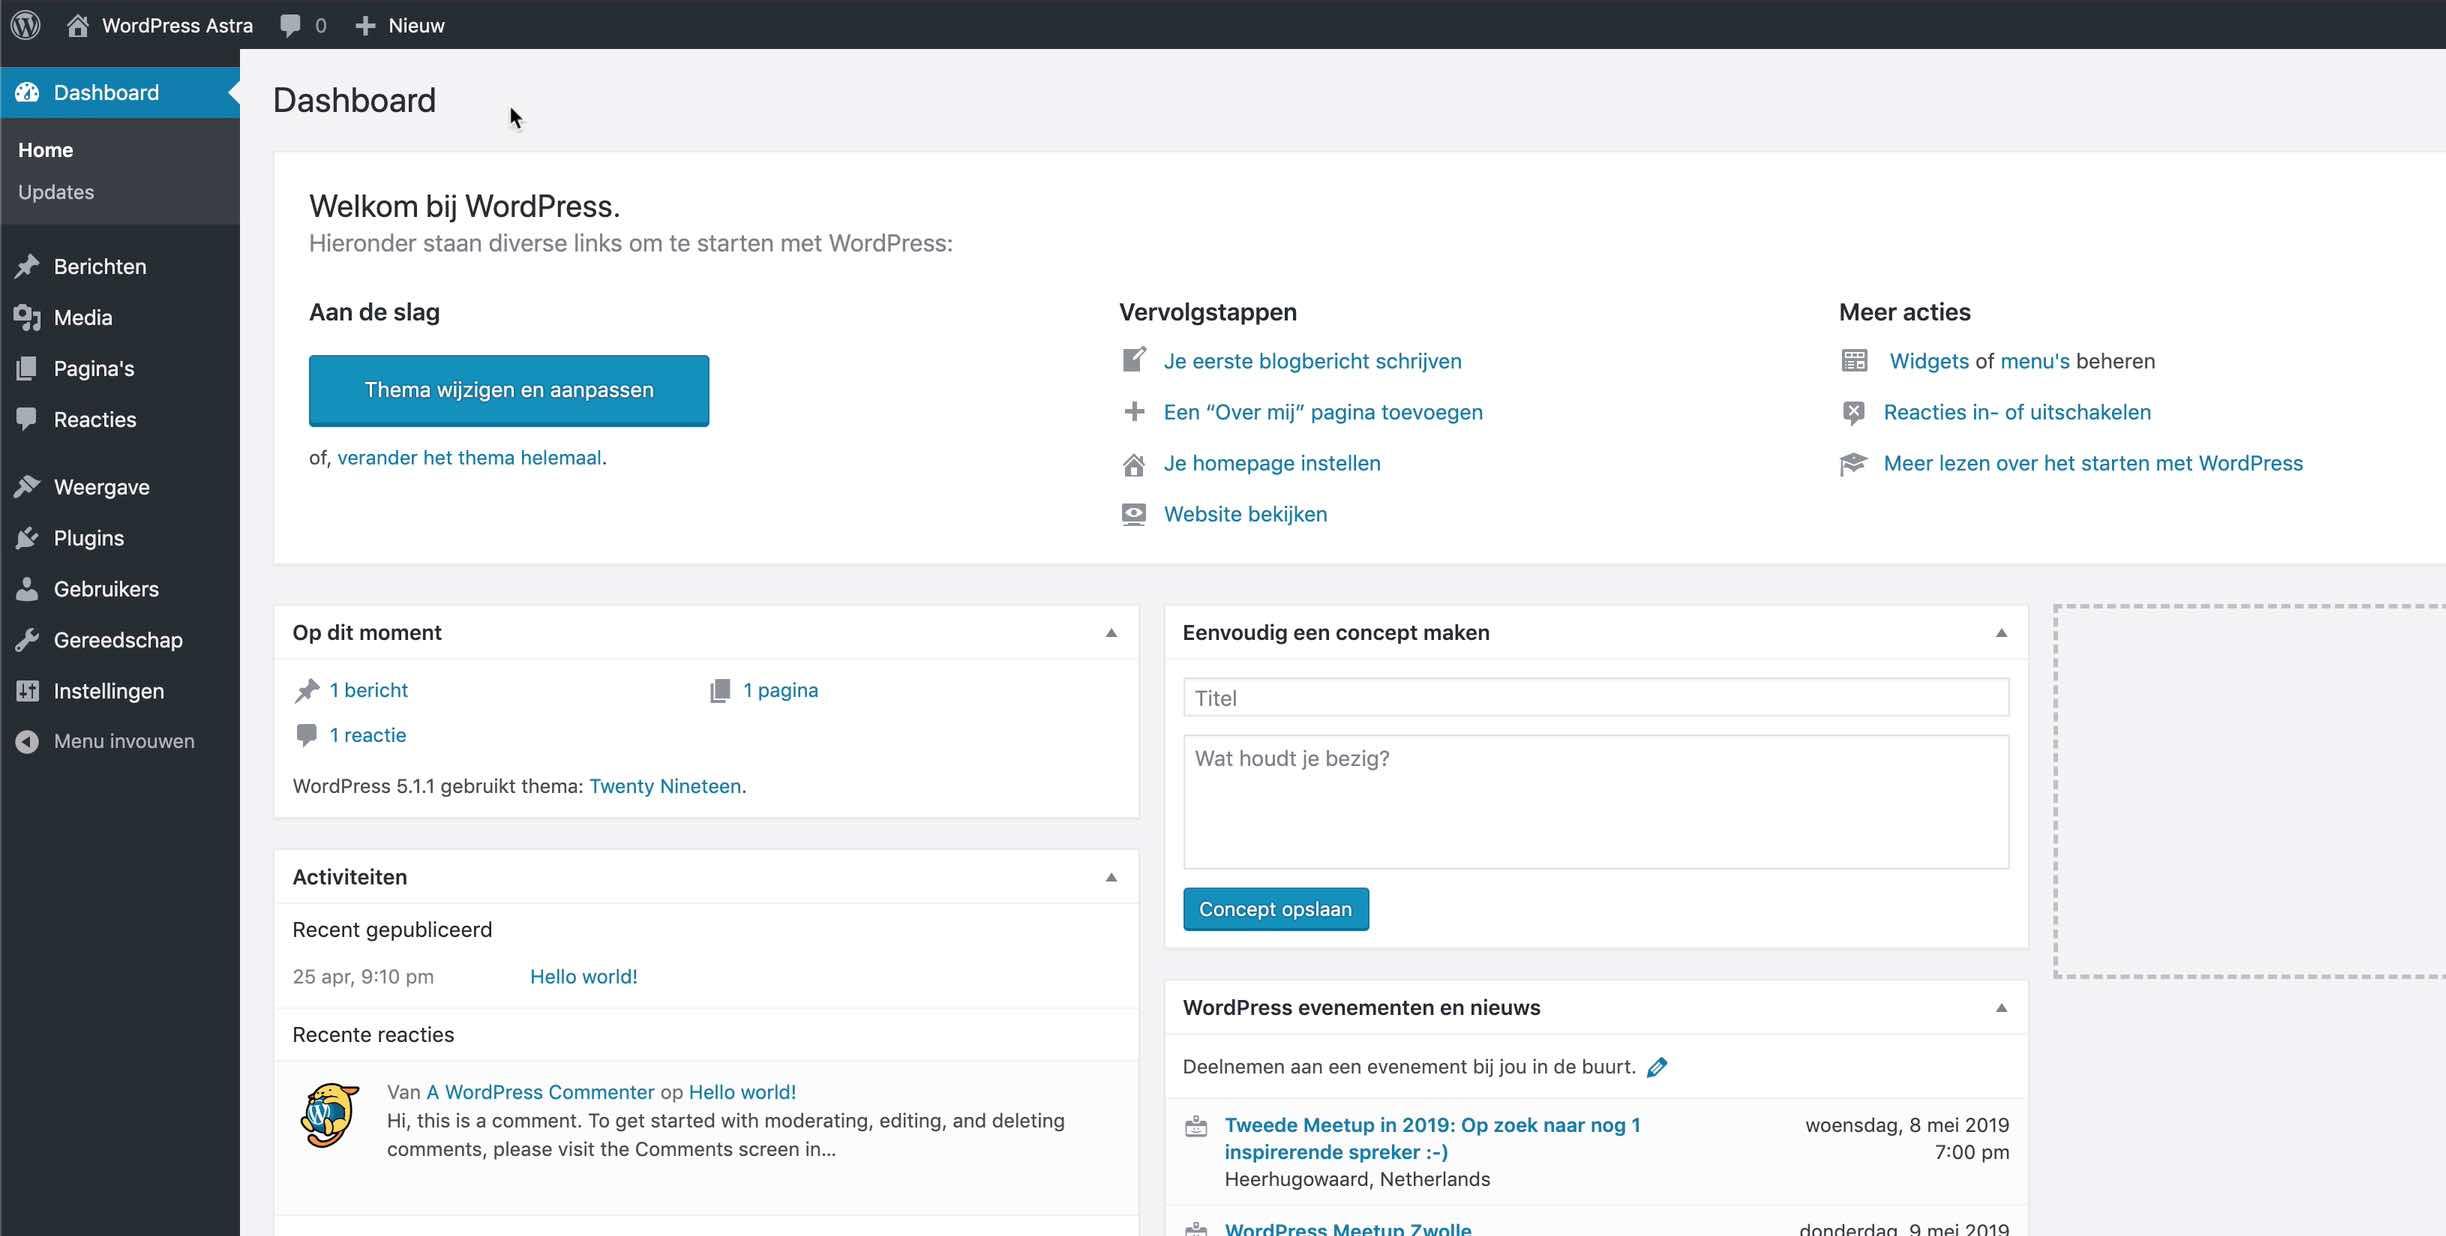
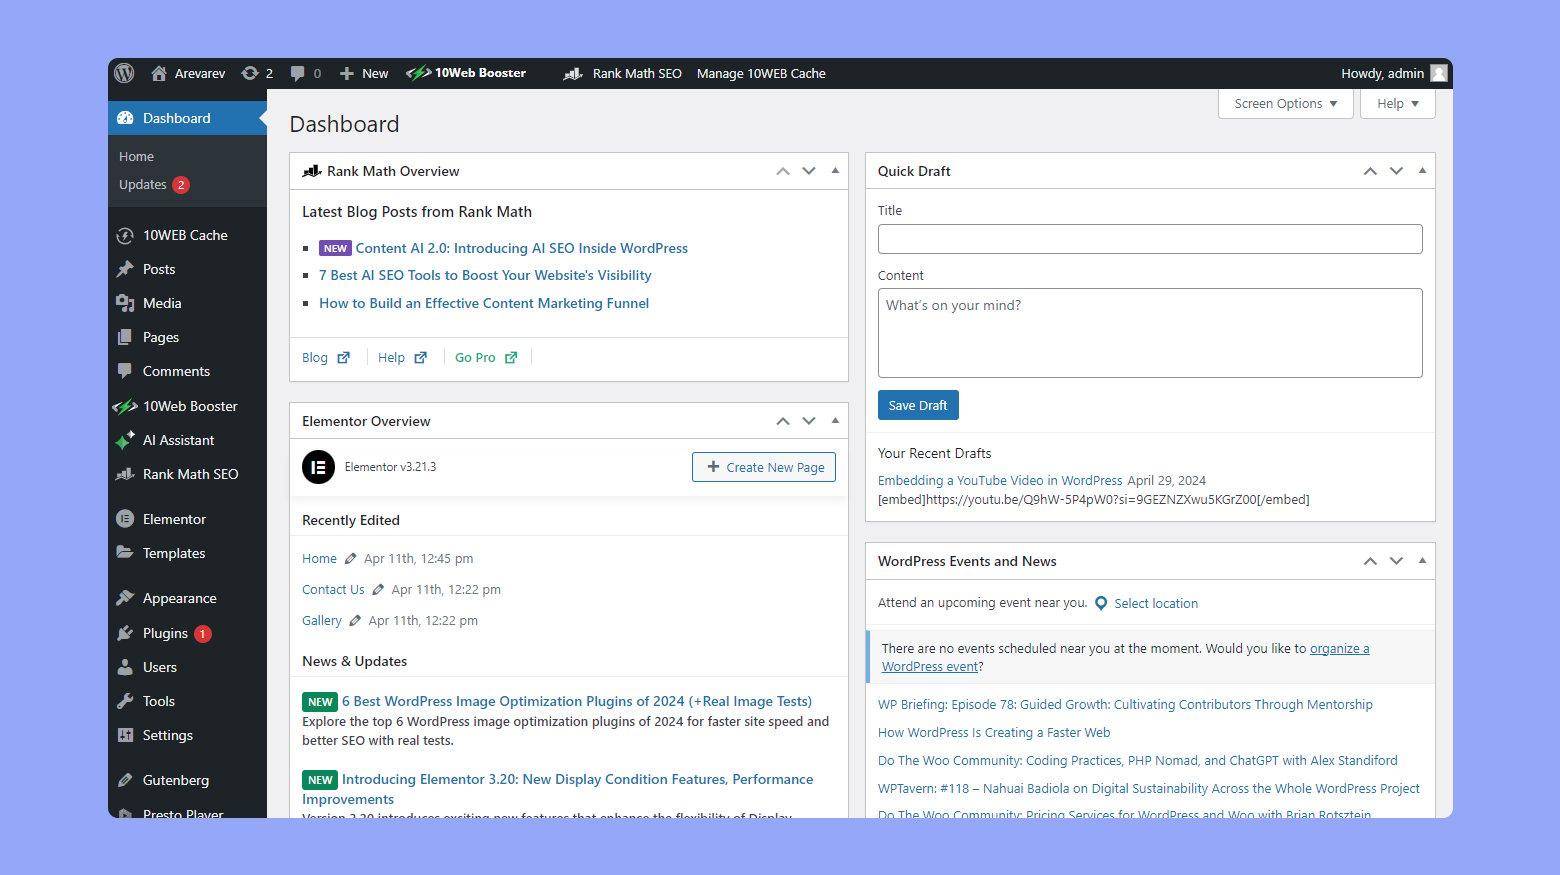
to begin changing your logo in the Eduma theme, first, you’ll want to access the WordPress Dashboard.This is your control center for all settings related to your site, and understanding how to navigate it will make your logo customization a breeze.
Once you’re in the dashboard, look for the Appearance section on the left-hand menu. By hovering over it, you’ll see a dropdown menu. Click on Customize, which will take you to the WordPress Customizer. This is where you can adjust various elements of your site, including your logo.
Within the Customizer, locate the section labeled Site Identity. Here, you’ll find options to upload a new logo, change your site title, and configure your tagline. To change your logo, click on the Select Logo button. You can either upload a new image or select one from the media library.
When you’ve chosen your logo,you’ll see a preview appear in the Customizer. If you’re satisfied with how it looks, don’t forget to click the Publish button at the top of the Customizer. This will save your changes and make your new logo live on your site.
It’s an excellent idea to check how your logo appears on different devices. the Customizer allows you to switch between desktop, tablet, and mobile views, ensuring that your logo looks great no matter how visitors access your site. This attention to detail can greatly enhance your brand’s professionalism.
Remember,your logo is a key element of your branding,so take your time to ensure it reflects your vision accurately. If you ever want to make additional adjustments, just return to the Customizer and repeat the process!
Step-by-Step Guide to Uploading Your New logo
Changing your logo in the Eduma theme is a straightforward process that can significantly enhance your site’s branding. Follow these simple steps to ensure a seamless upload of your new logo:
- Log in to your WordPress Dashboard: Start by accessing your WordPress admin area. Enter your credentials to log in.
- Navigate to the Theme Customizer: In the dashboard,go to Appearance and click on Customize. This will open the theme customizer interface where you can modify various aspects of your site.
- Select the Site Identity Section: Within the customizer, find the site Identity section. This is where you can update your logo, site title, and tagline.
- Upload Your New Logo: Click on the Select Logo button. This will open the media library. You can either choose an existing image or upload a new one by clicking Upload Files.
- Adjust Logo Settings: Once you’ve uploaded your logo,you can crop it if needed. After adjusting,click Choose Logo. you’ll see a preview of how it looks on your site.
- Save Your Changes: Don’t forget to click the Publish button at the top of the customizer to save all your changes. this will make the new logo live on your website.
By following these steps, you’ll have your new logo uploaded and displayed in no time! Remember, a well-placed logo creates a strong first impression and enhances your brand recognition.
In case you encounter any issues during the upload process, here’s a quick troubleshooting table to help you out:
| issue | Solution |
|---|---|
| logo not displaying | Check file format; use PNG or JPG. |
| Image quality is poor | Ensure your logo is high-resolution. |
| Logo not centered | Adjust logo alignment in the customizer settings. |
| Changes not saving | Clear your browser cache and try again. |
With the Eduma theme, branding your site to reflect your unique identity is only a few clicks away. Enjoy the process of personalizing your online presence!
Fine-Tuning Your Logo Appearance with Additional Settings
Once you’ve successfully uploaded your new logo in the Eduma theme, it’s time to focus on enhancing its appearance through additional settings.these settings allow you to customize your logo further, ensuring it aligns perfectly with your brand identity and website design.
adjusting Logo Size
One of the first adjustments you might consider is the size of your logo. A well-proportioned logo can significantly enhance your website’s overall aesthetics. You can edit the dimensions directly from the customizer:
- Navigate to Appearance > Customize.
- Select Site Identity.
- Use the logo size sliders to set your preferred height and width.
Adding Logo Margins
Margins can play a vital role in how your logo interacts with other elements on the page. Adjusting the margins helps in creating a balanced layout.Here’s how you can add margins:
- Still within the Site Identity section, look for the margin settings.
- Experiment with values until your logo sits comfortably within the header space.
Choosing Logo Alignment
Another essential aspect of your logo’s appearance is its alignment. You can opt for a centered, left, or right alignment, depending on your design preferences:
- Find the alignment options in the header settings.
- Choose the alignment that complements your overall theme and layout.
Exploring Advanced CSS Styles
If you’re comfortable with CSS, you can take your logo customization a step further. Adding custom styles can help you achieve unique effects, such as shadows or hover transitions. Here’s a quick example:
| CSS Property | Description |
|---|---|
filter: drop-shadow(2px 2px 5px #000); | Creates a subtle drop shadow for depth. |
transition: transform 0.3s ease; | Adds a smooth change effect on hover. |
Incorporate these properties in the Additional CSS section of the customizer, and watch your logo come to life!
Previewing and Saving Your Changes for a Flawless Look
Once you’ve updated your logo in the Eduma theme,the next crucial step is to visualize how these changes blend into your website’s overall design. A preview allows you to assess not just the logo’s appearance, but also its harmony with other elements on your site. Making sure your logo stands out yet complements your brand is essential for creating a professional look.
To ensure everything looks just right, follow these handy tips during the preview process:
- Check Various Devices: Make sure to preview your site on different screen sizes, including desktops, tablets, and smartphones. This will help you see if your logo maintains its quality and visibility across platforms.
- Inspect Placement: Look at how the logo fits within the header and footer, checking for proper alignment and spacing. A well-placed logo enhances user navigation and brand recall.
- Evaluate Color Balance: Ensure that the colors of your logo work cohesively with your website’s color scheme. A color mismatch can detract from the overall aesthetic.
Once you’re satisfied with the preview, it’s time to save those changes. Click the Publish button within the WordPress Customizer,and your new logo will be live for all visitors to see. To double-check that your changes have been applied correctly, consider the following:
| Check Status | What to Do |
|---|---|
| Logo Visible | Great! No further action needed. |
| Logo Missing | Clear your cache and refresh the page. |
| Logo Misaligned | Return to the Customizer to adjust settings. |
Don’t skip the final evaluation phase! Navigate through various pages on your site to see how the new logo interacts with different content. A well-integrated logo not only boosts your brand identity but also enhances user experience, making it easier for visitors to recognize and remember your brand.
after a few days, take a moment to review site analytics. Check how users are responding to the new logo and gather insights for future enhancements.This feedback loop will help you ensure that your website remains visually appealing and effectively serves its purpose.

Troubleshooting Common Logo Upload Issues
If you’re having difficulty uploading your logo in the Eduma theme, it can be frustrating. Here are some common issues you might face and how to resolve them.
- File Format Issues: Ensure that your logo is in a supported format such as PNG, JPG, or GIF. If your file is in an unusual format, convert it to one of these before uploading.
- File Size Limitations: Check if your logo file exceeds the maximum upload size allowed by your WordPress settings. Try compressing your image to reduce its size.
- Theme Compatibility: Some themes may have specific requirements for logo dimensions. Verify that your logo meets the recommended size for optimal display.
- Browser cache Problems: Sometimes, issues can stem from your browser cache. Clear your cache or try accessing your site in incognito mode to see if the logo uploads correctly.
In addition, here are some quick tips to ensure a smooth upload process:
| Tip | Description |
|---|---|
| Use a Reliable Browser | Ensure you are using an updated version of browsers like Chrome, Firefox, or Safari for better compatibility. |
| Check User Permissions | Make sure you have the necessary permissions to upload files within your WordPress dashboard. |
| Review Theme Documentation | Consult the Eduma theme documentation for any specific instructions regarding logo uploads. |
If you continue to experience issues even after trying these solutions, consider reaching out to your web hosting provider or checking for plugin conflicts that might potentially be affecting the upload process. Sometimes, a simple plugin update or a temporary deactivation can resolve unforeseen issues.
Resolving logo upload issues in the Eduma theme doesn’t have to be a daunting task. With these troubleshooting tips, you should be able to get your logo up and running smoothly in no time!
Enhancing Your Sites Aesthetic: Tips for logo Placement
When it comes to enhancing the aesthetic appeal of your site, logo placement is crucial.Your logo is often the first thing visitors notice, setting the tone for their overall experience.To make the most out of your logo placement, consider the following strategies:
- Top Left Corner: This is the most traditional and widely accepted spot for logos. Placing your logo here allows it to be easily seen as soon as visitors land on your page.
- Central Positioning: For a bold statement, centering your logo at the top of your site can create a striking visual impact, especially for brands looking to stand out.
- Sticky Header: Implementing a sticky header keeps your logo visible as users scroll down, reinforcing brand recognition throughout the browsing experience.
- Footer Integration: Including your logo in the footer provides a seamless way for visitors to remember your brand, even after they’ve finished reading your content.
Additionally, consider the size and clarity of your logo. A logo that’s too large can overwhelm your content, while a logo that’s too small may not capture attention. Strive for a balance that complements your overall design. Here’s a handy table to help determine the ideal logo dimensions for various placements:
| Placement | Recommended Size (px) |
|---|---|
| Header (Top Left) | 250 x 100 |
| Center | 300 x 150 |
| Sticky Header | 200 x 80 |
| Footer | 150 x 70 |
Moreover, ensure your logo aligns with your site’s color scheme and overall design aesthetic. A well-coordinated color scheme can enhance your logo’s visibility and create a coherent look throughout your site. Experiment with different backgrounds, as a contrasting color can make your logo pop. Also, consider the use of whitespace around your logo; sufficient spacing can elevate its importance and draw attention.
Lastly, don’t forget about mobile responsiveness. Make sure your logo scales well on smaller screens, as an increasing number of users access websites via mobile devices. Test how your logo looks across various devices and make adjustments accordingly. By focusing on these key aspects of logo placement,you can significantly enhance your site’s visual appeal and create a lasting impression on your visitors.
Final thoughts: Making Your Logo Shine and Represent Your Brand
Creating a logo that truly resonates with your audience is essential for building a strong brand identity. Your logo is often the first impression potential customers will have, so make it count! Here are a few key points to consider when designing or updating your logo:
- Keep it Simple: A clean and uncomplicated logo is more memorable. Avoid clutter and focus on the core elements that represent your brand.
- Color Matters: Choose colors that align with your brand’s personality. each color evokes different emotions; make sure your choices communicate the right message.
- Versatility is Key: Your logo should look great on various platforms and materials, whether it’s on a website, business card, or merchandise.
When using the Eduma theme, you have access to a plethora of customization options that can definitely help your logo shine.Take advantage of the theme’s built-in features to enhance the visual appeal of your logo:
| Feature | Description |
|---|---|
| Customizable Header | Adjust the header height and background to make your logo stand out. |
| Logo Upload Options | easily upload different file formats to ensure your logo maintains its quality. |
| Responsive Design | Your logo will automatically adjust for mobile and tablet views. |
Additionally, consider gathering feedback from your target audience. This can provide valuable insights into how your logo is perceived and its effectiveness in conveying your brand identity.Don’t shy away from testing different iterations – sometimes,small changes can lead to notable improvements.
remember that your logo is more than just an image; it’s a symbol of your brand’s story and values. By paying careful attention to design details and utilizing the tools available in your Eduma theme, you can create a logo that not only shines but also effectively represents what your brand stands for.
Frequently Asked Questions (FAQ)
Q&A: How To change Logo in Eduma Theme: Step-by-Step Guide
Q: Why should I consider changing the logo on my Eduma theme website?
A: Great question! Your logo is a crucial part of your brand identity. It’s the first thing visitors notice, and having a unique logo helps establish trust and professionalism. A fresh logo can also reflect the growth and evolution of your institution or business, making it more memorable to your audience.
Q: Is changing the logo in the Eduma theme difficult?
A: Not at all! Actually, it’s a simple process that only takes a few minutes. Even if you’re not tech-savvy, our step-by-step guide will walk you through everything you need to know. Trust me; you’ll be amazed at how easy it is indeed!
Q: What do I need before I start changing my logo?
A: You’ll only need a logo file ready to go! Ideally,your logo should be in a high-resolution format,like PNG or JPG,to ensure it looks sharp on your site. If you don’t have a logo yet, consider designing one or hiring a designer to create a unique logo that represents your brand.
Q: can I use any size logo for my website?
A: It’s best to adhere to specific dimensions for optimal display. Typically, a width of around 250-300 pixels is a good starting point for most website headers. Tho, refer to the Eduma theme documentation for any specific size requirements to ensure your logo fits perfectly.
Q: What if I want to change the logo again in the future?
A: No worries! The process is quick and easy, so you can change your logo whenever you like. Whether you’re rebranding or just want to refresh your look, you can follow the same steps outlined in our guide.
Q: Will changing the logo affect other parts of my website?
A: Changing your logo should not affect other parts of your website, as long as you follow the correct procedure. However, it’s always a good idea to check how your logo looks on different devices after making the change to ensure a seamless experience for all your visitors.
Q: Where can I find the step-by-step guide to change my logo in the Eduma theme?
A: You’re in luck! Just follow our detailed guide right here in the article. We’ve broken it down into easy-to-follow steps with screenshots to help you along the way. Soon, you’ll have a stunning new logo displayed on your site!
Q: If I encounter issues while changing the logo, what should I do?
A: If you run into any hiccups, don’t hesitate to reach out to the Eduma support team or check out their online community forums. There are plenty of resources available to help you troubleshoot common issues. Plus, we’re here to help! Feel free to ask questions in the comments below the article.
Q: Ready to change your logo? what’s stopping you?
A: Exactly! With the simple steps we’ve provided, there’s no reason not to give your website a fresh look. A new logo can invigorate your brand and capture attention. So why wait? Dive into our guide and make that change today! Your website deserves it!
Final Thoughts
And there you have it! Changing the logo in the Eduma theme is not just a simple task; it’s a crucial step in personalizing your website to reflect your brand’s identity. By following the steps outlined in this guide, you can effortlessly update your logo and give your site that professional touch it deserves.
Remember, your logo is the face of your brand, and ensuring it’s displayed prominently can make a significant difference in how visitors perceive your site. So why wait? Take action today and give your Eduma-powered website the makeover it needs!
If you have any questions or run into any issues along the way, don’t hesitate to reach out. we’re here to help you make your online presence as striking and memorable as possible. Happy customizing!