Introduction
Hey there, fellow WordPress user! If you’ve stumbled upon the dreaded “401 Error” while navigating your site, you’re not alone. It’s like hitting a brick wall when you’re just trying to get things done. Don’t worry, though—this isn’t the end of the road for your website. In fact, this frustrating little error can be tackled with the right approach!
In this step-by-step guide, we’ll walk you through the ins and outs of the WordPress 401 Error. We’ll break it down into simple, actionable steps that you can follow, even if you’re not tech-savvy. By the end of this article,you’ll not only understand what causes this pesky error but more importantly,how to fix it and get your site back on track. So grab a cup of coffee, roll up your sleeves, and let’s dive into the world of WordPress troubleshooting together!
Understanding the WordPress 401 Error and Its Causes
The wordpress 401 error is a common issue that can frustrate users trying to access their websites.This error typically indicates that authentication is required, meaning that the user is attempting to access a resource that they don’t have permission to view.Understanding the underlying causes of this error can help you troubleshoot and rectify the situation effectively.
Here are some common causes of the WordPress 401 error:
- Incorrect Login Credentials: One of the simplest reasons for a 401 error is entering the wrong username or password. Double-check your credentials before proceeding further.
- Plugin Conflicts: Sometimes, a plugin may interfere with the authentication process. Deactivating plugins one by one can help identify the culprit.
- Incorrect File Permissions: If your server’s file permissions are misconfigured, it could restrict access to certain resources, leading to a 401 error.
- Corrupted .htaccess File: Issues with the .htaccess file can also result in authentication errors.This file manages various settings for your WordPress site.
- Browser Cache Problems: Cached data in your browser might hold onto outdated login facts,which can trigger a 401 error.
To help you better understand potential fixes, we can summarize some troubleshooting steps in the following table:
| Step | Description |
|---|---|
| 1 | Verify your login credentials and try logging in again. |
| 2 | Deactivate all plugins and see if the error persists. |
| 3 | Check and adjust the file permissions of your WordPress files. |
| 4 | Rename the .htaccess file and regenerate it via WordPress settings. |
| 5 | Clear your browser cache or try accessing your site in incognito mode. |
Each of these solutions targets a specific cause of the 401 error, guiding you toward a resolution. By addressing these areas, you can frequently enough regain access to your WordPress site and ensure that your users enjoy a seamless experience. remember, a little patience and systematic troubleshooting can go a long way in resolving errors like the 401 in WordPress.
Identifying the Signs of a 401 Error in Your Site
When navigating the vast landscape of your website, encountering a 401 error can be frustrating. It’s essential to understand that this error signifies a problem related to authorization. Simply put, the server recognizes your request but refuses to grant access due to issues with your login credentials or permissions. Identifying the signs of a 401 error on your site can help you pinpoint the issue and address it swiftly.
Common symptoms that indicate a 401 error may include:
- Incorrect Login Credentials: If users are unable to log in despite entering the correct username and password, it could be a sign of a broader permission issue.
- Access Denied Messages: When you or visitors encounter a message stating “Access Denied” or “unauthorized Access,” it’s a clear indicator of a 401 error.
- Inability to Access Specific Pages: Users might find themselves locked out of certain pages, especially those that require authentication.
Another sign to watch for is a persistent prompt for login credentials. If users are repeatedly asked to enter their username and password—despite providing the correct information—this can be a strong indication of a 401 error. Such prompts can lead to frustration and may deter users from engaging further with your site.
To better understand the impact of a 401 error, here’s a brief overview of common causes:
| Cause | Description |
|---|---|
| Incorrect Password | Users may have forgotten or incorrectly entered their password. |
| Plugin Conflicts | Some plugins may inadvertently restrict access or alter permissions. |
| File Permissions | Improperly set file permissions can deny access to users. |
Identifying these signs early can save you time and effort in troubleshooting. Regular monitoring of user access and feedback can also help you spot issues before they escalate. Once you recognise the signs of a 401 error, you’ll be better equipped to take the necessary steps to resolve it and restore smooth access to your site.

The Quick Fix: Clearing Your Browsers Cache
When you’re grappling with a 401 error on your WordPress site, one of the quickest solutions is clearing your browser’s cache. It might sound simple, but this step can ofen resolve the issue by ensuring you’re loading the most current version of your site.
Here’s how to clear your cache on popular browsers:
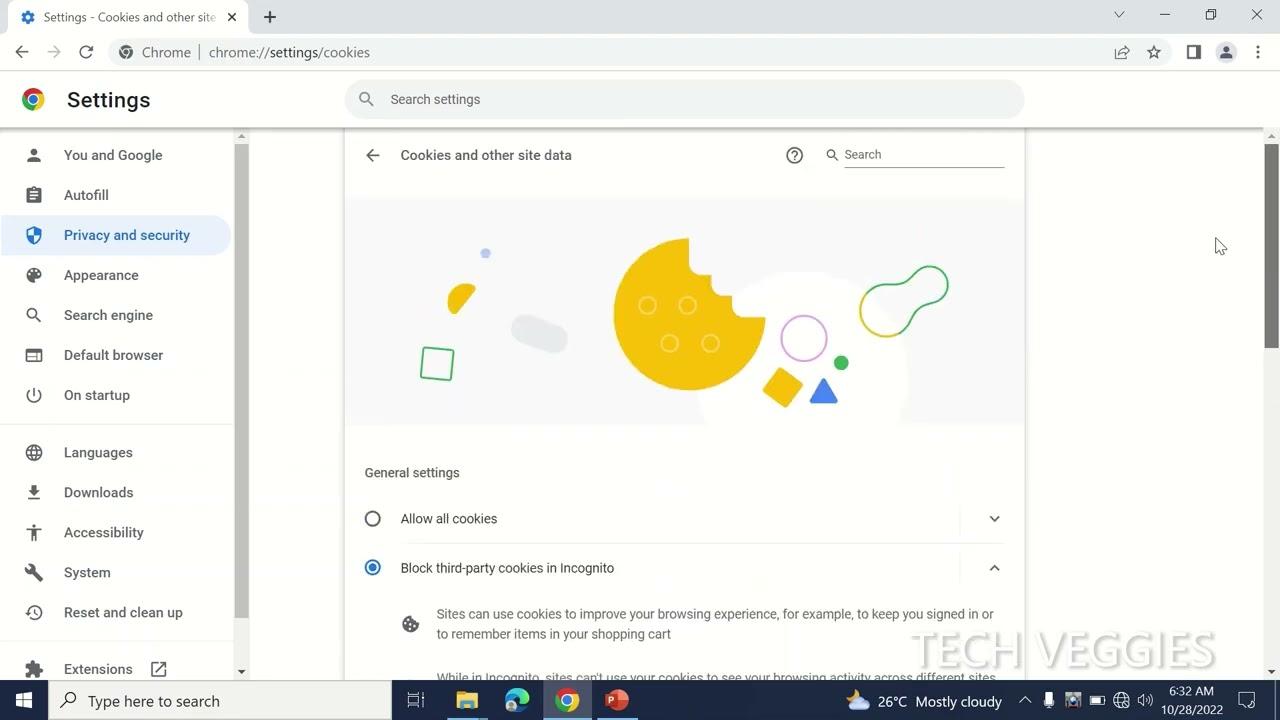
- Google Chrome: Go to the menu (three dots in the upper right corner) > More tools > Clear browsing data.Choose a time range and make sure “Cached images and files” is selected before clicking “clear data.”
- Mozilla Firefox: click the menu button (three horizontal lines) > Options > Privacy & Security. In the “Cached Web Content” section, click “Clear Now.”
- Safari: Go to Safari in the top menu > Preferences > Advanced. Check “Show Develop menu in menu bar.” Now select Develop > Empty Caches.
- Microsoft Edge: Click on the menu (three dots) > Settings > Privacy,search,and services. Under “Clear browsing data,” select “Choose what to clear” and check “Cached images and files” before hitting “Clear now.”
After clearing your cache, it’s a good idea to restart your browser. This ensures that the changes take effect and allows you to access your site fresh, without any previous data interfering.
If the problem persists after clearing your cache,consider checking for plugins or themes that might be causing the conflict. Sometimes, outdated plugins can create issues that mimic a 401 error. Always ensure your site is updated to its latest version for optimal performance.
| Browser | Steps to Clear Cache |
|---|---|
| Google Chrome | Menu > More Tools > Clear browsing Data |
| Mozilla Firefox | Menu > Options > Privacy & Security > Clear Now |
| Safari | Preferences > Advanced > Develop > Empty Caches |
| Microsoft edge | menu > Settings > Privacy, search, and services > Clear browsing data |
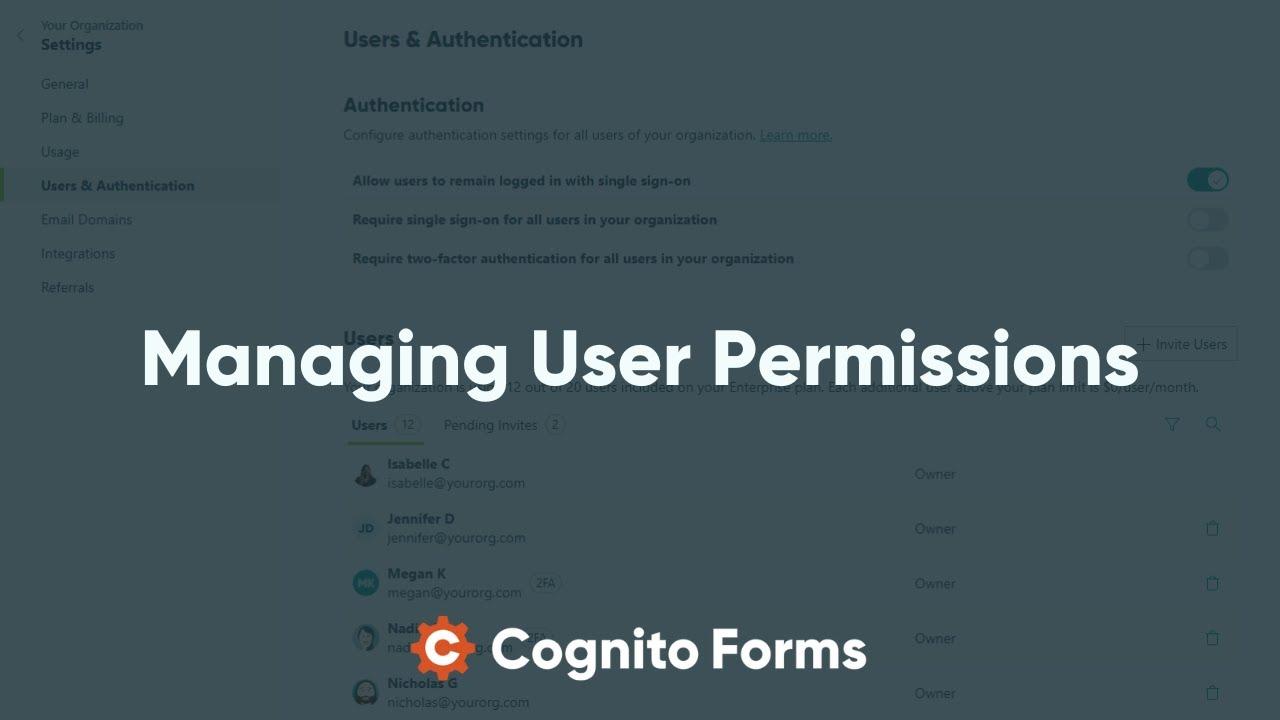
Checking User Permissions and Roles for Access Issues
When encountering a 401 error in WordPress, one of the first troubleshooting steps is to check user permissions and roles. This error frequently enough indicates that a user does not have the necessary rights to access certain content or features on your site. To resolve this, you’ll want to ensure that your user roles are correctly set up and that users have the appropriate permissions.
Start by reviewing the roles assigned to users in your wordpress dashboard. Navigate to Users and click on All Users. Here, you can see the list of all registered users along with their respective roles. Each role comes with specific capabilities that determine what actions a user can perform.The common roles include:
- Administrator: Full access to all settings and content.
- Editor: Can manage and publish posts, including those of other users.
- Author: Can publish and manage their own posts.
- Contributor: Can write and manage their own posts but cannot publish them.
- subscriber: Can only manage their profile and read content.
If a user is experiencing access issues,verify that their assigned role matches the actions they need to perform. You may need to adjust their role or even create a custom role if necessary. To edit a user’s role, simply click on their name, select the desired role from the dropdown menu, and click Update User.
Additionally, it’s crucial to consider any plugins that may interfere with user permissions. If you have installed membership or security plugins, they may impose additional restrictions. Review their settings to ensure they are not blocking access unintentionally.
Sometimes, conflicts between plugins can lead to unexpected behavior regarding user roles. If you suspect this might be the case,try disabling plugins one at a time to identify the culprit. If the 401 error disappears after disabling a specific plugin, you’ll need to reach out to the plugin’s support or look for alternatives that don’t conflict with your user permissions.
adequate user permission management is essential to maintaining a smooth experience on your wordpress site. By regularly reviewing user roles and addressing any conflicts with plugins, you can effectively eliminate access issues and enhance your site’s functionality.
Troubleshooting Plugins: Deactivating the Culprits
When faced with a 401 error in WordPress, one of the most common culprits can be problematic plugins. If you suspect a plugin might be the cause, deactivating them will help you pinpoint the issue. Here’s how you can tackle this step-by-step.
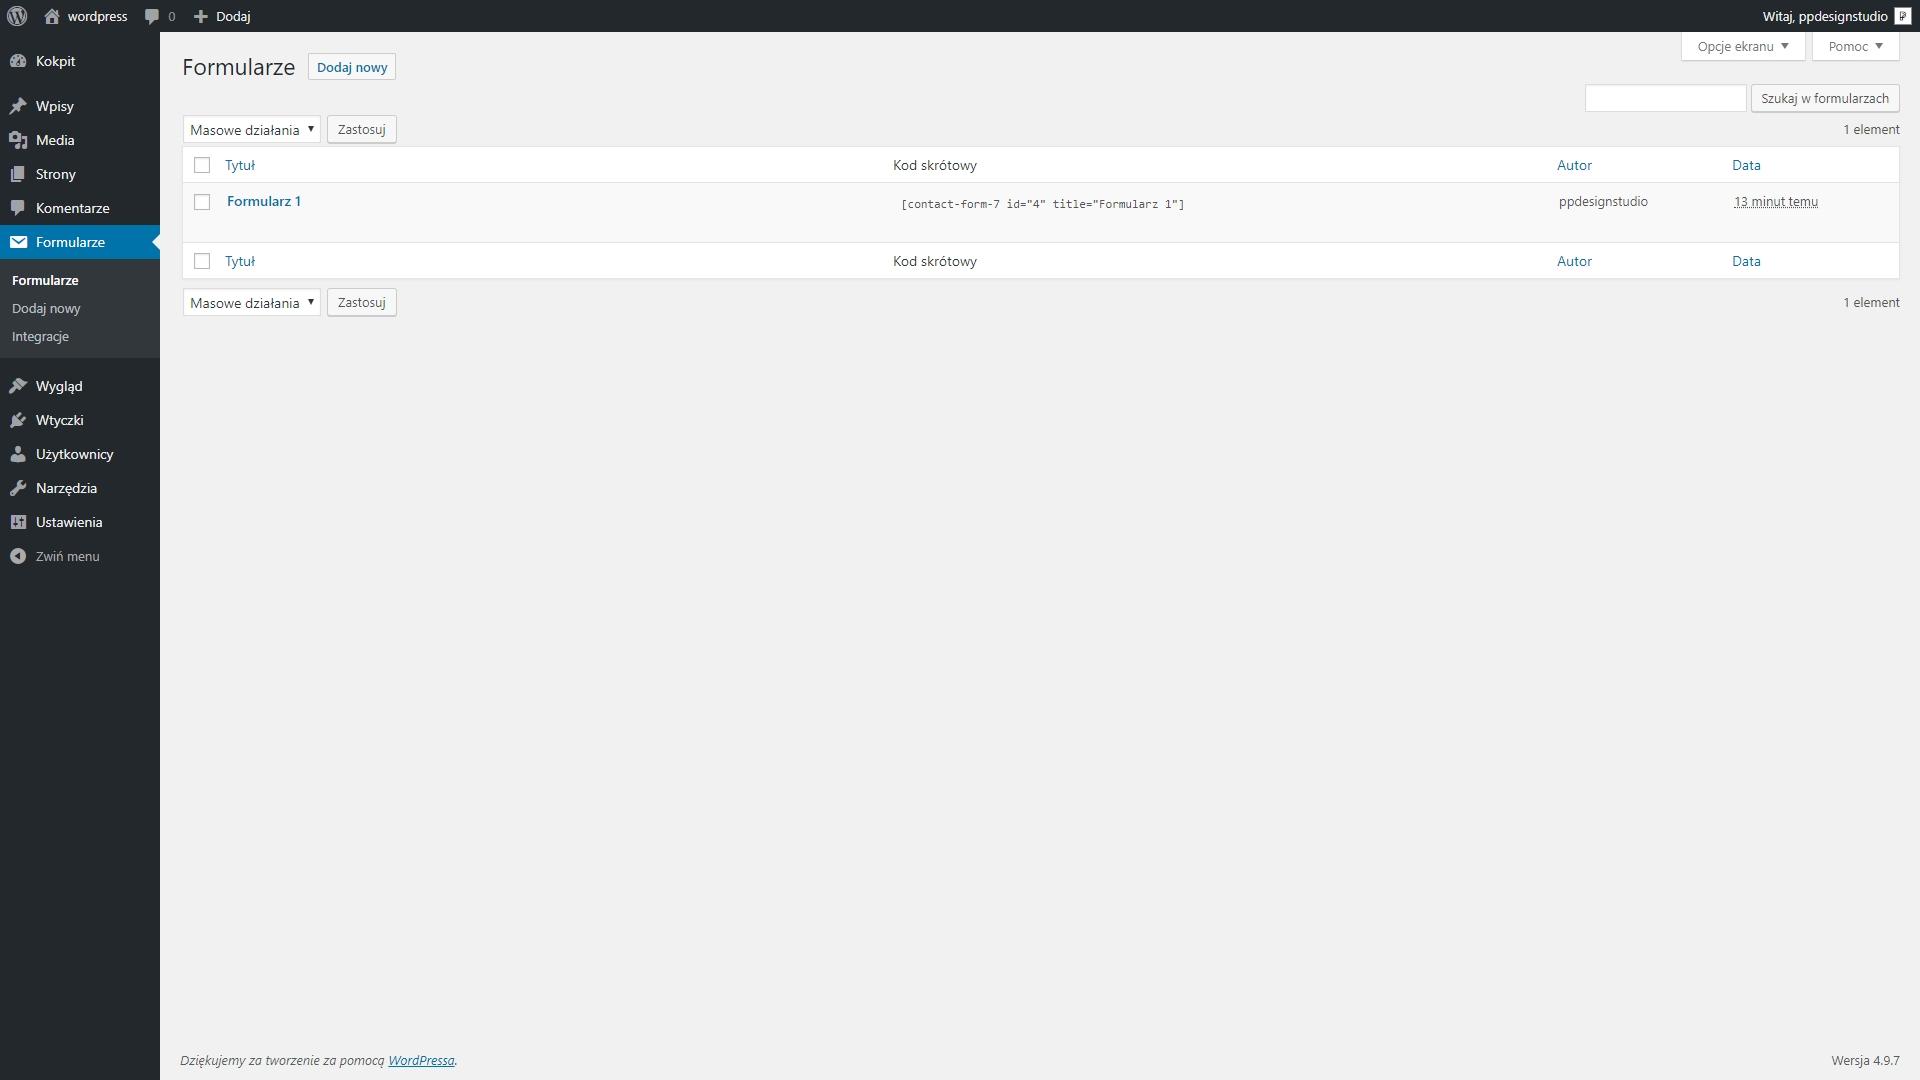
First, log into your WordPress dashboard and navigate to the Plugins section. Here, you can start by deactivating all plugins at once:
- Go to the Plugins menu.
- Select Installed Plugins.
- Check the box at the top to select all plugins.
- From the Bulk Actions dropdown, choose Deactivate and click apply.
Once all plugins are disabled, check your site again to see if the 401 error persists. If the error is resolved, it indicates that one of the deactivated plugins was the issue.To identify the culprit, you can reactivate the plugins one by one:
- Return to the Plugins section.
- Activate the first plugin on the list.
- After activating,check your website for the error.
- If the error reappears, that plugin is likely the problem.Deactivate it again.
- Continue this process until you find the offending plugin.
For easy reference,you can track your findings in a simple table:
| Plugin Name | Status |
|---|---|
| Plugin 1 | Active/Deactivated |
| Plugin 2 | Active/Deactivated |
| plugin 3 | Active/Deactivated |
Once you’ve identified the problematic plugin,you have a few options.You can either:
- Look for an option plugin that offers similar functionality.
- Check for updates for the problematic plugin, as developers often release patches for bugs.
- Contact the plugin developer for support if you wish to keep using it.
Taking these steps can save you time and frustration in resolving the 401 error, ensuring your site remains functional and accessible to all users.
Reviving your .htaccess File to Resolve Conflicts
When dealing with a 401 error, one of the culprits could be your.htaccess file. This file controls vital server directives, and if it’s misconfigured, it can lead to access issues for your site visitors. Here’s how to revive your .htaccess file effectively.
First, you’ll want to locate your.htaccess file. You can find it in the root directory of your WordPress installation. Using a file manager or FTP client, navigate to the public_html folder (or the folder where your WordPress is installed). If you don’t see the .htaccess file,it may be hidden. Most FTP clients have an option to view hidden files, so make sure to enable that.
Once you’ve accessed the file, make a backup before making any changes. This is crucial as it allows you to restore the original file if something goes wrong. to create a backup:
- Download the .htaccess file to your local machine.
- Rename it to .htaccess.backup for easy identification.
Now, it’s time to generate a fresh .htaccess file. You can simply rename or delete the existing one and then let WordPress create a new one. To do this, follow these steps:
- log in to your WordPress dashboard.
- Go to Settings > Permalinks.
- Without making any changes,click Save Changes.
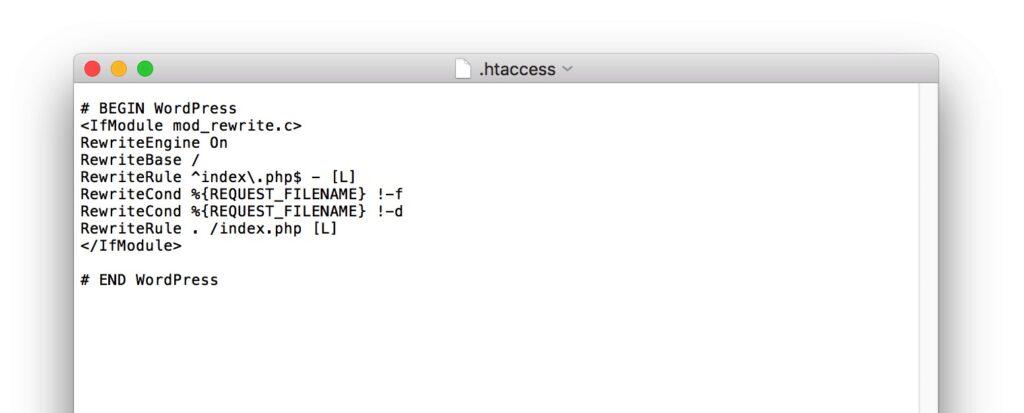
This action automatically regenerates a new .htaccess file with default WordPress rules.Below is a basic example of what your new.htaccess file should include:
| Directive | Description |
|---|---|
| # BEGIN wordpress | Begin WordPress rules |
| rewriteengine On | Enable rewriting engine |
| RewriteBase / | Set base URL for rules |
| RewriteRule ^index.php$ – [L] | Do not rewrite index.php |
| RewriteCond %{REQUEST_FILENAME} !-f | Check if file exists |
| RewriteCond %{REQUEST_FILENAME} !-d | Check if directory exists |
| RewriteRule . /index.php [L] | Redirect to index.php |
| # END WordPress | End WordPress rules |
After saving the new file,check your website to see if the 401 error persists. If the problem is resolved, you can start adding any custom rules or directives you previously had, one at a time, to identify if any specific rule is causing a conflict. By taking these steps, you can ensure your .htaccess file is optimized and conflicts are minimized.
How to Adjust Your Site’s Security Settings for Smooth Access
Adjusting your site’s security settings is crucial for maintaining smooth access while ensuring your WordPress site remains secure.A few minor tweaks can help eliminate those frustrating 401 errors, which often arise due to authentication issues. Here are some effective strategies to optimize your security settings without compromising user experience.
1.review User Permissions
Ensure that your user roles are correctly assigned. WordPress has a built-in user role management system that allows you to set permissions for different users. Here’s how to check:
- Navigate to the Users section in your WordPress dashboard.
- Review each user’s role and adjust if necessary.
- Remove any users who no longer require access.
Assigning appropriate roles minimizes the risk of unauthorized access while ensuring legitimate users have the access they need.
2.Check Your Security Plugins
Sometimes, security plugins can inadvertently block legitimate user access. To troubleshoot this:
- Disable your security plugins one at a time.
- Test the site after each deactivation to see if the error persists.
- If the error disappears, check the plugin settings for any overly aggressive security measures.
Adjust settings within the plugin to allow for smoother access while keeping your site secure.
3. Configure .htaccess File
Your .htaccess file plays a significant role in site security and access. Make sure it is correctly configured to avoid 401 errors:
| Action | Code Snippet |
|---|---|
| Allow access to specific IP addresses | allow from YOUR_IP_ADDRESS |
| Restrict access to the admin directory | deny from all |
Updating your .htaccess file, when necessary, can help refine user access while protecting sensitive parts of your site.
By following these steps, you can fine-tune your security settings effectively. Remember, a balanced approach to security fosters a better user experience and keeps your WordPress site running smoothly without those pesky 401 errors disrupting access.
When All Else Fails: Reinstalling wordpress Safely
If you’ve tired all troubleshooting methods and the persistent WordPress 401 error still haunts your site, it might potentially be time to consider a fresh start. Reinstalling WordPress can often resolve underlying issues that aren’t apparent through standard fixes. Though, it’s crucial to approach this process with care to prevent data loss and ensure a seamless transition.
Before diving into the reinstallation, take the following precautions:
- Backup Your Site: Utilize plugins like UpdraftPlus or BackupBuddy to create a complete backup of your database and files.
- Export Content: Go to the WordPress dashboard, navigate to Tools > Export, and download an XML file of your posts, pages, and media.
- Document Customizations: Make a note of any custom CSS, plugins, and theme modifications that you’ve implemented.
Once you’ve secured your site’s data, you can proceed with the reinstallation:
- Access Your Hosting Control Panel: Log in to your web hosting account and locate the File Manager or FTP client.
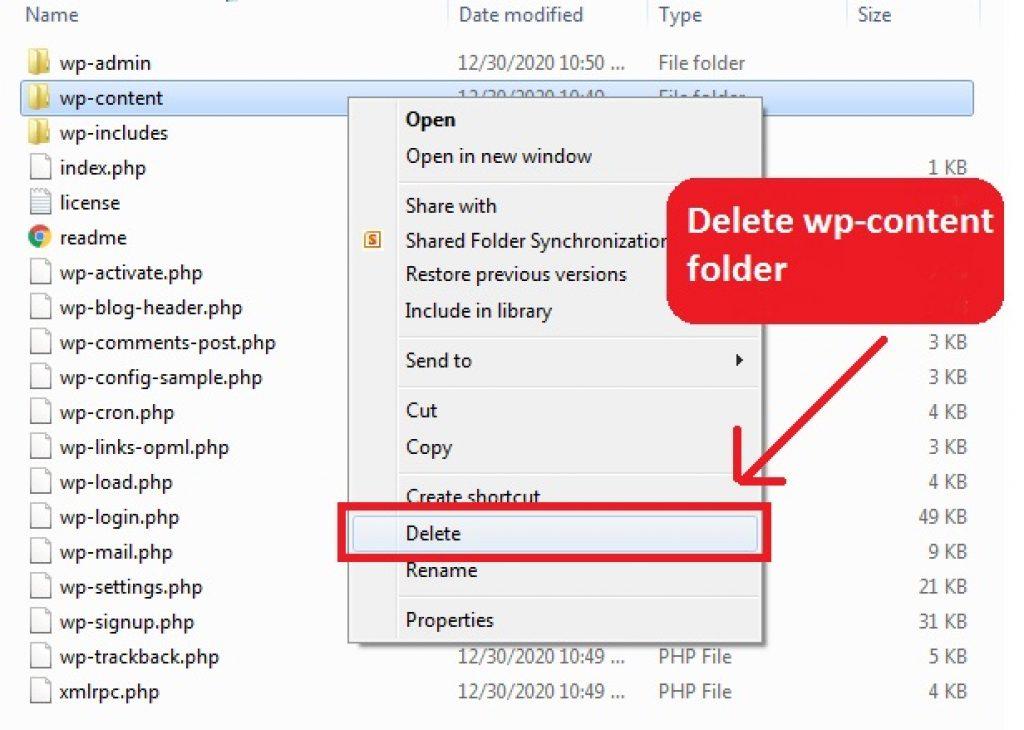
- Delete Existing WordPress Files: Carefully remove all WordPress files except for the
wp-contentfolder andwp-config.phpfile to retain your theme and plugins. - Download and Upload WordPress: Visit the official WordPress website, download the latest version, and upload the new files to your server.
- Run the Installation: Go to your website URL to initiate the installation process and follow the prompts to set up your site.
After reinstallation, you’ll want to ensure everything is functioning optimally:
- Restore Content: Import the XML file you previously exported back into your site via Tools > Import.
- Reinstall Plugins and Themes: Use your documented customizations to reinstall and configure your previous plugins and themes.
- Test Functionality: Check your site thoroughly to confirm that the 401 error is resolved and that all features work as intended.
By following these steps, you can effectively reinstall WordPress while preserving your valuable content. This process not only resolves persistent errors but also gives you a cleaner slate to work from, ultimately enhancing the overall performance of your site.
Preventing Future 401 Errors with Best Practices
To ensure you don’t face the frustrating 401 errors in the future, there are several best practices you can adopt. By proactively managing your WordPress site,you can enhance security while minimizing disruptions for your users.
Regularly update Your Plugins and Themes: Outdated plugins and themes can often lead to authentication issues. Make it a habit to check for updates regularly:
- Enable automatic updates wherever possible.
- Conduct routine checks on all installed plugins and themes.
- Remove any unused plugins to reduce vulnerabilities.
Implement Strong Access Controls: Protecting your site’s access points is crucial. Consider the following strategies:
- Utilize complex passwords and change them regularly.
- Employ a two-factor authentication method for added security.
- Limit login attempts to prevent brute-force attacks.
Monitor User Roles and Permissions: Not every user needs the same level of access. keep your user roles organized:
| User Role | Access level |
|---|---|
| Administrator | Full Access |
| Editor | Edit Content |
| Subscriber | View Content |
Regularly review user roles to ensure that only necessary permissions are granted.This not only helps in preventing unauthorized access but also reduces the risk of 401 errors.
Optimize Your Server settings: Sometimes, server misconfigurations can lead to authentication errors. Here’s what to check:
- Ensure your .htaccess file is properly configured.
- Review your server’s security settings and response messages.
- Consider consulting with your hosting provider for optimal settings.
By following these best practices,you can considerably reduce the risk of encountering 401 errors in the future,ensuring a smoother experience for both you and your visitors.
Seeking Help: Knowing When to Contact Support
When navigating the intricacies of wordpress, encountering a 401 error can be frustrating. While some issues may be resolved with basic troubleshooting, others might require the expertise of support professionals. It’s essential to recognize the signs that indicate it’s time to reach out for help.
Here are some indicators that can guide you in deciding when to contact support:
- Persistent Error: If the 401 error continues to reappear despite following common troubleshooting steps, it’s a clear signal that deeper issues may be at play.
- Complex Error Messages: Encountering complex error messages that you don’t understand can be daunting. These frequently enough require technical knowledge to resolve.
- Plugin Conflicts: If you suspect that a recently installed plugin is causing the issue, but you’re unsure how to identify or resolve the conflict, it’s wise to seek assistance.
- Need for Custom Solutions: Sometimes, the standard fixes don’t apply to your specific case, especially if your site has custom configurations. In such situations, expert help can be invaluable.
Before reaching out, gather as much information as possible.Document the steps you’ve taken to troubleshoot the issue, and include any relevant error messages or behaviors observed. This will help the support team understand your situation better and expedite the resolution process.
Additionally, consider your hosting provider’s support options. Many offer 24/7 assistance and have dedicated teams for WordPress-related issues. If you’re on a premium hosting plan, you might have access to specialized WordPress support, which can be particularly beneficial.
Ultimately, knowing when to contact support can save you time and reduce frustration. While self-troubleshooting is a valuable skill, leveraging the expertise of professionals can lead to a swift resolution and restore your site to full functionality.
Frequently Asked questions (FAQ)
Q&A: wordpress 401 Error – How to Fix It (Step-by-step Guide)
Q: What is a WordPress 401 Error?
A: A WordPress 401 Error is an HTTP status code that indicates unauthorized access. Essentially, it means that the server is refusing to let you view the requested resource because it requires authentication that hasn’t been provided.
Q: Why am I seeing this error on my WordPress site?
A: This error usually pops up when there’s an issue with your login credentials or if there’s a problem with the permissions set for your site. It could also be caused by a plugin conflict or a misconfiguration in your .htaccess file.
Q: How can I fix the 401 Error?
A: Don’t worry, fixing a 401 Error is usually straightforward! Start by checking your login credentials to ensure they are correct. If that doesn’t work, you can try clearing your browser cache or cookies. If those steps don’t resolve the issue, you may need to look into your .htaccess file or disable plugins that might be causing conflicts.Q: What’s the first step I should take when I encounter this error?
A: The first thing you should do is double-check your username and password. Sometimes, a simple typo can lead to this error. if you’re sure they’re correct, then proceed to clear your browser cache and cookies as the next step.
Q: How do I clear my browser cache?
A: Clearing your cache varies depending on the browser you use, but generally, you can find the option in your browser settings under “Privacy” or “History.” Look for an option to clear browsing data, and make sure to select cache and cookies before confirming.
Q: What if clearing the cache doesn’t work?
A: If that doesn’t do the trick, check your .htaccess file. Sometimes, this file can become corrupted. You can access it through your FTP client and rename it to something like .htaccess_old. Then, try reloading your site; if it effectively works, you’ll need to generate a new .htaccess file by going to your WordPress admin settings!
Q: Can plugins cause a 401 Error?
A: Absolutely! Sometimes, plugins don’t play nice together, or one might conflict with your theme. To troubleshoot, temporarily disable all your plugins and see if the error goes away. If it does, re-enable them one by one to identify the culprit.
Q: Should I contact my hosting provider for help?
A: If you’ve tried all the troubleshooting steps and are still stuck, reaching out to your hosting provider is a great idea. They can check server-level issues or configurations that you might not have access to.
Q: How can I prevent a 401 Error from happening in the future?
A: To prevent future occurrences, keep your WordPress, themes, and plugins updated. Regular maintenance and backups can also help you quickly recover from issues when they arise. Plus, using strong, unique passwords can help avoid authentication errors.
Q: Is there anything else I should know?
A: Just remember that encountering a 401 Error is common and usually fixable. Don’t panic! Follow the steps outlined in our extensive guide, and you’ll be back in control of your site in no time. Always make sure to back up your site before making significant changes, so you’re prepared for anything!
feel free to use this Q&A format to create a more engaging and informative article! Let me know if you need any more information or adjustments!
The Way Forward
And there you have it—your comprehensive guide to tackling the WordPress 401 error! We’ve walked through every step, from identifying the root of the problem to implementing effective solutions. Remember, a little troubleshooting can go a long way in keeping your website running smoothly.
If you ever find yourself stuck again, don’t hesitate to revisit this guide or reach out to the WordPress community; there’s a wealth of knowledge at your fingertips. Your website is an essential part of your online presence, and ensuring it’s accessible to everyone is crucial.
So, roll up your sleeves and take action! Fix that error and get back to what you love—creating and sharing amazing content. You’ve got this! And as always, keep learning and exploring the marvelous world of WordPress. Happy blogging!