Are you ready to take your online learning platform to the next level? If you’re using Eduma,one of the most popular WordPress themes for education,you’ve probably heard about the powerful Custom Layout Menu feature. But what exactly is it, and how can it enhance your website? In this step-by-step guide, we’ll walk you through everything you need to know to make the most of this fantastic tool. Whether you’re looking to create a more user-friendly experience for your students or simply want to showcase your courses in an engaging way, customizing your layout menu can make a world of difference. so grab a cup of coffee,and let’s dive into the exciting world of Eduma’s Custom Layout Menu—your ultimate guide to transforming your online education space awaits!
Understanding the Benefits of Custom Layout Menus in Eduma
Custom layout menus in Eduma provide a variety of advantages that can significantly enhance the user experience on your educational website. These menus offer a tailored approach to navigation, making it easier for visitors to find the content they need. By utilizing custom layouts, you create a more intuitive user journey that can keep learners engaged and reduce bounce rates.
One of the primary benefits is flexibility. Custom layout menus allow you to showcase specific courses, categories, or resources that are most relevant to your audience. You can highlight featured courses or upcoming events directly on the menu, ensuring that important information is always just a click away. This level of customization can lead to increased enrollment and participation rates.
Moreover, by organizing your menu according to user needs, you can enhance the overall usability of your site. Users frequently enough appreciate when they can navigate through intuitive categories rather than scrolling through endless pages. This organization not only helps in maintaining a clean layout but also encourages users to explore more of your offerings. A well-structured menu can lead to longer site visits and better retention rates.
Additionally, custom layout menus can improve your site’s SEO performance.By using relevant keywords in your menu structure, you can boost your visibility on search engines. A strategic approach to menu design can help search engines better understand the hierarchy and importance of your content, which can positively influence your rankings.
To illustrate how effective custom layout menus can be, consider the following table that compares standard menus wiht custom menus:
| Feature | Standard Menu | Custom Menu |
|---|---|---|
| Flexibility | Limited options | Fully customizable |
| user Experience | Generic navigation | Tailored for users |
| SEO Benefits | minimal impact | Enhanced rankings |
| Engagement | Variable | Higher interaction rates |
leveraging the power of custom layout menus can transform how users interact with your educational content.By focusing on user needs, enhancing SEO, and providing flexibility, you can create a more engaging and effective online learning environment.
Getting Started with Your Eduma Custom Layout Menu
Customizing your layout menu with Eduma is not just about aesthetics; it’s an possibility to enhance user experience and engagement on your site. the custom layout menu allows you to organize your content in a way that is intuitive and visually appealing. let’s dive into how you can get started effectively.
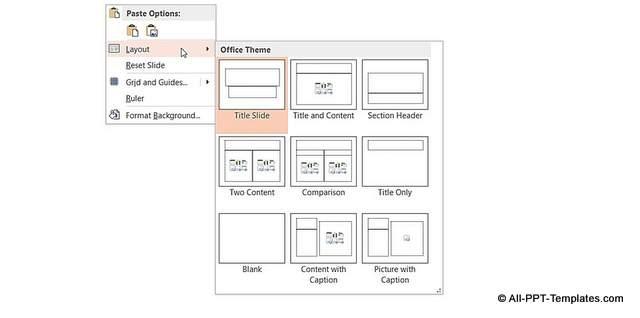
First, you’ll want to access the theme options. Navigate to Appearance > Menus within your WordPress dashboard. Here, you can create a new menu or edit an existing one. Once you have your menu set up, it’s time to add items:
- Pages: Add essential pages like Home, About, and Courses.
- Posts: Link to your latest blog posts to keep your content fresh.
- Custom Links: Include links to external resources or important announcements.
Next, consider how to style your menu. Eduma provides robust options to customize the appearance of your layout menu. You can adjust colors, fonts, and sizes directly in the theme customization panel. Here’s a rapid overview of the styling options:
| Feature | Description |
|---|---|
| Color Schemes | Select from preset schemes or create your own. |
| Font Styles | Choose fonts that align with your brand identity. |
| Hover Effects | Add interactive effects for a modern touch. |
After styling, it’s crucial to ensure your menu is user-friendly. Test the layout on various devices to confirm it’s responsive. Remember to prioritize accessibility by using clear labels and logical grouping of menu items. You want your visitors to navigate effortlessly.
don’t forget to save your changes and preview your site to see the custom layout menu in action.Engage with your audience by asking for feedback. This step will help you refine your menu further, ensuring it meets the needs of your users while fulfilling your website goals.
Exploring the User-Friendly Interface of Eduma
When it comes to creating an engaging online learning environment, the layout of your platform plays a pivotal role. Eduma offers a custom layout menu that simplifies navigation and enhances the user experience. The interface is designed with the end-user in mind, making it easy for both educators and students to find their way around seamlessly. Let’s dive into the key features that make Eduma’s interface so user-friendly.
One of the standout features of Eduma’s interface is its drag-and-drop functionality. This allows users to easily rearrange elements on their pages without any coding knowledge. Whether you’re adjusting the order of courses, moving widgets, or customizing your homepage, the intuitive design ensures that changes can be made quickly and efficiently. This flexibility empowers educators to tailor their sites to meet specific needs and preferences.
Another significant aspect is the responsive design that Eduma employs. Regardless of the device being used—be it a smartphone, tablet, or desktop—users can expect a consistent and pleasant browsing experience. This is essential in today’s mobile-first world, where learners ofen access content on various devices.The clarity of the layout keeps users engaged, minimizing frustration and maximizing learning.
To further illustrate the ease of use, let’s break down the menu options available in the custom layout:
| Menu Option | Description |
|---|---|
| Dashboard | Your control center for managing courses, students, and settings. |
| Courses | Create, edit, and manage courses with ease. |
| Students | Access student profiles and monitor progress. |
| Settings | Customize platform settings to suit your needs. |
Moreover, the customization options are extensive. Users can change colors, fonts, and layouts to reflect their brand identity. This not only makes the platform more visually appealing but also fosters a sense of ownership for educators and institutions. By allowing for these personal touches,Eduma transforms a standard learning management system into a unique online space.
the support resources available are another testament to Eduma’s commitment to user-friendliness. Comprehensive documentation, video tutorials, and a responsive support team ensure that users can navigate their way through customizations with confidence. By removing barriers to learning and implementation, Eduma truly stands out as a user-centric platform in the e-learning landscape.

Step-by-Step Guide to Creating Your First Custom Menu
Creating a custom menu in your Eduma theme can enhance the navigation experience for your users. Follow these steps to craft a menu that not only looks good but also functions seamlessly.
Start by Accessing the Menu Settings
First, log in to your WordPress dashboard. Navigate to appearance > Menus. Here, you’ll find the interface designed specifically for crafting your custom menu.
Create a New menu
- Click on the Create a new menu link.
- Provide a name for your menu that reflects its purpose, such as “Main Navigation” or “Footer Links”.
- Once named, click Create Menu to proceed.
Adding Items to Your Menu
Now that your menu is created, it’s time to populate it with items:
- On the left side of the Menus page, you’ll see boxes containing your Pages, Posts, custom Links, and Categories.
- Select the items you want to add to your menu by checking the box next to each item.
- Click the Add to Menu button, and watch your selected items appear on the right side.
Organize Your Menu
To make your menu user-friendly, you can drag and drop items to reorder them. You can also create sub-items (dropdowns) by simply dragging an item slightly to the right under the parent item. this will help in creating a clean and organized navigation structure.
Set Your Menu Location
Once you are satisfied with your menu structure, it’s essential to assign it to a location:
- Find the Menu Settings section below the menu structure.
- Select the location where you want your menu to appear, such as the Header or Footer.
- Click Save Menu to finalize your custom layout.
Preview and Adjust
it’s always a good idea to preview your site to see how the menu looks in action. Test the links to ensure they work correctly and make adjustments if necessary. Having a well-functioning menu can significantly improve user experience and navigation on your site.
Essential tips for Organizing menu Items Effectively
When it comes to organizing your menu items, clarity and ease of navigation are paramount.start by grouping similar items together. This not only helps users find what they’re looking for but also creates a smoother browsing experience. For instance,if you’re running a restaurant website,consider categorizing your menu items into appetizers,main courses,and desserts. Grouping can also extend to dietary preferences, such as vegan, gluten-free, or spicy options, which can attract a more diverse audience.
Another effective strategy is to use descriptive labels for your menu items. Instead of generic terms, employ catchy and informative titles that intrigue potential customers. for example, instead of labeling a dish simply as “chicken,” you might consider “Grilled lemon Herb Chicken with Seasonal Vegetables.” This not only enhances the appeal but also provides essential information about what to expect.
Utilizing images can significantly enhance the menu’s visual appeal. People are naturally drawn to visuals,so consider adding high-quality images of your dishes. Ensure that these images are well-lit and showcase the food attractively. A good rule of thumb is to feature images of your best-selling items prominently, as this can drive sales. To maintain uniformity, keep the style and size of the images consistent throughout your menu layout.
To further enhance user interaction, consider implementing hover effects or quick view options on your menu items. This feature allows visitors to quickly see more details about a dish without leaving the main menu page. Additionally,integrating call-to-action buttons like “Order Now” or “See Today’s Specials” can enhance customer engagement and encourage immediate action.
Lastly, always remember to keep your audience in mind. Regularly review and adjust your menu based on customer feedback and emerging trends. This dynamic approach not only keeps your offerings fresh but also shows your audience that you value their preferences. Consider using A/B testing to determine which layouts or items resonate most with your visitors, ensuring that your menu is not just functional but also a powerful marketing tool.
Adding Custom Icons and Styles to Enhance Your Menu
Enhancing your menu with custom icons and styles can significantly elevate the user experience,giving your site a distinct personality. Integrating unique icons is an excellent way to capture attention and convey critically important information at a glance. To start, consider the following steps:
- Choose Your Icons: Select icons that align with the theme of your site and resonate with your audience. Websites like FontAwesome and IconFinder offer extensive libraries of icons that are perfect for customizing your menu.
- Upload and Configure: Use the WordPress media uploader to add your selected icons to your site. After uploading, configure their alignment and size to ensure they fit seamlessly into your menu layout.
- Use CSS for Custom Styling: Modify the look of your menu items using CSS. Add background colors, hover effects, and font styles to match your brand’s identity.
Here’s an example of how to apply CSS to your menu items:
.menu-item {
    background-color: #f9f9f9;
    border-radius: 5px;
    padding: 10px;
}

.menu-item:hover {
    background-color: #e0e0e0;
    transition: background-color 0.3s;
}
To help visualize your changes, here’s a simple table that outlines the parameters for icon customization:
| Icon Name | File Format | Size (px) | Color |
|---|---|---|---|
| Home | SVG | 24 | #0073AA |
| Courses | PNG | 24 | #FF5722 |
| contact | JPG | 24 | #4CAF50 |
By placing significant attention on the aesthetics of your menu, you not only enhance its visual appeal but also improve navigation. Users are more likely to engage with a well-styled menu that communicates professionalism and clarity. So, don’t hesitate to get creative with your icons and styles; the results will speak for themselves!

Testing and Previewing Your custom Layout Menu
Once you’ve designed your custom layout menu in Eduma, it’s crucial to put it to the test. This step is about ensuring everything looks and functions as intended. Start by navigating to the front end of your website where your new menu is deployed. This will give you a firsthand look at the user experience.
To effectively test your layout menu, consider the following elements:
- responsiveness: Check how your menu behaves on various devices, including desktops, tablets, and smartphones.
- Navigation Ease: Ensure that all links are functioning correctly and that visitors can easily find their way around.
- Visual Appeal: Evaluate the aesthetics of your menu. Are the colors, fonts, and layout aligned with your website’s overall theme?
- Loading Speed: Confirm that the addition of your custom menu does not negatively impact the loading times of your site.
After your initial tests, gather feedback from users who interact with your site.You might consider sending out a brief survey or simply asking friends and colleagues for their opinions. Pay special attention to their suggestions regarding usability or design tweaks that could enhance the experience even further.
Next, make necessary adjustments based on the feedback you’ve gathered. Utilize the WordPress Customizer to easily implement these changes. It offers real-time previews, which means you can instantly see how modifications affect your layout. This feature allows for a more agile design process, saving you time and effort.
Lastly, don’t forget to document your process! Keeping a record of what works and what doesn’t will not only streamline future updates but also provide insights into user preferences over time. As you continue refining your custom layout menu, you’ll create a more engaging environment for your visitors.
Best Practices for Optimizing Menu Performance
To ensure an efficient and user-friendly menu experience, consider applying the following best practices:
- Simplify Your menu structure: A streamlined menu with clear categories helps users find what they’re looking for without confusion. Avoid cluttering the menu with too many options; instead, focus on the essentials.
- Utilize Descriptive Labels: Use intuitive and straightforward labels that accurately describe the content. This not only improves usability but also enhances SEO rankings.
- Implement a Responsive Design: Ensure that your custom layout adapts seamlessly to different devices. A responsive menu design will provide a consistent user experience across desktops, tablets, and smartphones.
- Leverage Mega Menus: For sites with a lot of content, mega menus can be incredibly beneficial. They allow you to display multiple options in a single, organized dropdown, making navigation easier.
- Integrate Search Functionality: Adding a search feature within your menu can significantly enhance user experience, allowing visitors to find specific content quickly without navigating through multiple layers.
Along with the structural elements, consider optimizing the performance of your menu through:
- Regular Testing: Monitor how users interact with your menu. A/B testing different layouts and styles can provide valuable insights into what works best for your audience.
- Feedback Collection: Encourage user feedback regarding the usability of your menu. This constructive criticism can guide further enhancements and refinements.
- Performing regular Updates: Keep the menu updated with current content and remove outdated links. An up-to-date menu reflects a professional and trustworthy website.
Lastly, consider how your menu impacts site speed:
| Action | Impact on Performance |
|---|---|
| Minimize JavaScript | Improves loading speed and reduces lag |
| Optimize Images | Reduces the overall page weight, speeding up rendering |
| Limit CSS Files | Fewer requests lead to faster load times |
By implementing these strategies, you can optimize your menu’s performance, enhancing both the user experience and the overall functionality of your website.
Troubleshooting Common Issues with Custom Menus
When working with custom menus in Eduma, you may encounter a few hiccups along the way. Don’t worry—most issues can be resolved with some simple troubleshooting steps. Here are some common problems you might face and how to address them:
- Menu Not Displaying: If your custom menu is not appearing, ensure that you’ve assigned it to the correct location in the theme settings. Navigate to Appearance > Menus and check if the menu is set to display in the desired theme location.
- Items Missing from Menu: Sometimes, you may find that certain items you’ve added are not showing up. Double-check that the items are still checked in the menu settings and save your changes to refresh the menu output.
- Menu styling Issues: If the styling of your menu doesn’t match your expectations, inspect the CSS settings. You may need to add custom CSS to override the default styles. Use the WordPress Customizer or a dedicated CSS plugin for adjustments.
Additionally, clearing your browser cache can resolve display issues, as outdated cached versions may not reflect recent changes you made to the menu. To clear your cache, simply go to your browser settings and clear browsing data, ensuring that cached images and files are included in the process.
If you encounter any persistent issues, consider the following table summarizing some additional troubleshooting tips:
| Issue | Solution |
|---|---|
| Menu is not responsive | check mobile settings and ensure your theme supports responsive menus. |
| Links not working | Verify that the URLs are correct and properly formatted. |
| Dropdown not functioning | Ensure that JavaScript is enabled and that there are no conflicting plugins. |
By following these troubleshooting steps, you can effectively resolve most common issues encountered while working with custom menus in Eduma. Remember that patience is key; sometimes, a fresh look after making adjustments can reveal the solution you need!
Final Touches: Launching Your Custom Layout Menu with Confidence
Once you’ve meticulously crafted your custom layout menu, it’s time to take those final steps before launching it to your audience. Confidence is key here—after all, this is the face of your site! To make sure everything runs smoothly, consider the following essential tips:
- Preview, Preview, preview: before going live, make sure to preview your menu on various devices. Check how it looks on desktops, tablets, and smartphones to ensure it’s responsive and visually appealing everywhere.
- Test Functionality: Click every link and button in your menu to guarantee that they perform as was to be expected.A faulty link can turn away visitors!
- Gather Feedback: If possible, ask a few trusted users to review your layout. Their fresh perspective can highlight areas for betterment that you may have overlooked.
Now, if you’re feeling a little unsure about your launch, here’s a simple checklist to ease your mind:
| Checklist Item | Status |
|---|---|
| Menu Links Functional | ✔️ |
| Responsive Design Checked | ✔️ |
| Feedback Collected | ✔️ |
| SEO Optimized | ✔️ |
With this checklist in hand, you can reassure yourself that you haven’t missed any crucial details.Remember,your custom layout menu is an extension of your brand; it should reflect your unique identity. Don’t shy away from adding personal touches that resonate with your audience.
after you hit that ‘launch’ button, keep an eye on user engagement. Monitor how visitors interact with your menu and be ready to refine and adjust as necessary. Continuous improvement is part of the game, and your users will appreciate your commitment to enhancing their experience.
Frequently Asked Questions (FAQ)
Q&A: How To Use Custom Layout Menu Eduma: Step-by-step Guide
Q1: what is the Eduma theme, and why should I consider using it?
A1: Grate question! Eduma is a powerful WordPress theme designed specifically for educational institutions, online courses, and e-learning platforms. It’s user-friendly and packed with features that can definitely help you create a professional-looking website without any coding knowledge. If you want to elevate your online presence, Eduma is definitely worth considering!
Q2: What exactly is a custom Layout Menu in Eduma?
A2: The Custom Layout Menu in Eduma allows you to personalize the navigation menu of your website. You can add, remove, or rearrange menu items to suit your needs, making it easier for your visitors to find what they’re looking for. A customized menu can significantly enhance user experience, helping to retain visitors and increase engagement.
Q3: How do I access the Custom Layout Menu feature?
A3: Accessing the Custom Layout Menu is simple! First, log into your WordPress dashboard. From there, navigate to “Appearance” and then select “Menus.” You’ll see options to create or edit menus. Just click on the menu you want to customize, and you’re ready to go!
Q4: Can you walk me through the steps of customizing my menu?
A4: Absolutely! Here’s a quick step-by-step guide:
- Create a New Menu: Click on “Create a new menu,” give it a name, and click the “Create Menu” button.
- Add Menu Items: On the left, you’ll see various options like Pages, Posts, Custom Links, and Categories. Check the boxes next to the items you want to add and click “Add to Menu.”
- Organize Your Menu: Drag and drop the menu items to rearrange them. You can also create sub-items by dragging them slightly to the right under a parent item.
- Set Menu Location: Don’t forget to assign your menu to a specific location in your theme by checking the appropriate box under “Menu settings.”
- Save Your Menu: Click the “Save Menu” button, and voila! Your custom layout is all set.
Q5: Are there any tips for creating an effective menu?
A5: Definitely! Here are a few tips to keep in mind:
- Keep It Simple: Aim for a clear and concise menu. Too many options can overwhelm visitors.
- Prioritize Critically important Pages: Place the most important pages at the top for easy access.
- Use Descriptive Labels: Make sure your menu item labels clearly describe what visitors can expect when they click on them.
- Test and Iterate: Don’t be afraid to ask for feedback from users and make changes as needed.
Q6: What if I run into issues while customizing my menu?
A6: no need to worry! If you encounter any problems,you can check Eduma’s extensive documentation or their support forums for troubleshooting tips.Additionally, many users find that reaching out to the support team can quickly resolve any technical hiccups.
Q7: How can I ensure that my custom layout menu is mobile-friendly?
A7: Great question! Eduma is designed with responsive design principles, meaning your custom menu should automatically adjust for mobile devices.Though, it’s always good to test it out by previewing your site on different devices.Make sure the menu remains easy to navigate on smaller screens!
Q8: Is there anything else I should know about the Custom Layout Menu?
A8: Yes! Remember that your menu is a reflection of your brand, so make it visually appealing. You can also consider incorporating icons or dividers to enhance the look.Plus, keep an eye on analytics to see how users interact with your menu. This data can provide valuable insights for future adjustments.
Q9: Why should I take the time to customize my menu?
A9: Customizing your menu may seem like a small task, but it can have a huge impact on user experience.A well-organized and easy-to-navigate menu can keep visitors on your site longer, encourage them to explore different sections, and ultimately lead to higher conversion rates—whether that means more course sign-ups or inquiries.
Q10: Ready to dive in?
A10: Absolutely! With this step-by-step guide, you’re all set to customize your Eduma menu. Dive in, get creative, and make your website truly yours. Remember, a fantastic user experience starts with a well-structured menu!
Closing Remarks
Conclusion: Unlock the Full Potential of Your Eduma Experience!
And there you have it! With our step-by-step guide on how to use the Custom Layout Menu in Eduma, you’re now equipped to transform your website into a dynamic and user-friendly platform that truly reflects your brand.Whether you’re looking to create engaging learning experiences or simply want to enhance navigation, customizing your layout can make all the difference.
Remember, the power to captivate your audience lies in your hands! Don’t hesitate to experiment with different styles and arrangements—after all, it’s all about creating an environment that resonates with your learners.
So, what are you waiting for? Dive in, start customizing, and watch your Eduma site come to life like never before! If you have any questions or want to share your own tips and tricks, feel free to drop a comment below. Happy customizing!