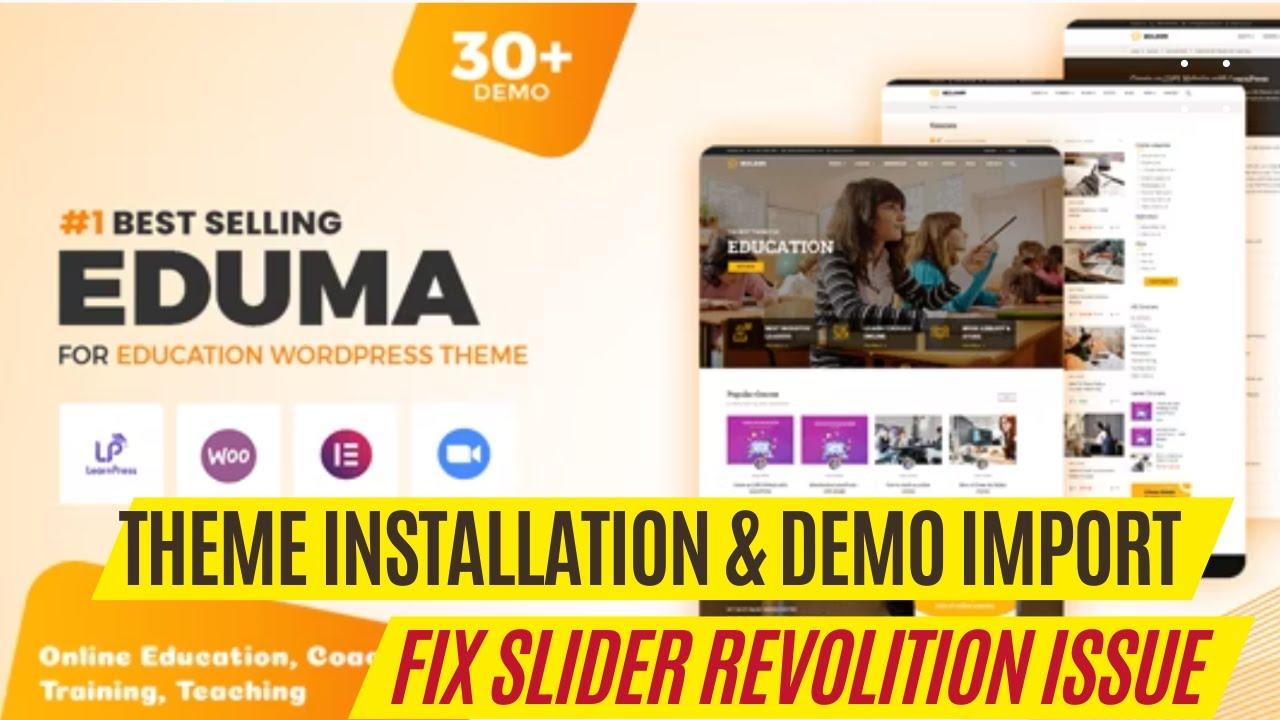
Are you considering diving into the world of Eduma and want to make the most of your time? Importing a demo can seem like a daunting task, especially if you’re unfamiliar with the process.But fear not! In this article, we’ll break down exactly how much time you’ll need to import a demo in Eduma, making it easier for you to hit the ground running. Whether you’re a seasoned developer or a complete beginner, understanding the timeline for this process can save you precious hours and help you avoid needless headaches. So, grab a cup of coffee, settle in, and let’s explore how you can efficiently import your Eduma demo and start creating your dream educational platform!
Understanding the Eduma Demo Import Process
Importing demo content in Eduma can be a smooth and straightforward process, especially if you follow the right steps. The time required to import a demo typically ranges from 10 to 30 minutes, depending on several factors. let’s explore these factors to help you better understand what to expect during the demo import process.
First and foremost, your hosting surroundings plays a crucial role in the speed of the demo import. If you are using a high-performance hosting provider, the import process can be significantly quicker. Here are a few considerations to keep in mind:
- Server Performance: A server with higher resources will handle the import file more efficiently.
- PHP Version: Make sure you are running the recommended PHP version for optimal compatibility.
- Storage Space: Ensure you have enough disk space to accommodate the demo files and media.
Another important factor is the size of the demo content you are importing. Eduma offers various demos, some of wich may include extensive media files such as images and videos. The following are key points to consider:
| Demo Type | Estimated Import Time |
|---|---|
| Basic Demo | 10-15 minutes |
| Advanced Demo | 20-30 minutes |
| full Site Import | 30+ minutes |
your internet connection and the WordPress setup can also influence the import duration. A stable and fast internet connection is essential for downloading demo files seamlessly. Additionally, having plugins that optimize performance can reduce load time. Always ensure to:
- Deactivate unnecessary plugins before starting the import.
- Clear your cache to eliminate any potential conflicts.
- Backup your site beforehand to prevent data loss.
by carefully considering your hosting environment, the size of the demo content, and optimizing your WordPress setup, you can streamline the import process. With the right planning, you’ll have your Eduma demo up and running in no time!
Key Factors Influencing Import Time
When considering the importation of a demo in Eduma, several key factors play a crucial role in determining how long the process will take. Understanding these elements can help you set realistic expectations and streamline your workflow.
1.Server Performance: The performance of the server hosting your website significantly impacts the import time. if your server has limited resources, such as low CPU or insufficient RAM, the import process may slow down. It’s essential to ensure your hosting plan is robust enough to handle the demands of importing a demo.
2. Demo Size: The size of the demo you are importing is another important factor. Larger demos with more content, images, and features can take much longer to upload and configure. Always check the demo specifications to gauge the expected import time and prepare your server accordingly.
3. Internet Connection: Your internet connection speed also plays a pivotal role in how quickly the demo can be imported. A slower connection can lead to delays in downloading files from the server and may require multiple attempts if the connection is unstable. Consider testing your connection before starting the import.
4. Plugin Conflicts: The presence of incompatible or outdated plugins can significantly hinder the import process. Ensure all plugins are updated and compatible with the Eduma theme before initiating the demo import. This will not only speed up the process but also reduce the risk of errors during the import.
5. Content Management System (CMS) Settings: The configuration of your CMS can affect the import time, especially if there are several custom settings or modifications. Check your CMS settings to ensure they are optimized for importing large amounts of data and adjust them if necessary.
| Factor | Impact on Import Time |
|---|---|
| Server Performance | High |
| Demo size | Moderate |
| Internet Connection | High |
| Plugin Conflicts | Variable |
| CMS Settings | moderate |
Step-by-Step Guide to Importing your Eduma Demo
Importing your Eduma demo can be a straightforward process if you follow the right steps. here’s a clear guide to help you navigate through it smoothly.
First, ensure that your WordPress setup is fully prepared:
- Backup Your Site: Before making significant changes, it’s crucial to back up your existing site. This way, you can easily restore it if anything goes wrong.
- Check System Requirements: Verify that your server meets the necessary requirements for the Eduma theme.
- Install Required Plugins: Make sure all recommended plugins are installed and activated to ensure full functionality.
Once your site is ready, you can begin the import process:
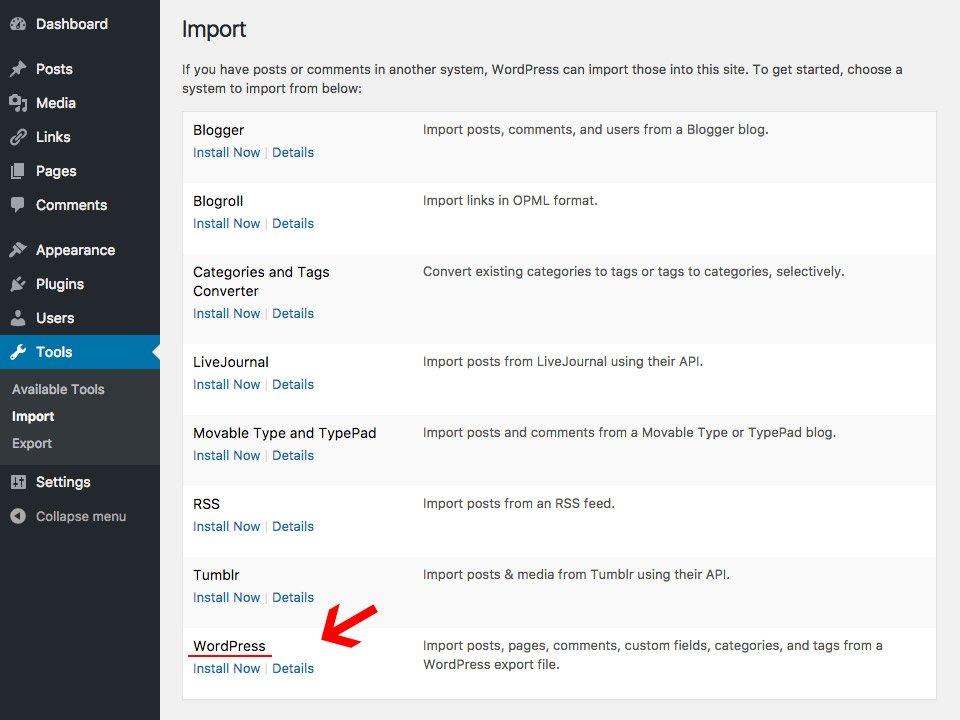
- Access the Eduma Dashboard: Navigate to your WordPress dashboard and find the Eduma theme options.
- Import Demo Data: Click on the demo import option, which typically allows you to select the specific demo you wish to import.
- Wait for the Process: Depending on your hosting speed and internet connection, the import can take anywhere from a few minutes to half an hour. Patience is key!
After the import is completed, take some time to review your site:
- Check for Missing Content: Ensure that all pages, posts, and media have been imported correctly.
- Customize as Needed: Personalize your site to fit your brand, adjusting colors, fonts, and layouts as desired.
- Test Functionality: go through the website to check if all features, such as forms and menus, are working as they should.
Here’s a swift summary of the expected time required for each step:
| Task | Estimated Time |
|---|---|
| Backup Your Site | 5-15 minutes |
| Install Plugins | 5-10 minutes |
| Demo import Process | 5-30 minutes |
| Customization & Testing | 15 minutes – several hours |
By following this guide, you can effectively import your Eduma demo and have your site up and running in no time. enjoy the process and make your website truly yours!
Common Challenges and How to Overcome Them
When importing a demo in Eduma, you may encounter several common challenges that can hinder the process. Understanding these hurdles is essential for a smooth experience and triumphant setup.
One frequent issue is the compatibility of the server environment. If your hosting environment is not configured correctly,it may lead to timeouts or failed imports. To overcome this, ensure that your server meets the minimum requirements for Eduma, such as:
- PHP version: Ensure your PHP is at least version 7.0 or higher.
- Memory Limit: Set your PHP memory limit to at least 256 MB.
- Execution Time: Increase the maximum execution time to avoid timeouts during the import process.
Another common challenge is the size of the demo content. Large demo files can be tricky, especially if your hosting service has restrictions on file uploads. To tackle this, consider the following:
- Use a file compression tool to reduce the demo file size before uploading.
- Check with your hosting provider about increasing the upload limit.
- If possible,import the demo in smaller chunks instead of all at once.
Sometimes, users face issues with theme and plugin conflicts that can disrupt the import process. To prevent these conflicts, always ensure that:
- You are using the latest version of Eduma and all necessary plugins.
- you temporarily disable any unnecessary plugins during the import.
- You check for known compatibility issues on the Eduma support forums.
it’s crucial to have a reliable backup plan in place. in case things go wrong during the import process, having a backup can save you from potential data loss.Here’s a simple table outlining the importance of backups:
| Backup Type | Description |
|---|---|
| Full site Backup | includes all files, databases, and configurations. |
| Database Backup | Focuses specifically on your site’s database content. |
| Manual Export | Allows you to download specific content or settings. |
By anticipating these challenges and implementing the suggested solutions, you can effectively streamline the demo import process in Eduma and ensure a successful website launch.
Tips for Streamlining Your Import Experience
Importing a demo in Eduma can be a straightforward process if you follow some effective strategies. Here are a few tips to help you navigate the import experience smoothly:
- Prepare Your Environment: Before you start the import process, ensure that your WordPress environment is optimized. This means having all necessary plugins installed and ensuring that your server meets the required specifications for Eduma.
- Use a Reliable Internet Connection: A stable internet connection is crucial to prevent any interruptions during the import. Consider using a wired connection if possible,as it tends to be more stable than Wi-Fi.
- Follow Documentation: Eduma provides comprehensive documentation.Make it your first stop for understanding the import process. Each step is clearly outlined, making it easier for you to follow along.
Organizing your files ahead of time can significantly reduce the time required for the import. Create a dedicated folder for the demo content,including images,plugins,and theme files. This will save you time searching for files later and ensure you have everything needed at your fingertips.
| Item | Importance |
|---|---|
| Backup Your Site | High |
| Check for Plugin Conflicts | Medium |
| Ensure Theme is Updated | High |
After importing, don’t forget to review your site thoroughly. Check for any visual discrepancies and ensure that all links are functioning properly.Spending a little time on post-import tweaks can go a long way in enhancing your site’s overall appearance and user experience.

Maximizing Efficiency with Pre-Import Preparations
When it comes to importing a demo in Eduma, pre-import preparations can significantly cut down on your time and effort. By taking a few proactive steps,you can ensure a smoother transition and a quicker setup process. Here are some key strategies to keep in mind:
- Backup Your Current Site: Always start with a backup. This protects your existing content and settings in case anything goes wrong during the import process.
- Check Server Requirements: Ensure that your hosting environment meets the necessary requirements for Eduma. This can definitely help prevent compatibility issues later on.
- Review Import Documentation: Familiarize yourself with the import documentation provided by Eduma. Understanding the steps involved can save you from common pitfalls.
- Disable Caching Plugins: Before starting the import,disable any caching plugins you have active. This ensures that your import runs smoothly without interference.
- Prepare Your Content: Organize your content and media files in advance. Having everything sorted will allow you to quickly identify what needs to be included in your import.
Additionally, consider creating a checklist based on the above points.This simple tool can definitely help you stay organized and ensure that you don’t overlook any critical steps. A well-structured checklist can also serve as a reference for future imports.
| Preparation step | description | status |
|---|---|---|
| Backup Site | ensure all existing content is saved | ✅ Complete |
| Check Server | Confirm hosting meets Eduma’s requirements | ✅ complete |
| Review Documentation | Understand import steps | ✅ Complete |
| Disable Caching | Turn off caching plugins | ✅ Complete |
| Organize Content | Sort files for easy access | ✅ In Progress |
By investing time in these preparations, you are not just saving yourself effort; you are paving the way for a successful import experience. When you’re ready to import, everything will be in place, allowing you to enjoy the new features and designs Eduma has to offer without unnecessary delays.
Post-Import adjustments for a Seamless Setup
Once you’ve successfully imported the demo content into Eduma,you’re just a few steps away from having a fully functional website. The process doesn’t end with the import; post-import adjustments are essential to ensure everything looks and works as intended. Here’s what you need to consider:
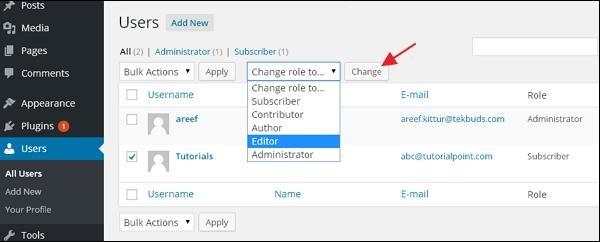
- Check Theme Settings: Navigate to the theme options panel and make sure all settings are configured to your liking. This includes adjusting colors, fonts, and layout options to align with your brand.
- Review Menus: Importing a demo often creates default menus that may not suit your needs. Customize the menus by adding or removing items to enhance the user experience.
- Adjust Widgets: Widgets may be placed in various sidebars and areas based on the demo layout. Take the time to review each widget and ensure they provide value to your visitors.
- Optimize Images: Depending on your import settings, you might find placeholder images. Replace these with your own high-quality images to maintain a professional appearance.
Additionally, it’s crucial to verify the functionality of all features on your site. Check out the following:
| Feature | Status | Comments |
|---|---|---|
| Contact Form | ✔️ Working | Test submissions to confirm delivery. |
| Payment Gateway | ❌ Not configured | Set up before launching. |
| Social Media links | ✔️ Functional | verify all links direct to correct profiles. |
don’t overlook the importance of SEO optimization. Make sure to:
- Set Up Permalinks: Customize your URL structure in the settings to enhance search engine visibility.
- Install SEO Plugins: Consider adding popular plugins like Yoast or All in One SEO to help optimize content and manage meta tags.
By taking these post-import adjustments into account, you’ll not only streamline your setup but also ensure that your Eduma site is primed for performance and ready to impress your audience.

Best Practices for a Successful Demo Launch
Launching a demo successfully requires careful planning and execution. To ensure that your demo is both effective and impactful, consider the following best practices:
- Know Your audience: Tailor your demo to meet the specific needs and interests of your target audience.Understanding their pain points will help you present solutions that resonate.
- Practice Makes Perfect: Rehearse your demo multiple times before the actual launch. This will help you refine your presentation, anticipate questions, and improve your delivery.
- Engage Your audience: Encourage interaction during the demo. Allow your audience to ask questions and provide feedback to create a more dynamic and engaging experience.
- Highlight Key Features: Focus on the most compelling features of your demo. Use real-life scenarios to demonstrate how these features can solve problems or add value.
Moreover, timing is crucial. Make sure to schedule your demo at a time that is convenient for your audience. Consider using tools that allow you to send reminders and updates, ensuring everyone is on board. Here’s a simple table to help you identify the optimal timing:
| Day | Best Time (GMT) | Audience Availability |
|---|---|---|
| Monday | 10:00 AM | High |
| Wednesday | 2:00 PM | Medium |
| Friday | 1:00 PM | Low |
After the demo, follow up with your attendees. Send them a thank-you email that includes a summary of the key points discussed, additional resources, and a link to the demo recording. This not only reinforces the facts shared but also keeps the conversation going and shows your commitment to their needs.
Lastly, gather feedback! Post-launch surveys can provide valuable insights into what went well and what could be improved for future demos. use this information to continuously enhance your approach and create even more successful launches down the line.

Getting Support when You Need It
When diving into the world of Eduma, you might encounter some hiccups while importing the demo content. But fear not! There are various avenues available to ensure you don’t feel lost during the process.Here’s how you can get the support you need, right when you need it.
community Forums: One of the best resources at your disposal is the community forums. here,you can connect with other Eduma users who have likely faced similar challenges. Engaging in discussions can provide you with quick solutions and practical tips.
Documentation and Tutorials: Eduma offers extensive documentation and tutorials that guide you step-by-step through the demo import process. These resources are designed to be user-pleasant and can significantly reduce the time spent troubleshooting.Make sure to check:
- Official Documentation: Comprehensive guides covering all aspects of Eduma.
- Video Tutorials: Visual learners will benefit from walkthroughs that demonstrate the import process.
- FAQs: Quick answers to common questions that can save you time.
Customer Support: If you find yourself stuck, reaching out to customer support can be a lifesaver. They are equipped to handle inquiries related to demo content imports and can provide tailored assistance. Here’s how you can contact them:
| Support Method | Response Time |
|---|---|
| Email Support | 24-48 hours |
| live Chat | Immediate |
| Ticket System | 1-3 days |
social Media Groups: Joining Eduma-related groups on platforms like Facebook and LinkedIn can also be beneficial. These communities are often filled with keen users ready to share their experiences and insights, making them a great place to seek advice or even find quick fixes.
Unlocking the Full Potential of Your Eduma Demo Import
When it comes to leveraging the full capabilities of your Eduma demo import, understanding the time investment required is crucial. Many users often wonder how much time they’ll need to set everything up, and the answer can vary based on a few key factors.
Generally, the process can take anywhere from 30 minutes to a few hours.Here’s a breakdown of what influences that timeline:
- Preparation: Gathering all necessary assets (like images and content) before diving into the import can save a significant amount of time.
- familiarity with the platform: If you’re already comfortable with WordPress and the Eduma theme, the process will be quicker for you.
- Customizations: If you plan to make custom changes after the initial import, this will naturally extend the time required.
To give you a clearer picture, consider the following table that outlines typical time frames based on different user scenarios:
| User Experience Level | Estimated Time Required |
|---|---|
| Beginner | 1-2 hours |
| Intermediate | 30-60 minutes |
| Advanced | 15-30 minutes |
Once your demo is successfully imported, the real fun begins. You can dive into customizing the layout, tweaking the design elements, and ensuring that the content resonates with your target audience. With just a bit of effort, you can transform your demo import into a stunning, fully functional site that reflects your brand’s identity.
Remember, the key to unlocking the full potential of your Eduma demo lies not just in the import itself, but in how you choose to personalize it afterward. The time you invest in this stage will pay off tenfold in creating a vibrant and engaging learning environment.
Frequently Asked Questions (FAQ)
Q&A: How Much Time is Required to Import a Demo in Eduma?
Q1: What exactly is Eduma, and why would I want to import a demo?
A1: Great question! Eduma is a versatile WordPress theme specifically designed for educational purposes, like online courses and learning management systems. Importing a demo allows you to quickly set up your website with a pre-designed layout,saving you tons of time on customization. It’s a fantastic way to kickstart your project without having to start from scratch!
Q2: Okay, that sounds useful! But how much time will it actually take to import a demo?
A2: The good news is that importing a demo in Eduma is typically a quick process! On average, it takes about 10 to 30 minutes. This timeframe includes downloading the demo content and settings, and then letting the magic happen as everything gets set up on your site. Just a short investment for a professional-looking website!
Q3: Is there anything that might cause the process to take longer?
A3: Yes, a few factors can affect the import time. For instance, the speed of your internet connection plays a significant role. If you have a slower connection, it might take a bit longer to download the demo files. additionally, if your hosting server is experiencing high traffic or is slower than usual, that can also delay the process.Though, in most cases, it should still remain within that 10 to 30-minute window.
Q4: Do I need any specific technical skills to import a demo?
A4: Not at all! One of the best things about Eduma is its user-friendly interface. You don’t need to be a tech whiz to import a demo. The theme provides step-by-step instructions, and you can easily follow along. if you can click a few buttons, you’re good to go!
Q5: What if I run into issues while importing the demo?
A5: If you encounter any hiccups, don’t panic! eduma has a robust support system in place.you can reach out to their customer support, and they’ll be glad to assist you. Plus, there are plenty of online forums and communities where you can find tips and tricks from other users who have been in your shoes.
Q6: After importing the demo, can I customize it further?
A6: Absolutely! Importing a demo is just the beginning. Once it’s set up, you have full control over customization. You can tweak colors, fonts, and layouts to match your brand.Eduma is designed to give you versatility,so you can create a unique website that truly reflects your vision.
Q7: So, what’s stopping me from getting started?
A7: Nothing at all! If you want to create an engaging educational website quickly and efficiently, importing a demo in Eduma is the way to go. With just a little time and the right tools, you can have a stunning site up and running before you know it.Why wait? Dive in and watch your ideas come to life!
In summary
importing a demo in Eduma doesn’t have to be a daunting task. With the right guidance and a little bit of patience, you can transform your website into an engaging learning hub in no time. So,whether you’re a seasoned educator or just starting out,take the leap! Investing the time to import your demo correctly will pay off in spades as you create a vibrant online community for your students.
don’t hesitate to reach out if you have any questions or need further assistance; the Eduma community is here to help you every step of the way.Remember, every moment you spend setting up your platform is a step toward a brighter, more organized educational experience.Happy importing, and here’s to your success with Eduma!