are you looking to elevate your WordPress site and engage your audience like never before? If so, you’ve landed in the right place! Picture this: a seamless way to gather feedback, inquiries, or even lead data from your visitors—all without needing to dive into complex coding or hire a developer. sounds appealing, right?
Introducing our brand-new course, “How to Create Custom Forms in WordPress with Ninja Forms.” This isn’t just any ordinary course; it’s your gateway to mastering the art of form creation on one of the most popular content management platforms out there. Whether you’re a newbie just starting out or a seasoned pro looking to expand your skill set, this course has something for everyone.
Join us as we break down the process of building eye-catching, functional forms that will help you connect with your audience and streamline your operations. With step-by-step instructions and practical tips, you’ll be well on your way to transforming your website into an interactive hub for your visitors. Ready to unlock the full potential of your WordPress site? Let’s dive in!
Discover the Power of Ninja Forms for Your WordPress Site
Are you ready to take your WordPress site to the next level? With Ninja Forms, crafting beautiful and functional forms has never been easier. This powerful tool allows you to create custom forms that not only meet your needs but also enhance user engagement and conversion rates. Whether it’s for contact forms, surveys, or registrations, ninja Forms gives you the flexibility and functionality to deliver a seamless experience.
Here’s why you should consider using Ninja Forms:
- User-friendly interface: The drag-and-drop interface makes it accessible for everyone, regardless of technical expertise.
- Customization Options: With countless field types, styling options, and configurations, you can tailor your forms to match your brand.
- Integrations: Easily connect with popular services like Mailchimp,PayPal,and more to streamline your processes.
- conditional Logic: Create dynamic forms that adapt based on user inputs, ensuring a personalized experience.
In our new course, you’ll explore each feature of Ninja Forms in detail, learning how to maximize the potential of your forms.From basic setups to advanced configurations, you’ll gain insights that will empower you to create forms that not only collect information but also enhance the overall user experience.here’s a sneak peek of what you’ll learn:
| module | Description |
|---|---|
| getting Started | Introduction to Ninja Forms and installation guide. |
| Form Creation Basics | Step-by-step process for building your first form. |
| Advanced Features | Using conditional logic and settings for enhanced forms. |
| Integrating with Other Services | Connecting your forms with third-party platforms. |
By the end of this course, you’ll not only be proficient in creating forms but also understanding how to measure thier effectiveness. Track submissions, analyze data, and refine your approach to achieve better results. Don’t miss out on the possibility to harness the full power of Ninja Forms and transform your WordPress site into a lead-generating machine! Join us today and unlock the potential of your forms!
Step-by-Step Guide to Installing Ninja Forms
Installing Ninja Forms on your WordPress site is a breeze! follow these simple steps to get started on creating custom forms that cater to your unique needs.
- Log in to Your WordPress Dashboard: Start by logging into your WordPress admin panel. This is where you’ll manage all your site settings.
- Navigate to Plugins: On the left-hand sidebar,hover over the “Plugins” menu and click on “Add New.” This will take you to the plugin marketplace.
- Search for Ninja Forms: In the search bar on the top right corner, type in “Ninja Forms.” The plugin should appear in the search results.
- Install the Plugin: Click the “Install Now” button next to Ninja Forms. Wait a moment for the installation to complete.
- Activate the Plugin: After installation, the button will change to “Activate.” Click it to enable the plugin on your site.
once activated, you will see a new Ninja Forms menu item appear on the dashboard. This is your gateway to creating custom forms.
Creating Your First Form: click on the Ninja Forms menu,then select “Add New.” You’ll be taken to a user-friendly form builder interface where you can drag and drop various field types to create your form.
Configuring Form Settings: After designing your form, adjust the settings by navigating to the “Emails & Actions” tab. Here, you can set up notifications, confirmations, and other essential settings to ensure that your forms are functional and user-friendly.
| Field Type | Description |
|---|---|
| Single Line Text | Perfect for short responses like names or titles. |
| Paragraph Text | Ideal for longer responses or detailed feedback. |
| For collecting email addresses with validation. | |
| Select | Allows users to choose from a dropdown menu. |
After you’ve configured your form, don’t forget to publish it! You can use the provided shortcode to embed the form on any page or post of your choice. Just copy the shortcode and paste it where you want the form to appear.
unleashing Creativity: Designing Custom Forms That Wow
Are you ready to transform the way your audience interacts with your website? Custom forms are more than just a way to collect data; they are an opportunity to engage your users and enhance their experience. With the power of Ninja Forms, you can design forms that not only function seamlessly but also captivate and impress.
Imagine creating forms that reflect your brand’s personality. With Ninja Forms,customization options are virtually limitless. You can:
- Select vibrant colors to align with your brand palette.
- Add eye-catching backgrounds that set the mood.
- Utilize custom fonts to match your site’s typography.
Furthermore, integrating advanced features can elevate your forms from basic to remarkable. here are some functionality you can incorporate:
- Conditional Logic: Show or hide fields based on user responses.
- File Uploads: Allow users to submit documents or images directly.
- Email Notifications: Keep your team informed in real-time.
To give you a clearer picture of what’s possible, check out this brief comparison of standard forms versus custom forms:
| Feature | Standard Forms | Custom Forms |
|---|---|---|
| Design Flexibility | Limited | Extensive |
| User Engagement | Basic | High |
| Data Collection | Generic | Tailored |
| Branding | Neutral | Strong |
With guided instructions and hands-on activities in our course, you’ll not only learn how to create these forms but also unveil a treasure trove of tips and tricks that will set you apart from your competition. Get ready to unleash your creativity and leave a lasting impression on your audience!
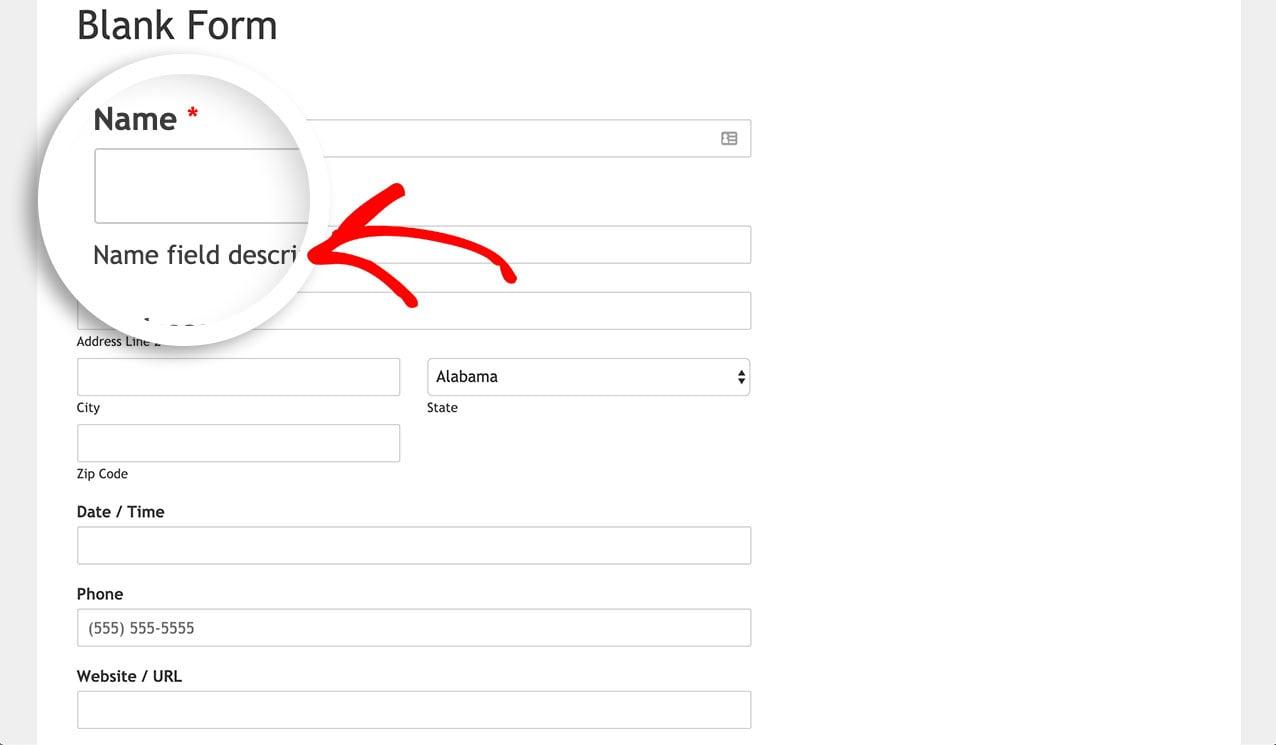
mastering Form Fields: Tips for choosing the right Options
When creating custom forms in WordPress using Ninja Forms, selecting the right form fields is crucial for enhancing user experience and achieving your goals. Each field type has its unique characteristics and functionalities, making it critically important to match the field to your specific needs. Here are some key considerations to help you choose wisely:
- Understand Your objectives: Before diving into field selection, clarify the purpose of your form. Are you gathering feedback, collecting payments, or registering users? knowing your goals helps narrow down the field options.
- Consider User Experience: User-friendly forms lead to higher completion rates. Keep the number of fields to a minimum and use logical groupings to make the form intuitive.
- Field Types Matter: Choose from various field types such as text, dropdowns, checkboxes, and radio buttons.Each serves a different function, so select the one that best captures the information you need.
- Validation Needs: Implement validation rules for fields like email and phone numbers to ensure data integrity. This not only streamlines your data collection but also enhances user trust.
In addition to these considerations, testing your form with actual users can provide invaluable feedback. Conduct A/B testing on different field configurations to see which options yield the best results. For example, if you find that a dropdown menu outperforms a series of checkbox options in certain scenarios, you can adjust accordingly.Make sure to implement analytics to track user behavior on your forms, which can inform your adjustments.
| Field Type | Use Cases | Pros | Cons |
|---|---|---|---|
| Text Field | Names, Emails | Simple, Easy to Use | Limited to short inputs |
| Dropdown | Categories, Choices | Saves Space, Clear Options | Can be overwhelming with many options |
| Checkboxes | Multiple Selections | Flexible, Easy to Understand | Can clutter the form |
| Radio Buttons | Single Selections | Clear Choice, User-friendly | Restrictive, Only one option |
Remember, the efficacy of your form largely depends on how well you align your field choices with user expectations and behavior.By taking the time to master form fields, you’ll create an experience that not only captures valuable data but also resonates with your users. The right choices can substantially boost engagement and satisfaction, leading to higher conversion rates and better results for your WordPress site.
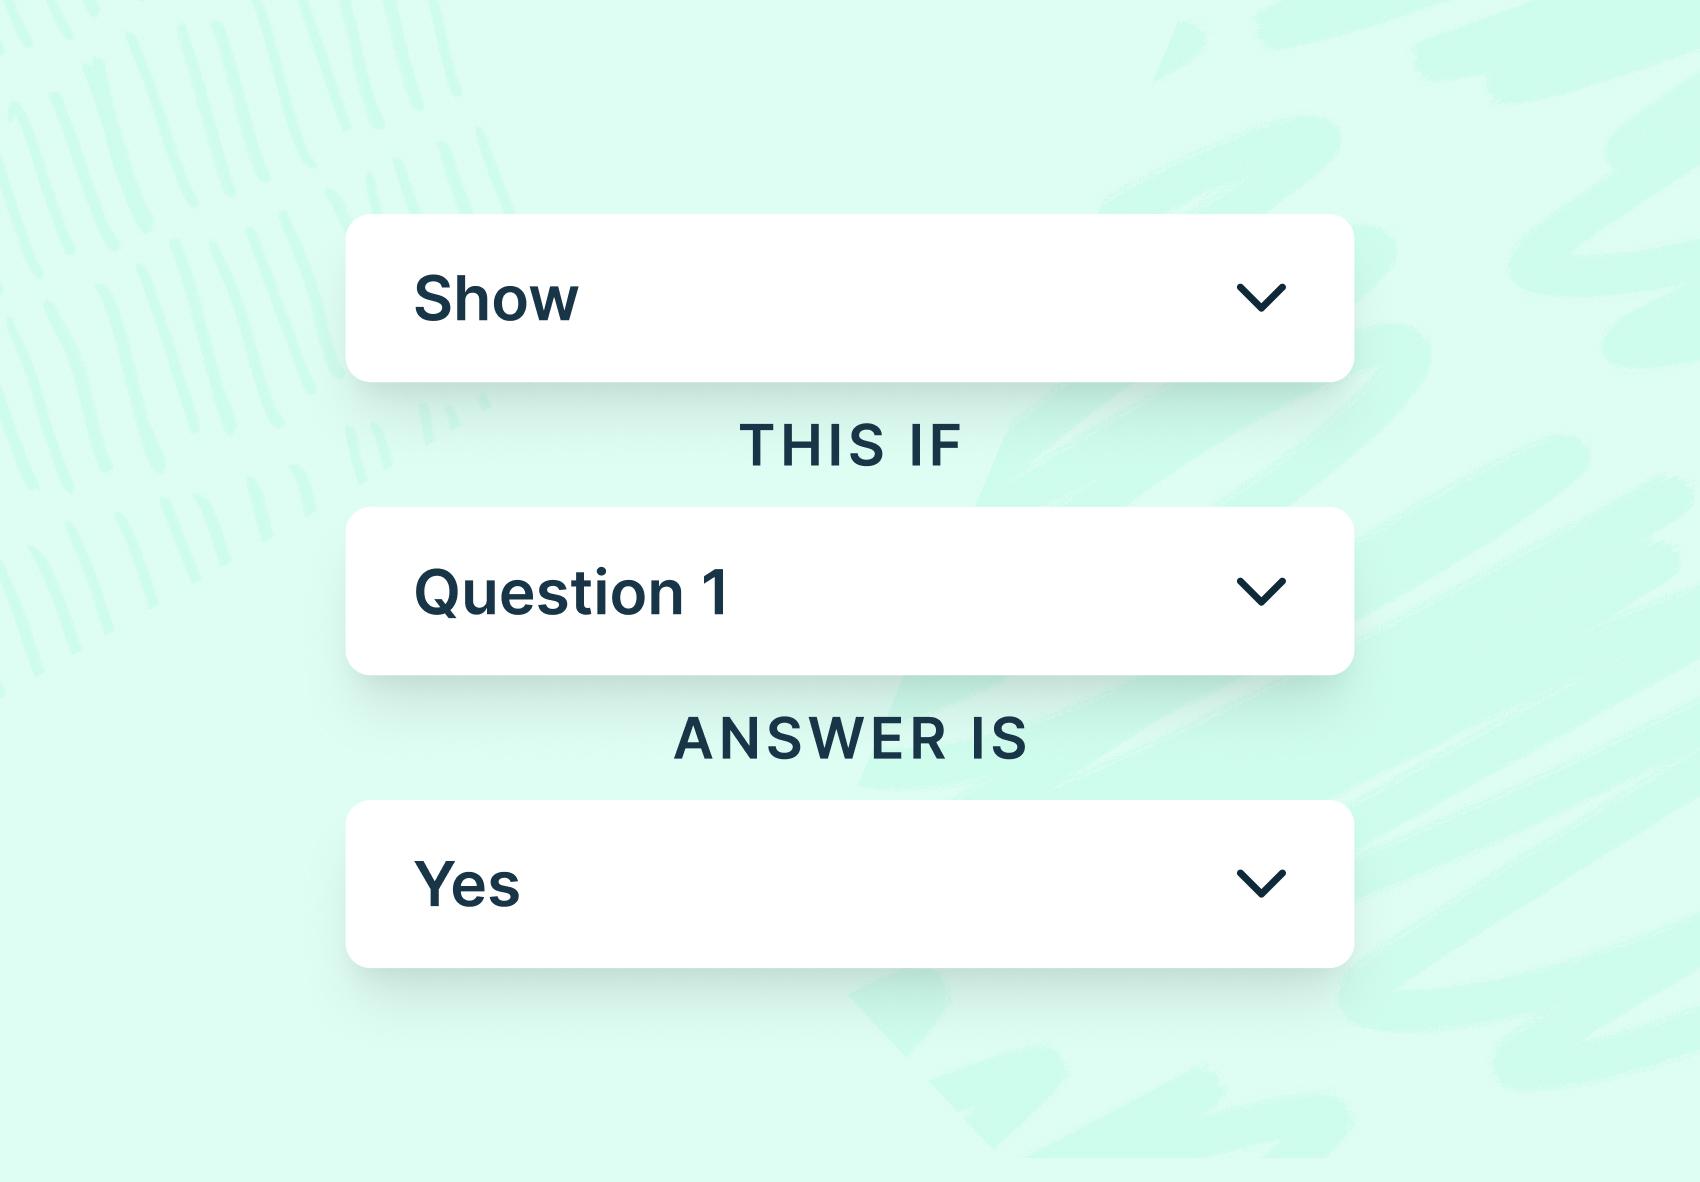
Enhancing User Experience with Conditional Logic
When it comes to creating forms that resonate with users, incorporating conditional logic can be a game changer. This powerful feature allows you to tailor the user experience by displaying fields based on previous selections.Imagine a scenario where a user selects “Yes” to a question, and suddenly, a whole new set of relevant fields appears. This not only streamlines the process but also makes users feel that the form is designed specifically for them.
Here are some key benefits of using conditional logic in your forms:
- Enhanced Relevance: Users only see questions pertinent to them, reducing confusion and frustration.
- Improved Engagement: By keeping the form dynamic, users are more likely to complete it, as it feels interactive and personalized.
- Data accuracy: Conditional logic helps in collecting precise information, minimizing the risk of irrelevant responses.
- Streamlined Workflow: It simplifies the submission process, making it quicker for both you and your users to reach the desired outcome.
Implementing conditional logic in Ninja Forms is straightforward. You can easily set up rules that determine when specific fields should be shown or hidden based on user input. For example, if a user indicates they are a business owner, you can present them with fields that gather their company information, while hiding fields irrelevant to casual users.
To visualize how this works, consider the following example table that showcases a simple form logic setup:
| User Selection | Fields Displayed |
|---|---|
| Are you a business owner? | business Name, Business Type, Number of Employees |
| No | preferred contact Method, Comments |
By leveraging conditional logic, you can create forms that not only gather data but also enhance user satisfaction. Users appreciate forms that respect their time and attention, and conditional logic does just that.Dive into the course and discover how to harness this feature for your WordPress forms,transforming mundane data collection into a delightful user experience.

Integrating Payment Options: Monetize Your Forms Effortlessly
One of the most powerful features of Ninja Forms is its ability to seamlessly integrate various payment options, enabling you to monetize your forms effortlessly. Whether you’re running a small business, offering online courses, or collecting donations for a cause, incorporating payment gateways has never been easier.By integrating payment options directly into your forms, you can streamline the purchasing process and enhance user experience.
With Ninja Forms, you can easily connect to popular payment processors such as:
- PayPal – Accept credit and debit card payments directly through PayPal.
- Stripe – Enable credit card payments securely and instantly.
- Authorize.net – For those needing advanced fraud prevention and security features.
Integrating these payment options is straightforward. Once you’ve set up your form, just navigate to the payments tab in the Ninja Forms dashboard. From there, you can select your desired payment processor and configure the settings to suit your needs. This allows you to:
- Create customizable pricing fields.
- Set up conditional logic for different payment scenarios.
- Manage refunds and payment notifications directly from the dashboard.
Here’s a fast overview of how these integrations can benefit you:
| Payment Processor | Best For | Fees |
|---|---|---|
| PayPal | Quick setup for small businesses | 2.9% + $0.30 per transaction |
| Stripe | Recurring payments and subscriptions | 2.9% + $0.30 per transaction |
| Authorize.net | Advanced payment needs | 2.9% + $0.30 + monthly fee |
By leveraging these integrations, you not only provide your users with diverse payment options but also ensure that each transaction is handled securely. This builds trust and encourages conversions, allowing you to focus on what truly matters: growing your business and engaging with your audience. With Ninja Forms, monetizing your forms is just a few clicks away!

Boosting Engagement: Effective Strategies for Form Placement
When it comes to increasing user engagement on your WordPress site, the placement of your forms is crucial. You want to ensure that visitors can easily see and access the forms you’ve created with Ninja Forms. Here are some effective strategies to consider:
- above the Fold: Placing your form above the fold ensures that it is indeed one of the first things visitors see when they land on your page. this prime real estate grabs attention and increases the chances of form submissions.
- Call-to-action Buttons: Utilize prominent call-to-action buttons that lead to your forms. Make these buttons stand out with contrasting colors and persuasive text that compels users to click.
- Sidebar Widgets: Consider adding your forms as a widget in the sidebar. This allows the form to be visible while users navigate through your content, providing continuous access without interrupting their reading experience.
Another key aspect to consider is the context in which your forms appear. Forms that are seamlessly integrated into relevant content can significantly boost engagement. Such as, if you have a blog post about a specific topic, including a related form at the end can encourage readers to take the next step:
| Content Type | Form Placement | Engagement strategy |
|---|---|---|
| Blog Post | End of Post | Encourage comments and feedback |
| Landing page | Pop-up or Slide-in | Capture leads effectively |
| Product Page | Near Product description | Gather inquiries and interest |
Lastly, don’t overlook the power of mobile optimization. As more users browse on their smartphones, ensuring that your forms are responsive and easily accessible on all devices will maximize engagement. Test the placement on various device sizes to see what works best.
By implementing these strategies,you’ll be setting your custom forms up for success. Engage your audience effectively and watch as your form submissions increase, thanks to thoughtful placement and attention to user experience.
Troubleshooting Common Issues with Ninja Forms
Even the best tools can run into hiccups, and Ninja Forms is no exception. Whether you’re a novice or a seasoned developer, you might encounter some common issues while creating your custom forms. Here are a few troubleshooting tips to help you navigate these challenges smoothly.
1. Form Not Sending Emails
If your form submissions aren’t being sent to your email, check the following:
- Spam Folder: Sometimes, emails end up in the spam folder, so always check there first.
- Email Settings: Ensure that the email address configured in the form settings is correct.
- SMTP Configuration: Consider using an SMTP plugin to improve email deliverability.
2. form Validation Errors
Validation errors can be frustrating. To resolve these:
- Field Settings: Double-check the field settings to ensure that required fields are correctly marked.
- JavaScript Conflicts: Look for potential conflicts with other scripts or plugins running on your site.
3. Styling Issues
If your form doesn’t look quite right, styling can often be the culprit.Here’s what to check:
- Theme Compatibility: Ensure your theme is compatible with Ninja Forms and doesn’t override its styling.
- Custom CSS: Add custom CSS in the theme’s Additional CSS section to fine-tune the appearance of your forms.
If you find yourself frequently dealing with issues, consider keeping a log of the problems you’ve encountered and the solutions that worked for you. this can serve as a handy reference for future form creations. Remember, troubleshooting is just part of the process, and with a little patience, you’ll be creating beautiful, functional forms in no time!

Analytics and Insights: Tracking Form Performance
Understanding how your forms are performing is crucial for optimizing your user experience and improving conversion rates.With Ninja Forms, you gain access to a suite of analytics tools that make it easy to track form performance and glean valuable insights. Here are some key metrics you should focus on:
- Submission rate: Monitor how many users are completing your forms compared to how many are starting them. A low submission rate might indicate that the form is too long or complex.
- Drop-off Rate: Identify points in the form where users abandon the process. This will help you pinpoint specific fields that may be causing friction.
- time on Form: Analyze how long users are spending on your forms.If the time is excessively long, it may suggest that the form is confusing or requires too much information.
To help you visualize these metrics, consider creating a simple table within your dashboard that summarizes your findings:
| Metric | Current Value | Target value |
|---|---|---|
| Submission Rate | 45% | 60% |
| drop-off Rate | 30% | 15% |
| Time on Form | 3 minutes | 1 minute |
Utilize A/B testing to experiment with different form layouts, field arrangements, and colors. This method allows you to assess which version resonates better with your audience. Ninja Forms makes it easy to duplicate forms and modify them for testing purposes. By tracking changes in submission rates before and after making alterations, you can continually refine your approach.
Don’t forget to incorporate feedback mechanisms into your forms as well. After submission, ask users for their thoughts on the form’s length, clarity, and overall experience. This qualitative data can provide context to your quantitative metrics, offering a fuller picture of user interactions.
Taking Your Forms to the Next level with Add-ons and Extensions
Once you’ve mastered the basics of creating forms with ninja Forms, it’s time to elevate your form-building game. By integrating add-ons and extensions, you can transform standard forms into powerful tools that enhance user experience and gather more insightful data. Ninja Forms offers a variety of add-ons that cater to different needs, enabling you to customize your forms in ways you’ve only dreamed of.
Consider the possibilities:
- Payment Processing: Integrate with payment gateways like PayPal and Stripe to collect payments directly through your forms.
- CRM Integration: Connect your forms to popular CRM tools like Salesforce or Mailchimp to manage leads and automate your marketing efforts.
- Analytics and Reporting: Utilize add-ons that provide detailed analytics on form submissions, helping you refine your strategies based on real data.
each add-on you choose not only expands functionality but also enhances user engagement. as an example, the Conditional Logic add-on allows you to create dynamic forms that change based on user input, ensuring that customers only see questions relevant to them. This not only improves completion rates but also provides a tailored experience that can lead to higher conversions.
Here’s a quick look at some of the essential add-ons and what they offer:
| Add-on | Description |
|---|---|
| Multi-Part Forms | Breaks long forms into manageable sections, improving user experience. |
| File Uploads | Allows users to upload files directly through the form, streamlining data collection. |
| Form Abandonment | Tracks users who leave the form before submission, letting you follow up and improve completion rates. |
With these add-ons,you’re not just creating forms; you’re building comprehensive solutions that can adapt to your business needs. the flexibility and scalability of Ninja Forms mean that whether you’re running a small blog or a large e-commerce site, you can customize your forms to match your specific goals. Embrace the power of add-ons and watch as your forms become more than just data collection tools—they evolve into integral parts of your business strategy.
Frequently Asked Questions (FAQ)
Q&A: New course - How to Create custom Forms in WordPress with Ninja Forms
Q: What’s the main focus of the new course on creating custom forms in WordPress?
A: The course is designed to teach you how to use Ninja Forms to create stylish, functional, and customized forms for your wordpress site. Whether you’re looking to build contact forms, surveys, or registration forms, we cover it all!
Q: Why should I choose Ninja Forms for creating forms on my website?
A: Ninja Forms is user-friendly and packed with features! It offers a drag-and-drop interface, making it easy to design forms without any coding knowledge. Plus, it integrates seamlessly with various email marketing and payment platforms, which is a huge plus for anyone looking to expand their site’s functionality.
Q: Do I need any prior experience with WordPress or forms to take this course?
A: Not at all! This course is perfect for beginners. We start with the basics and gradually move to more complex features, ensuring that everyone, regardless of their skill level, can create remarkable forms by the end.
Q: What can I expect to learn by the end of the course?
A: By the end of the course, you’ll be able to create custom forms tailored to your needs, implement conditional logic, manage submissions, and even style your forms to match your website’s design. You’ll gain the confidence to take your website’s functionality to the next level!
Q: How long is the course, and how is it structured?
A: The course is structured into easy-to-follow modules that you can complete at your own pace. It consists of video tutorials, quizzes, and practical assignments. You can expect to finish it in just a few hours, but you’ll have lifetime access to revisit the material whenever you need.
Q: Is there any support available if I run into issues while creating my forms?
A: Absolutely! We provide dedicated support through discussion forums and email. You’ll also find a community of fellow learners who can share tips and tricks. We’re here to ensure you succeed!
Q: What makes this course unique compared to other WordPress form building courses?
A: this course not only covers the technical aspects of using Ninja Forms but also emphasizes best practices for form design, user experience, and data management. Plus,we share real-life examples and case studies to help you understand how to apply what you learn effectively.
Q: How can I enroll in the course?
A: Enrolling is super simple! Just visit our website, sign up, and you’ll gain instant access to all the course materials. Plus, keep an eye out for early bird discounts and special offers!
Q: What are the benefits of creating custom forms for my website?
A: Custom forms can enhance user engagement, streamline communication, and even boost conversions. They allow you to collect valuable data from your visitors, making it easier to cater to their needs and grow your business.
Q: Any final thoughts for potential students?
A: Don’t miss out on this opportunity to level up your WordPress skills! Creating custom forms can significantly improve your website’s functionality and user experience. Join us today, and let’s get started on building forms that not only look good but also work wonders for your site!
Wrapping Up
As we wrap up our journey into the world of custom forms with Ninja Forms, it’s clear that creating tailored solutions for your WordPress site has never been easier. Whether you’re looking to gather feedback, generate leads, or streamline communication, this course empowers you with the tools and knowledge to make your vision a reality.
Imagine having the ability to design forms that not only look great but also function seamlessly, enhancing the user experience on your site. With Ninja Forms, you can do just that—without any coding skills required!
So why wait? Dive into this course and unlock the full potential of your WordPress site today. The skills you gain here will not only elevate your website but also engage your audience in ways you never thought possible. Join us in mastering the art of custom forms—your visitors will thank you, and your site will shine like never before!
Ready to get started? Let’s make your form-building dreams come true!